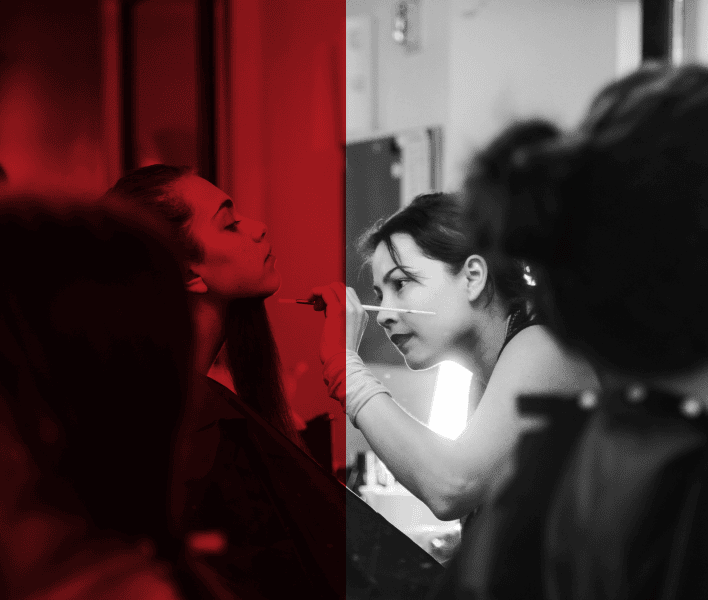
Makeup goes far beyond color and contour, it’s the art of complete transformation. If you’re aiming to craft creatures, sculpt wounds, or build unforgettable characters, one skill will push your artistry from impressive to legendary: mold-making.
Think about the most jaw-dropping special effects you’ve seen, those realistic burns, fantasy creatures, or full facial transformations. Behind each of those looks is a mold: carefully sculpted, cast and applied to turn imagination into reality.
Learning how to create custom molds is a foundational technique for any makeup artist who wants to go beyond beauty and into full-blown character design.
This guide will show you why mold-making is essential, how it fits into your career as a serious artist and even walk you through a beginner’s take on how to make molds that actually fit, flex and perform on set.
Mold-Making: Backbone of Professional Special Effects Makeup
Mold-making is the process of capturing the shape of a three-dimensional object (like a sculpted prosthetic piece) to reproduce it accurately in different materials, typically silicone, latex, foam, gelatin and more.
A mold allows for the creation of repeatable, custom-fit pieces that look lifelike, move realistically on the skin and stay consistent throughout production. It’s how movie monsters, aging makeup, fantasy creatures and even delicate beauty effects are brought to life.
Without mold-making, there is no full transformation, only half-finished illusions.
Learn How to Create Creature Design Using Latex, Silicone & Prosthetics?
Enroll now or book a tour to start your journey on becoming a special effects makeup expert!
Why Mold-Making Is a Must-Have Skill for Career-Focused Makeup Artists?
Learning mold-making empowers makeup artists to move beyond basic application and become full creative forces in production. It allows for original, reusable prosthetics, increases your value on set and enables hyper-realistic designs that meet today’s high-definition standards. From saving time and money to collaborating across departments, mold-making is an essential skill for any serious, career-focused SFX artist.
1. You’re Able to Unlock True Creative Freedom
When you know how to make molds, you’re no longer limited by what’s available off the shelf. You’re free to design custom prosthetics from scratch, sculpt your creature concept and turn it into a reusable, wearable piece that fits your exact artistic vision.
This freedom is especially important when working on productions that demand originality – horror films, sci-fi series, fantasy theater, cosplay competitions, or concept photo shoots. A mold you design can capture expressions, textures and asymmetries that no store-bought appliance ever could.
Bonus: Once you create a mold, you can reproduce it consistently, perfect for projects that require multiple takes, stunt doubles, or touring stage productions.
2. You Will Enhance Your Marketability in Film, TV & Theater
Today’s entertainment landscape demands versatility. Production teams aren’t just looking for makeup artists; they want creators who can conceptualize, sculpt, fabricate and apply. Mold-making proves you’re more than just an applicator; you’re a builder of characters from the ground up.
When you can take a design from idea to wearable prosthetic, you become invaluable to any project. Whether you’re working on a sci-fi epic, a period drama, or a live theatrical performance, your ability to mold custom pieces ensures every character looks distinct and production-ready.
Studios value artists who can bring their own creations to life because it saves time, reduces dependency on external vendors and guarantees originality.
3. Create Hyper-Realistic Prosthetics
In a high-definition age where every wrinkle and pore is captured on screen, realism is everything. Mold-making allows you to produce prosthetics that look natural, move with the actor’s face and hold up under close-up shots.
Silicone and foam latex are today’s go-to prosthetic materials because of their flexibility and skin-like quality. A well-made mold ensures that every cast is:
- Skin-tight for comfort and believability
- Repeatable for continuity across shooting days
- Every vein, pore and scar was sculpted with meticulous detail.
From burn scars and zombie bites to fantasy creatures and age prosthetics, everything starts with a good mold. The better your mold, the better your makeup.
4. You’re able to Save Time and Money
Investing time in mold-making may seem like extra work upfront, but it’s a huge time-saver. Once you’ve sculpted and molded a piece, you can replicate it quickly for future jobs, clients, or productions.
You also save money by not having to resculpt the same piece over and over again.
5. Collaborate Seamlessly with Other Creative Departments
SFX makeup artists frequently collaborate with costume teams, prop builders and VFX specialists to bring characters fully to life. When you understand mold-making, it becomes easier to build appliances that integrate with costumes, helmets, armor, or animatronics.
Your work becomes part of a larger visual story and your ability to design functional, wearable prosthetics that fit into the big picture strengthens your value across departments.
Learn Mold-Making at Cinema Makeup School
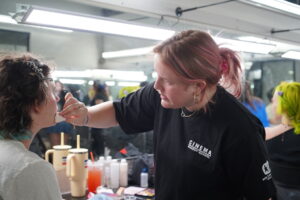
Want to bring your makeup creations to life from the ground up? You are at the right place! Cinema Makeup School’s Special Effects Makeup Course is built for artists ready to go beyond the basics.
At Cinema Makeup School, we offer hands-on training in sculpting, mold-making and prosthetic design that prepares students for real-world work in film, television, theater, cosplay and medical simulation.
Common Materials Used in Mold-Making
Understanding the different materials used in mold-making is essential for creating prosthetics that are effective, comfortable and production-ready. Each type of mold – silicone molds, plaster molds, latex molds, alginate molds, gelatin molds and polyurethane molds – serves a specific purpose in the special effects makeup industry.
Here’s a detailed look at each one, when to use them and why mastering them matters for every serious makeup artist:
A. Silicone Molds
Silicone molds are the gold standard in special effects makeup due to their flexibility, durability and ability to capture ultra-fine detail. These molds are commonly used to produce high-quality prosthetics that are applied directly to the skin.
Ideal for: Custom facial prosthetics, lifelike wounds, fantasy creatures and reuse.
If you need to create elf ears, burn scars, or a full-face creature appliance that’s reusable and flexible, silicone molds are your go-to.
Watch how silicone heads are created in this video:
Enroll now or book a tour to start your journey on becoming a special effects makeup expert!
B. Plaster Molds
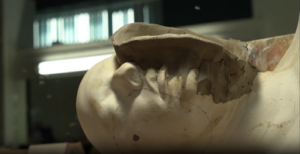
Plaster molds or rigid molds are typically used to support flexible materials like silicone or gelatin. They’re also common for creating the initial positive cast from a life mold made with alginate.
Ideal for: Mother molds, lifecasting support and flat molds.
A plaster mold might be used to support a silicone lifecast of a model’s face, helping to keep the soft mold in shape while casting prosthetic pieces.
C. Latex Molds
Latex molds are traditionally used for making masks and small appliances. While they are less commonly used for high-end prosthetics today, they’re still useful for fast, low-cost applications and lightweight builds.
Ideal for: Mask making, haunted house props and hobby projects.
⚠️ Caution: Latex can degrade over time and isn’t ideal for high-detail or skin-contact prosthetics. It is great for making simple zombie masks or theatrical pieces that don’t require fine realism or skin-safe materials.
D. Alginate Molds
Alginate Molds are commonly used in lifecasting – making quick, detailed impressions of a person’s face, hands, feet, or other body parts. Alginate is skin-safe and fast-setting, making it perfect for capturing body contours.
Made to handle: Life casting (one-time use)
Use alginate molds when you need a mold of an actor’s face to sculpt a custom prosthetic.
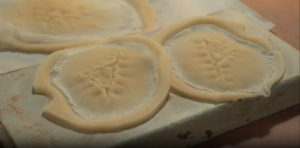
E. Gelatin Molds
While gelatin is more commonly used for casting prosthetics than creating molds, gelatin molds can be used for practice or short-term effects. Gelatin molds are ideal for quick-turnaround projects or when working on a tight budget.
Ideal for: Practice pieces and single-use FX
A gelatin mold might be used to create a temporary scar or wound piece for a live performance or classroom demo.
F. Polyurethane Molds
Polyurethane molds are rigid and durable, often used for prop and costume fabrication rather than direct skin contact. They hold up well for industrial use or when casting hard materials like resin or foam.
Ideal for: Props, costume parts, rigid prosthetics
⚠️ Caution: Most polyurethane molds are not skin-safe, so they’re not ideal for prosthetics applied directly to the face or body.
Polyurethane molds are used to cast helmets, horns, or chest armor pieces for cosplay and film props.
Get insights on: Foam Latex vs Silicone: Choosing the Right Material for SFX Prosthetics
Quick Overview:
| Mold Type | Flexible | Skin-Safe | Reusable | Best Use Case |
| Silicone Molds | Yes | Yes | Yes | High-end prosthetics, FX applications |
| Plaster Molds | No | Yes | Limited | Support shells, lifecasting |
| Latex Molds | Semi | Varies | Limited | Masks, props |
| Alginate Molds | Yes | Yes | No | One-time body casting |
| Gelatin Molds | Yes | Yes | Re-melt | Practice FX, classroom work |
| Polyurethane Molds | No | No | Yes | Props, rigid costume pieces |
Where Mold-Making Talent Is in High Demand?
From entertainment to education and even healthcare, the demand for artists who can sculpt, mold and fabricate prosthetics is growing steadily. By adding mold-making to your skill set, you’re becoming an asset to multiple high-demand industries. Here are the top industries that hire mold-making specialists:
- Film & TV (Netflix, Marvel, indie films)
- Theater (Broadway, immersive shows)
- Theme parks (Universal Studios, Disney)
- Haunted attractions and escape rooms
- Cosplay prop and costume fabrication
- Medical and forensic simulation companies
Related Article: Career Options for Special Effects Makeup Artists
How to Make Molds (Beginner-Friendly)
Step 1: Sculpt Your Original Piece
Start by sculpting your design using oil-based clay. This could be a wound, a creature detail, or a facial appliance. Oil-based clays like Monster Clay work best because they hold fine details and don’t dry out over time.
Step 2: Build a Mold Box or Barrier
Create a containment wall around your sculpt using foam board, acrylic sheets, or modeling clay. This will keep your mold-making material in place when you pour it over your sculpture.
Step 3: Apply Mold Release
Use a mold release spray or brush-on agent on your sculpt. This ensures the mold material doesn’t stick permanently to your sculpture and makes demolding easier and cleaner.
Step 4: Mix and Pour Your Mold Material
Choose your molding material based on your project and mix according to product instructions, then pour slowly and evenly over your sculpt to capture all detail.
Step 5: Cure and Demold
Let the mold material cure completely (this can take anywhere from 30 minutes to several hours, depending on the type). Once cured, gently remove the mold from the sculpt, you now have a custom mold ready for casting!
Sound too complicated to do it yourself? Enroll now or book a tour to start your journey with Cinema Makeup School to learn from professionals!