Special effects makeup can captivate audiences by creating moments that shock, excite, and leave lasting impressions on screen. Among the most jaw-dropping illusions is the slit throat makeup effect, a gruesome yet essential skill for SFX artists working in horror, thriller and action genres. Whether it’s a chilling slasher film or a realistic crime drama, the art of creating the illusion of a slashed throat with makeup is the mark of a true professional.
In this guide, we’ll dive deep into slit throat makeup techniques used by professional SFX artists, exploring everything from products and application methods to pro-level secrets that ensure your effect looks terrifyingly real on screen.
Why Slit Throat Makeup Is a Staple in SFX?
A slashed throat makeup effect is more than just gore; it’s storytelling. The illusion instantly raises tension and builds emotional impact. Filmmakers rely on skilled makeup artists to make these effects believable, especially in close-up shots.
Professional SFX artists master throat cut makeup:
- To enhance realism: The audience must believe the wound is authentic, even under HD cameras.
- To highlight technical artistry: A slit throat makeup look reveals an artist’s ability to sculpt wounds, merge prosthetics seamlessly, and paint realistic skin textures.
- To match character arcs: Injuries often define pivotal plot moments and emotional shifts.
Essential Materials for Slit Throat Makeup
Before attempting a realistic throat cut makeup look, artists need the right toolkit. Here are the essentials professionals swear by:
1) Liquid Latex or Silicone: For building realistic skin textures and prosthetic wounds.
2) Gelatin or Wax: Useful for sculpting quick wound effects.
3) Pre-Made Prosthetics: Silicone appliances shaped like slashed throats.
4) Fake Blood (Multiple Types): Thick blood for clotting, runny blood for fresh wounds and darker tones for dried blood.
Read on to learn the insider secrets SFX makeup artists use when making fake blood look real.
5) Grease Paints or Alcohol-Activated Palettes: For bruising, shading and depth.
6) Adhesives (Pros-Aide, Spirit Gum): To secure prosthetics in place.
7) Makeup Sponges & Brushes: For blending edges and applying layers.
Having high-quality materials ensures your makeup holds up on camera, under lighting and during long shooting hours.
Step-by-Step Guide to Creating Slit Throat Makeup
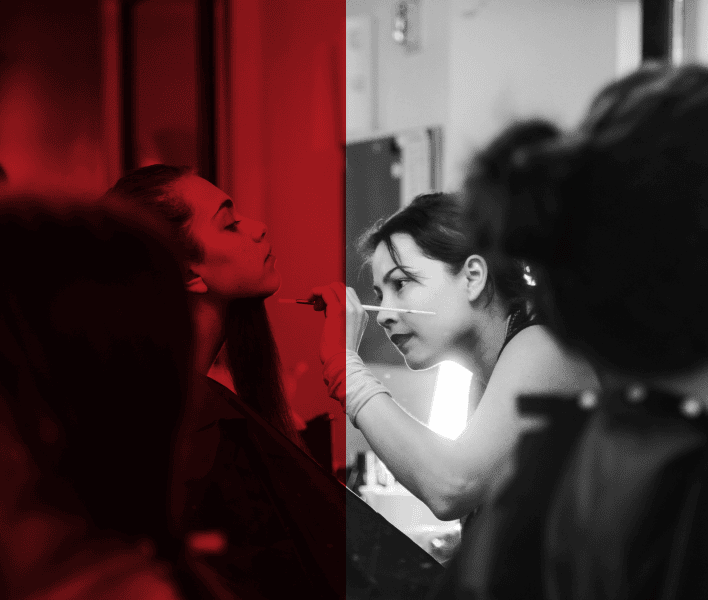
Creating a believable slit throat makeup effect takes more than just fake blood, it’s a process that blends technique, materials and artistry. Professional SFX artists follow a series of careful steps, from prepping the skin and sculpting the wound to coloring, adding blood effects and finishing with final details.
Enroll now or book a tour to start your journey on becoming a special effects makeup expert!
Below is a complete step-by-step guide that walks you through how these realistic slashed throat illusions are built from start to finish.
Step 1: Start with prepping the Skin
Clean the skin around the neck to remove oils and dirt. Apply a barrier spray if the actor has sensitive skin, ensuring that latex or adhesives won’t irritate.
Step 2: Mapping the Wound
Decide the placement and direction of the cut. Will it be a shallow scratch or a deep slash? Outline the cut gently with a makeup pencil to mark where the effect will be built.
Step 3: Building the Base
Apply liquid latex, wax, or silicone to the area, depending on the effect you want to achieve. Liquid latex works well for flexible, layered wounds on a budget, while wax is useful for sculpting shallow cuts or creating quick effects.
For hyper-realistic results that can withstand hot lights and long shooting hours, professional SFX artists often prefer silicone. No matter which material is chosen, layering is key and building texture ensures the slit looks dimensional rather than flat.
Step 4: Sculpting the Slash
With a spatula or sculpting tool, carve a slit into the latex, wax, or silicone base. Widen the wound slightly to mimic torn skin. For more advanced setups, pre-made silicone prosthetics can be applied for a dramatic and durable gash.
Step 5: Coloring for Realism
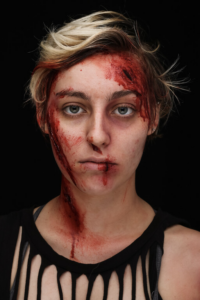
This is the point where real creativity shows. To create depth, professional artists apply deep reds and blacks inside the wound, mimicking the look of torn tissue and dried blood.
Around the edges, purples, greens and yellows are layered to replicate the bruising and trauma that naturally accompany such an injury. Finally, the wound is blended with the skin so it looks natural and becomes part of the actor’s real skin.
Step 6: Adding Blood Effects
A slit throat effect only looks convincing when the blood appears realistic. Artists rely on a mix of blood types to capture different stages of injury. Thin fake blood is applied so it trickles down the neck, amplifying the realism of a fresh injury.
Thick, clotted blood is packed inside the gash to build texture and depth, while darker, drying blood is layered around the edges to suggest an older or partially healed injury. By combining these variations, the effect achieves the perfect balance of freshness, detail and authenticity.
Step 7: Final Touches
Blend the edges with a sponge, then check how it looks under different lights and camera angles. For live performances, add extra sealing sprays to prevent smudging.
Where Do You Master These Techniques From?
A short answer is: Learn from a well-known, results-driven special effects makeup school. That’s exactly what Cinema Makeup School is all about. We don’t just say this, our graduates do and you can check out their reviews yourself!
Let’s be clear, you want to learn special effects makeup skills that can open doors to a well-paying career and recognition in the industry, right? Got it! Now, head over to our website to see what we offer and how you’ll learn directly from industry professionals.
You can also explore our YouTube channel to see tutorials and learn how professionals create these effects.
More Helpful Guides:
How Much Do Special Effects Makeup Artists Make? A 2025 Insight
SFX Burn Makeup Techniques Every Artist Should Know
How to Make a Face Cast That Fits Perfectly for Prosthetic Makeup?
Safety Considerations When Creating Slit Throat Makeup
When applying slashed throat makeup, safety must always come first:
- Use skin-safe adhesives to prevent allergic reactions.
- Test fake blood for staining and sensitivity.
- Avoid restricting the throat area to ensure the actor can breathe and move comfortably.
- Communicate with performers – check in during long shoots to make sure they’re comfortable.
Schedule a tour of our SFX makeup school campus in Los Angeles, California or apply now and start your journey today.