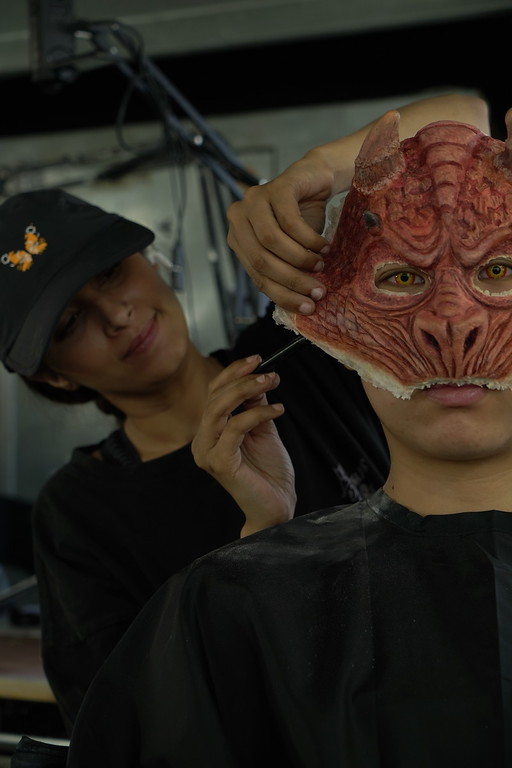
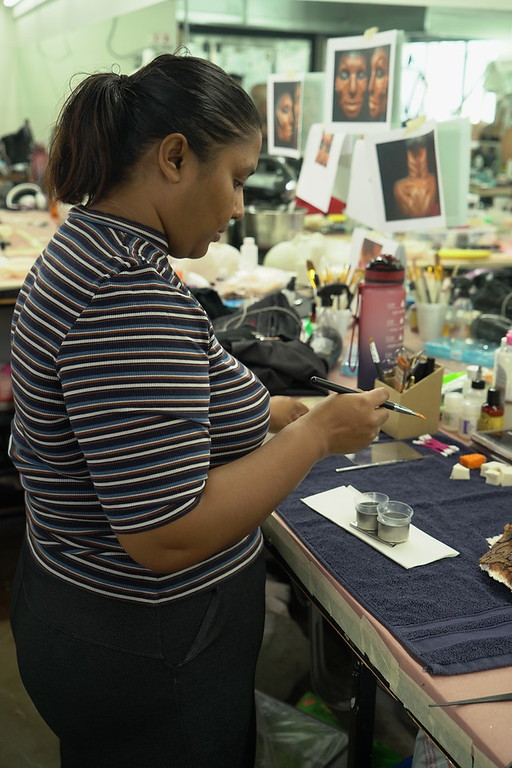
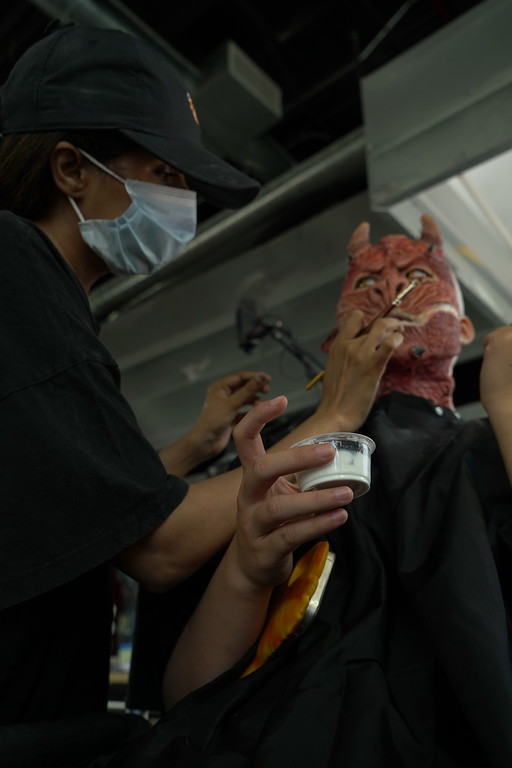
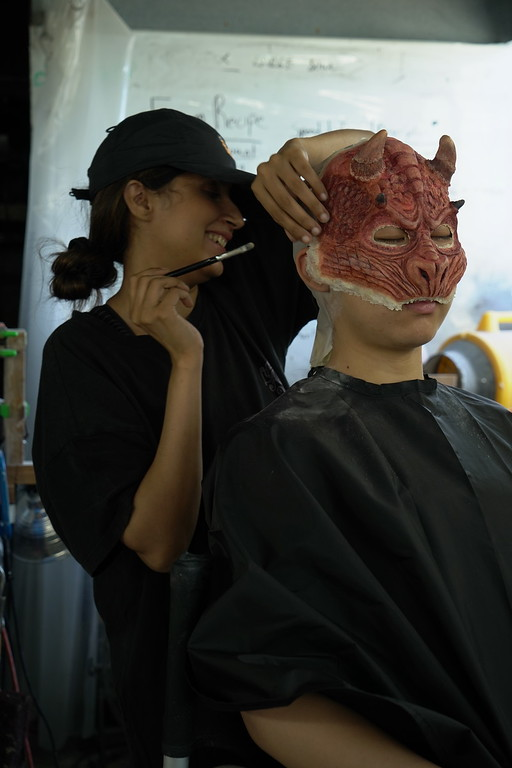
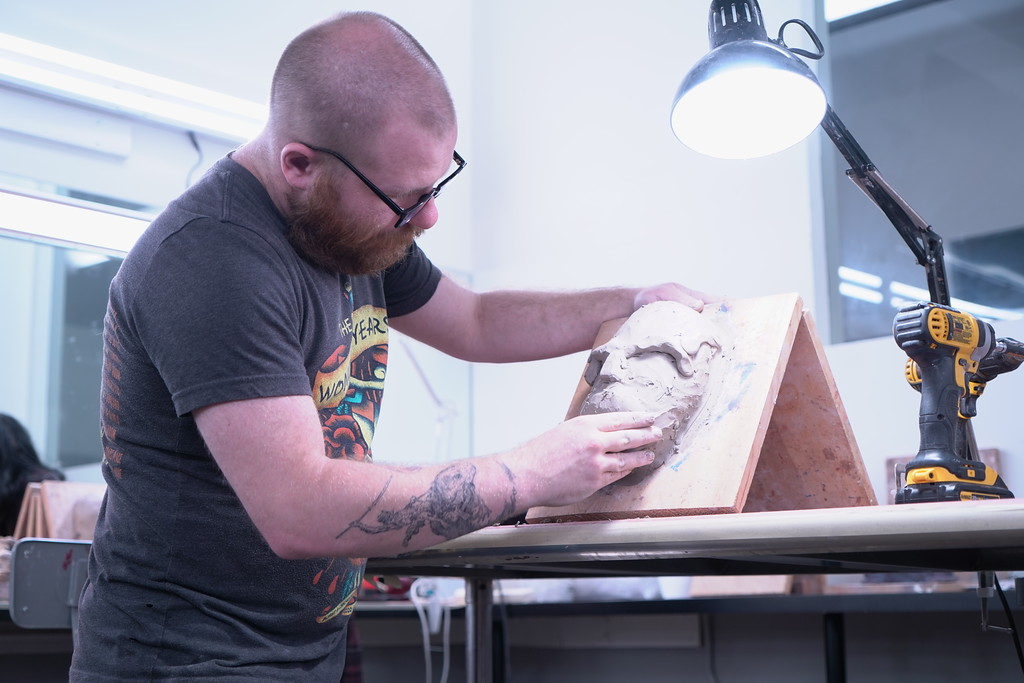
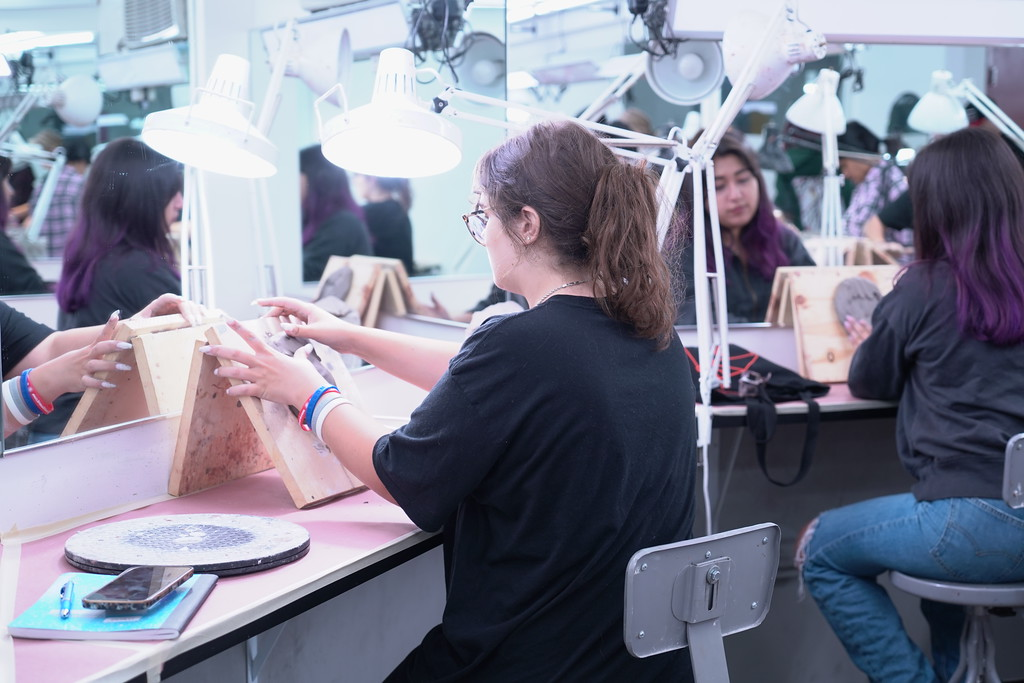
Special effects makeup is a creative field where artists transform actors using realistic wounds, fantasy characters and cinematic looks across films, TV and digital media. With rising demand in visual storytelling, many aspiring professionals are now choosing professional SFX makeup training to build practical skills and start creative careers.
Despite its growing opportunities, many beginners hesitate due to common myths and misconceptions about the industry. In reality, special effects makeup offers diverse career paths and real growth potential. Understanding the truth behind these myths helps artists gain confidence and move forward with the right knowledge and direction.
Below are some common SFX career myths explained clearly so you can understand the real industry facts and make informed career decisions.

Common Myths About SFX Makeup Careers
Many aspiring artists believe the field is too difficult, limited to horror films, dependent on industry connections, or only suitable for young beginners. In reality, SFX is a diverse and skill-driven profession with real growth opportunities. Let’s break it down:
Myth 1: SFX Makeup Is Too Difficult for Beginners
Some artists assume that special effects makeup is too complex for beginners and requires advanced drawing or painting skills to start. While creativity is helpful, professional art expertise is not a strict requirement. Most artists begin with basic makeup knowledge and gradually build their skills through structured learning and regular practice.
SFX is a practical, hands-on craft that focuses on understanding materials like latex, silicone and prosthetics while developing techniques step by step. Workshops, guided training and real project experience help beginners grow with confidence over time.
Reality: Strong skills come from consistency, proper training and continuous practice, not from natural artistic talent alone.
Myth 2: SFX Makeup Is Only for Horror Movies
Many people assume SFX makeup is only about horror characters or extreme transformations, but the reality is far more diverse. Special effects techniques are used to create realistic character details, enhance storytelling and bring creative concepts to life across multiple visual industries. From subtle enhancements to complex character design, SFX artists contribute to a wide range of professional projects beyond monsters or gore.
Even subtle effects like scars, aging, or realistic injuries require skilled SFX techniques. The industry offers creative diversity far beyond horror genres.
Myth 3: Expensive Kits Are Required to Start
Social media often highlights high-end studios and advanced professional tools, which can make beginners feel that Special Effects Makeup requires a huge initial investment. In reality, most artists begin their journey with basic kits and gradually upgrade their products as they gain more experience, confidence and professional opportunities.
Understanding how to use simple tools effectively is far more valuable than owning expensive materials in the early stages.
Important Note: Professional courses at Cinema Makeup School include complete makeup kits as part of the training program. Students receive the essential tools and materials required for practice, so there is no need to purchase products separately at the beginning.

Myth 4: Career Growth in SFX Is Limited
It is believed that long-term opportunities in SFX careers are difficult to find. In reality, the industry offers multiple paths for professional development and many artists build stable careers by expanding their skills and exploring different types of projects. Diversifying work helps professionals gain consistent experience while opening new creative and financial opportunities.
Experienced SFX artists often work across:
- Film and television productions
- Fashion shoots and editorial work
- Advertising campaigns
- Theatre performances
- Cosplay conventions
With the rapid growth of digital platforms and independent productions, the demand for skilled SFX artists continues to increase, creating more space for long-term career advancement.
Check Out: Career Options for Special Effects Makeup Artists
Myth 5: Only Film Industry Connections Matter
Many beginners think film industry contacts are the only way to grow in SFX, but strong skills, practical training and a professional portfolio play a bigger role in building a career. Consistent work and dedication help artists gain recognition based on their talent and performance.
Artists today grow by building connections during training, showcasing work through online portfolios, social media, collaborating on projects, participating in competitions and gaining experience through industry internships.
Skill, professionalism and continuous learning often create more opportunities than connections alone.
Myth 6: Online Videos Are Enough to Master SFX
Many beginners think online tutorials are enough to become professional SFX artists. While videos help with basic learning and inspiration, they cannot replace hands-on practice or structured training.
For a successful career in special effects makeup proper understanding of hygiene, materials, techniques and real production workflows is required, which are best learned through practical experience.
Get to know: Importance of Hygiene and Safety in SFX Makeup Careers
Myth 7: SFX Makeup Is Only for Young Beginners
Many people think Special Effects Makeup is only for those who start young, but artists of all ages and professional backgrounds successfully enter this field. What truly matters is skill, creativity and proper training not when you begin your journey. With dedication and practice, anyone can learn to create realistic injuries, prosthetics and imaginative characters.
Age never limits creativity; in fact, diverse experiences often bring unique perspectives that make an artist’s work stand out.
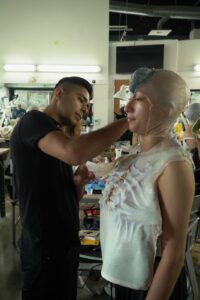
See how students at Cinema Makeup School work on real SFX projects and develop industry-ready skills.
More Helpful Blogs –
How To Become a Makeup Artist for Films?
Top Career Mistakes New SFX Makeup Artists Make (and How to Avoid Them)
What Skills Are Required for a Successful SFX Makeup Career?
- Clear Communication – Prevents makeup mistakes and ensures everyone understands the character design.
- On-Set Pressure Management – Ability to stay calm and work efficiently under tight deadlines.
- Material Knowledge – Understanding latex, silicone, adhesives and prosthetics behavior.
- Hygiene & Safety Awareness – Proper sanitation and safe product application/removal.
- Problem-Solving Skills – Quick fixes for lifting prosthetics or unexpected issues.
- Time Management – Completing complex tasks within production schedules.
- Professional Discipline – Punctuality, preparation and reliability on set.
Schedule your visit to our campus and start envisioning your growth in the special effects makeup career and make your vision a reality.
A character’s appearance is key to making stories believable in film and TV. Makeup transforms actors into creatures, heroes, or realistic characters, helping audiences fully connect with the story. From subtle scars to elaborate prosthetics, every detail matters in creating a convincing look. Getting the perfect design takes careful experimentation and planning before the final shoot.
Let’s explore how pre-production tests for special effects makeup allow artists to refine designs and prevent costly revisions during the shoot.
What Is a Makeup Test?
A makeup test is a trial process where makeup artists experiment with different looks before finalizing the character’s on-screen or on-stage appearance. It allows creative teams to explore skin tones, textures, prosthetics, colors and styles under real lighting conditions. These tests act as a visual rehearsal, helping teams make informed decisions long before the final performance or shoot.
Why Are Pre-Production Makeup Tests So Important?
Pre-production makeup tests help finalize a character’s look before filming begins. They allow artists to try different designs, check how makeup appears on camera and fix issues early. These tests mainly focus on improving design quality, camera appearance, actor comfort, durability and team collaboration to create a strong and realistic final character look.
Bringing Concepts to Life
Makeup tests turn sketches and ideas into real character designs. Artists experiment with colors, styles and prosthetics to create the most effective look that fits the story and the actor.
Testing How Makeup Looks on Screen
Makeup can look different under HD cameras and studio lighting compared to real life. During pre-testing, artists see how colors, textures and details appear on screen. This ensures the character looks natural, clear and consistent in every shot.
Ensuring Actor Comfort and Performance
Heavy makeup or prosthetics can be restrictive. Testing helps ensure that actors are comfortable, can move freely and perform naturally during long shooting hours.
Checking Application Time and Durability
Pre-tests help artists see how long makeup takes to apply and how well it holds up during filming, allowing them to refine techniques for speed and consistency across scenes.
Collaborative Feedback for Improvement
Makeup tests involve directors, costume designers and cinematographers. Feedback from the team helps refine every detail to create a final look that perfectly suits the story and production style.
Watch behind-the-scenes tutorials of SFX makeup transformations here.
Step-by-Step Guide to Character Makeup Testing
The makeup testing process helps turn creative character ideas into polished, on-screen looks before filming begins. Each step allows artists to test designs, check comfort and see how makeup performs under real camera and lighting conditions, ensuring the final look is realistic and consistent. This process also helps prevent last-minute issues on set, saving time and ensuring smooth production.
1. Script Analysis and Research
Artists study the script to understand the character’s personality, story and visual needs. They gather references and ideas to create an accurate makeup concept, ensuring the design fits the narrative and mood.
2. Concept Design and Sculpting
Artists create sketches or digital designs to plan the character’s appearance. For SFX characters, they may sculpt prosthetics or design molds to match the planned look, making sure the design is practical and wearable.
3. Initial Makeup Test
The first makeup application is done on the actor to see how the design looks in real life. Artists check colors, textures, prosthetic fit and comfort, identifying any issues that need adjustment.
4. Camera and Lighting Evaluation
Makeup is tested under real production lights and filmed on camera. Adjustments are made to ensure the character looks consistent and realistic on screen, even in different lighting conditions.
5. Refinement and Final Approval
Based on feedback, artists refine colors, materials and techniques. Once everything works well on camera and looks perfect, the final makeup is approved for filming, ensuring a smooth and professional production process.
Build Your SFX Makeup Skills With Expert Guidance
If you’re an aspiring artist looking to grow seriously in special effects makeup, Cinema Makeup School is the perfect place to start. While makeup tests are one important part of the professional process, our programs give you much more; hands-on experience with real projects, practical training under experienced instructors and guidance in mastering the techniques used on film, TV and creative productions.
Here, you’ll learn how to bring your ideas to life while building the skills and confidence needed for a successful career in SFX makeup.
Book a tour of our SFX makeup school and explore how makeup tests help finalize professional on-screen character looks.
FAQs
1. Can makeup tests reduce mistakes during actual filming?
Yes. By identifying issues like color mismatches, prosthetic misfits, or material problems early, makeup tests prevent costly mistakes on set and ensure smoother production.
2. How do digital tools support makeup tests?
Artists use digital tools like ZBrush and Photoshop to preview and refine character designs before physical application, saving time and allowing precise adjustments ahead of on-set makeup tests.
3. Can makeup tests help with budgeting and resource planning?
Absolutely. By testing materials, prosthetics and application time in advance, production teams can estimate costs, order supplies and schedule makeup artists more efficiently.
Body painting is one of the most powerful yet often underestimated techniques in special effects makeup. With the right understanding of anatomy, color, light and perspective, body painting can transform a human form into creatures, injuries, armor, fantasy beings, or surreal illusions, without relying heavily on prosthetics.
In film, live performances, photoshoots and immersive experiences, body painting plays a critical role in creating high-impact SFX makeup illusions that feel believable and visually striking.
This blog explores how body painting works, the techniques behind the illusions and why mastering body painting is essential for aspiring special effects makeup artists.
Commonly Used Body Painting Techniques in SFX Makeup
Body painting in special effects makeup relies on strong planning, anatomy knowledge and precise application. Color theory and concept sketches guide depth and lighting, anatomy ensures accurate placement and airbrushing creates smooth blends, texture and realistic detail.

1. Color Theory and Concept Planning
Before body painting begins, it is essential for artists to understand color theory. In special effects makeup, color is used to create depth, realism and visual illusion.
Most professional SFX artists start by creating concept art in a sketchbook or digitally. These sketches help visualize how the final body painting will look, where highlights and shadows should fall and how different colors will interact on the body. Planning colors in advance allows artists to control the illusion and avoid flat or unrealistic results.
2. Anatomy for Accurate Placement
Along with color theory, understanding human anatomy plays a major role in SFX body painting. Artists must know the structure of muscles, bones and natural body contours to place painted details correctly.
Anatomy knowledge helps artists understand:
- Where muscles naturally sit and how they move
- How bones and joints affect body shape
- Where shadows naturally form on the body
Whether painting exposed muscles, robotic parts, or creature designs, following real anatomical landmarks makes the illusion more convincing. Without this understanding, even well-painted designs can appear incorrect or unrealistic.
Check out: Why SFX Makeup Artists Should Study Human Anatomy for Sculpting Realistic Prosthetics?
3. Airbrushing
Airbrushing is one of the most important techniques used in special effects body painting. It allows artists to build realistic illusions by applying paint in controlled, lightweight layers that blend seamlessly into the skin. Airbrushing helps create smooth color transitions, soft shadows and subtle highlights that are difficult to achieve with brushes alone.
Because the paint is applied evenly and gradually, the illusion appears more natural and works especially well for film, photography and close-up shots. Airbrushing is commonly executed using a combination of tools, including:
Airbrush gun: Used to apply smooth base layers, gradients and controlled shading across large areas of the body.
Stencils: Placed on the skin while airbrushing to create repeated patterns, textures, scales, mechanical details, or sharp-edged designs.
Sponges: Used alongside airbrushing to break up flat color, add organic texture and create effects such as bruising, dirt, decay, or uneven skin.
Brushes: Used after airbrushing to refine details like veins, cracks, scars and edges.
Pro Tip: When it comes to understanding materials and creating characters and transformations, professional training under well-recognized SFX makeup schools works better. Cinema Makeup School offers multiple training programs covering different techniques.
Here, you will learn prosthetic makeup, airbrushing techniques, color theory, concept art and creature transformations within a structured timeframe that helps prepare you for professional-level work.
Watch the Robot Girl Body Paint Makeup tutorial to see these techniques in action.
Which Illusions Are Created Through Body Painting?
Through skilled use of paint, the human body can be altered in multiple ways to create high-impact looks. Body painting techniques allow artists to achieve effects such as camouflage, realistic depth, object-like transformations, angle-based perspective designs, painted clothing, movement illusions and fantasy character creation.
Each approach relies on precise control of color, anatomy, lighting and perspective to reshape how the body is perceived, making paint appear dimensional, dynamic and believable.
1. Camouflage
In this style, the body is painted to match its surroundings, such as walls, trees, sand, or city backgrounds. When done carefully, the person blends into the scene and becomes difficult to notice. This technique plays with visibility and makes the body almost disappear into the environment.
2. 3D Effects
Artists carefully study how light interacts with real forms and then replicate those lighting conditions using paint. By applying highlights, mid-tones and shadows in the correct anatomical positions, body painting can suggest depth, curvature and volume on the surface of the skin. These painted values guide the viewer’s eye to perceive raised, recessed, or overlapping forms, even though the skin itself remains flat.
When combined with accurate anatomy and controlled lighting, these techniques create convincing three-dimensional SFX illusions that hold up on camera and in live settings.
Also Read How 3D Printed Prosthetics Are Revolutionizing Movie Makeup?
3. Object Transformation
In body painting, the human form can be visually altered to resemble non-human subjects such as statues, animals, architectural elements, natural surfaces, or everyday objects. Through careful use of color, shading and perspective, artists disguise natural body features and replace them with the appearance of an entirely different form.
The body may appear as stone, rock, wood, metal, or animal form rather than skin and muscle. This type of illusion is commonly used in conceptual art, live performances, themed productions and creative photography, where strong visual impact and complete transformation are essential.
4. Angle-Based Perspective Illusions
This technique works best from a specific viewing angle. When seen from the right position, the painted body lines up perfectly with the surrounding space, creating a powerful visual effect. From other angles, the artwork may look distorted.
Learn How Movie Makeup Changes Audience Perception of a Character?
5. Painted Clothing and Costumes
Body painting allows artists to create the appearance of clothing, armor and accessories directly on the skin, without using real fabric or materials. By painting elements such as seams, folds, textures and edges, the body can look fully dressed.
This technique depends on a strong understanding of human anatomy, fabric structure and light behavior. Strategic highlights and shadows are used to suggest depth, weight and movement, making flat paint appear layered and realistic. Details like stitching, buttons, or armor panels strengthen the visual effect and improve overall realism.
6. Movement Effects
Patterns, repeated lines, or contrasting colors create a sense of motion. Even when the person is standing still, the design makes the body appear as if it is moving, vibrating, or flowing.
7. Fantasy Characters
Body painting is widely used to bring fantasy characters to life by transforming the human body into imaginative designs. These characters are often inspired by mythology, folklore, dreams, or original creative concepts that go beyond realistic human appearances.
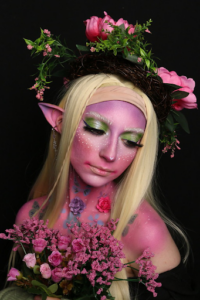
Unlike realism-based body painting, fantasy work allows greater freedom in color choices, textures and forms. Artists may exaggerate features, blend organic and abstract shapes, or introduce symbolic patterns to express mood, personality, or emotion. Bright colors, metallic finishes, glowing effects and unconventional shading are commonly used to enhance the visual impact.
Book a tour of our special effects makeup school today and get started learning from experienced industry instructors.
Weather conditions can significantly impact how makeup performs during extended hours on set, outdoor shoots, or live performances. What works well in a controlled studio may not hold up the same way in real-world environments.
In special effects makeup, these challenges become more noticeable because of the use of prosthetics, adhesives, paints and textured details. Without proper planning and maintenance, even a well-applied SFX look can start lifting, cracking, or fading.
In this blog, we will explore how heat, humidity, cold, wind and rain can affect special effects makeup and how artists can keep their work looking professional and long-lasting.
How Weather Conditions Can Affect SFX Makeup?
- Heat and sweat can cause adhesives and prosthetics to lift or melt.
- High humidity slows drying and can make paints sticky or smudge.
- Cold temperatures make prosthetics stiff and increase cracking in paints.
- Rain or moisture can wash away color and damage delicate textures.
- Wind can lift edges, shift wigs, or disturb lightweight prosthetic pieces.
- Sudden temperature changes can affect the flexibility of materials.
- Excessive sun exposure can fade colors or soften adhesives.
Check Out: Must-Have Special Effects Makeup Tools Every Artist Should Own
Maintaining SFX Makeup in Hot Weather
Heat can make sweat, oil and body movement a real challenge for SFX makeup. Prosthetics may lift, adhesives can weaken and paints might smudge or slide. Using spirit-based or heat-resistant adhesives, alcohol-activated or sealed grease paints, controlling moisture with powders or blotting papers and reinforcing prosthetic edges can help keep your makeup durable and professional in hot conditions.
1. Prepare the Skin Properly
Start with a clean, oil-free base to ensure adhesives and prosthetics adhere well. Use a gentle cleanser to remove dirt and oil, followed by a silicone-based or alcohol-based primer. These products create a slightly tacky surface that improves adhesive hold. Avoid heavy moisturizers, as they can reactivate adhesives and reduce durability in heat.
2. Choose Heat-Resistant Adhesives
Professional-grade adhesives like Pros-Aide hold well on skin and resist sweat. Spirit-based adhesives such as Telesis or Mastix are ideal for extended wear under heat. Apply adhesives in thin layers to allow proper curing and prevent trapped heat from weakening the bond.
3. Use Sweat-Resistant Paints and Sealers
High temperatures can cause paints to slide or smudge. Alcohol-activated paints dry to a water-resistant finish, making them ideal for heat. Grease paints can be sealed with Ben Nye Final Seal or Kryolan Dermacolor Fixer to improve longevity. Applying paints in thin layers helps them dry evenly and reduces the risk of cracking or pooling.
4. Control Sweat and Oil on Set
Even with proper preparation, heat can cause excess sweat and oil to accumulate, affecting makeup stability. Keep blotting papers or translucent setting powders on hand to absorb moisture without disturbing the makeup. Lightly dust powders over prosthetic edges to prevent lifting, but avoid heavy application, as it can make edges more visible.
5. Protect Prosthetic Edges
Edges of prosthetics are the most vulnerable areas in hot weather. Carefully blend edges with Pros-Aide during application and touch up any lifting with Telesis powder or alcohol-activated paints. Regular monitoring and small fixes prevent minor lifting from turning into major issues.
6. Plan for Touch-Ups
Even with preparation, hot conditions can challenge makeup longevity. Always have a mini kit on set that includes adhesives, alcohol-based paints, sealers, brushes, sponges and powders. Performing frequent small touch-ups is more effective than reapplying an entire prosthetic.
Maintaining SFX Makeup in Rainy or Wet Conditions
Wet weather can lift prosthetic edges, blur paints and soften textures, making the makeup less durable. To prevent this, it’s important to use water-resistant adhesives, sealed alcohol-activated or grease paints and, whenever possible, shield the makeup from direct rain or moisture.
1. Use Waterproof Adhesives
In wet weather, avoid water-based adhesives. Opt for water-resistant or spirit-based adhesives, which hold prosthetics firmly even when exposed to moisture. Silicone adhesives are also ideal for flexible prosthetics in wet environments.
2. Choose Water-Resistant Paints and Sealers
Water-based paints are prone to smudging or running. Alcohol-activated or grease-based paints sealed with a layer that performs much better and maintains color and detail in rain or mist.
3. Protect Prosthetic Edges and Fine Details
In wet conditions, seams, edges and raised details are at higher risk of lifting or losing definition. Reinforce these areas with additional adhesive or a thin coat of waterproof sealer to maintain the prosthetic’s shape and texture, ensuring it stays intact even when exposed to moisture.
4. Minimize Direct Water Exposure
Whenever possible, shield the makeup from direct rain or mist using umbrellas, temporary covers, or protective barriers to prolong durability.
Maintaining SFX Makeup in Cold Weather
Cold weather can make prosthetics stiff, adhesives less effective and paints prone to cracking, while dry air dehydrates the skin. Using flexible adhesives, paints that resist cracking, light hydration and minimal powders helps keep SFX makeup smooth, durable and comfortable in low temperatures.
1. Combat Dry Skin
Cold air dries out the skin, which can prevent adhesives from sticking properly. Use a light, fast-absorbing moisturizer or primer to hydrate the skin without leaving it oily. This creates a smooth surface for adhesives while avoiding interference with their grip.
2. Maintain Adhesive Flexibility
In winter, some adhesives can become stiff or hard. Use flexible options such as spirit-based or silicone adhesives, which remain sticky even in low temperatures. Apply in thin layers to ensure proper curing and to reduce cracking or lifting during facial movements.
3. Choose Paint that Doesn’t Crack in Cold Conditions
Grease-based and water-based paints can harden in winter, causing cracks in makeup. Apply alcohol-activated paints or flexible grease paints in thin layers and lightly seal each layer. This maintains color integrity while keeping the prosthetic flexible.
4. Avoid Heavy Powders
Using too much powder in cold weather can make the makeup look dry and flaky. Lightly apply only where necessary to set paints or reduce shine. This keeps the prosthetic and skin looking smooth and natural without stiffening the makeup.
Maintaining SFX Makeup in Windy Conditions
Strong wind can lift prosthetic edges, disturb powders and shift hair or lightweight elements, making makeup less stable. Securing edges, using matte finishes, protecting hair and minimizing loose or delicate pieces helps keep SFX makeup intact and looking professional even in windy environments.
1. Secure All Edges Properly
Double-check all prosthetic edges and thin areas, such as ears, neck, or facial creases. Reinforce with flexible adhesive and blend carefully to prevent lifting. Properly secured edges help the prosthetic stay in place even in strong airflow.
2. Use Matte Finishes
Sticky or glossy surfaces attract dust and small debris carried by the wind. Using matte paints or sealers reduces shine and prevents dust from sticking, keeping the makeup looking clean and smooth throughout the shoot.
3. Protect Hair Work
Wigs, hairpieces, or facial hair can shift or lift in windy conditions. Use strong hair adhesives, pins and proper blending techniques to secure hair and prevent movement.
Also Read Art of Hair & Wig Work in Movie Special Effects Makeup
4. Limit Lightweight Add-Ons
Foam pieces, loose prosthetic elements, or small accessories are vulnerable to being blown off. Either provide extra support with adhesives or avoid using these pieces in windy environments. Prioritizing stability ensures that all elements stay intact on set.
Related Articles –
How to Make SFX Makeup Last Longer on Skin?
Water-Based vs. Alcohol-Based Airbrush Makeup
Advanced SFX Makeup Techniques Every Artist Should Master
Why Professional Training Is Essential for Handling Extreme Conditions?
The above-mentioned tips are valuable, yet nothing beats learning and practicing under the supervision of experienced instructors. Professional training gives artists access to insider knowledge, practical tips and real-world problem-solving strategies that can’t be learned from books or blogs alone.
Through SFX makeup courses at Cinema Makeup School, you learn how to:
- Make quick on-set adjustments when prosthetics or makeup start failing.
- Understand subtle material behaviors under different conditions, like how certain adhesives react to heat, moisture, or cold.
- Use advanced tools, layering techniques and blending methods that enhance durability and realism.
- Gain confidence in timing, workflow and planning for shoots, essential for working efficiently in professional productions.
Schedule your visit to our campus and start envisioning the growth of your SFX makeup career – make your vision a reality.
In special effects makeup, adhesives are essential for creating believable transformations and characters. They are used to secure prosthetics, build wounds and ensure makeup applications remain intact during long shooting hours, hot lighting conditions and physical movement.
For beginners, choosing the right adhesive can be confusing. There are many options available and each one behaves differently on skin, foam latex, silicone and other materials. Professional makeup artists select adhesives based on skin type, appliance material, shooting conditions and how long the makeup needs to last.
In this guide, we will explore the most commonly used adhesives in SFX makeup, how they work and when each one should be used.
Factors to Consider When Using Adhesives in SFX Makeup
Choosing the right adhesive is just as important as selecting the prosthetic itself. Different factors affect how well an adhesive performs on skin, especially during long shoots or live performances. Understanding these key considerations helps ensure the makeup stays secure, looks natural and remains safe for the performer.
- Skin Safety: When using adhesives, remember to choose ones that are safe for direct contact with skin. They should not cause allergic reactions, irritation, or long-term damage when applied and removed correctly.
- Strong and Reliable Hold: If SFX makeup needs to stay in place for long hours, the adhesive must keep prosthetics and appliances securely attached without lifting or shifting.
- Flexibility with Skin Movement: When performing, an actor’s skin constantly moves due to facial expressions and body motion. Choose adhesives that remain flexible, so they move naturally with the skin instead of cracking or separating.
- Durability Under Harsh Conditions: On movie sets or stage, makeup is often exposed to hot lights, long hours, sweat and repeated movement. Choose adhesives that can hold up under these conditions without breaking down, losing grip, or causing the prosthetic to lift.
- Safe and Controlled Removal: A suitable adhesive should allow safe removal using proper removers without damaging the skin. Clean removal is essential to protect the performer’s skin, especially when adhesives are used repeatedly over multiple days.
Learn How to Make SFX Makeup Last Longer on Skin?
Common Adhesives Used in Special Effects Makeup
Special effects makeup uses a range of adhesives such as Spirit Gum, Pros-Aide, Telesis silicone adhesives, gelatin, liquid latex and FX tape, each suited for different materials and wear times. Knowing when to use each one helps achieve secure, safe and realistic SFX applications.
1. Spirit Gum
Spirit gum is used for small applications such as fake mustaches, beards, eyebrows, lightweight prosthetic pieces and small facial appliances. It is also used in theatrical makeup where long-term durability is not as critical as in movies.
However, it is not recommended for heavy prosthetics or long-duration film shoots, as it may lose strength with sweat and facial movement.
2. Pros-Aide Adhesive
Pros-Aide is widely used for attaching foam latex appliances in SFX makeup. It is a water-based acrylic adhesive known for its strong bond and flexibility, allowing prosthetics to move naturally with the skin.
This adhesive is frequently used in film, television, theatrical productions and themed entertainment, where long-lasting wear and durability are required.
3. Telesis Silicone Adhesive
This adhesive is an industry standard for film and television productions, especially when seamless blending and invisibility on camera are critical. Unlike traditional adhesives, it cures chemically rather than through evaporation, forming a strong and flexible bond.
It is used for silicone prosthetics, encapsulated appliances and other applications that require long wear, heat resistance and moisture durability. Telesis silicone adhesive also provides excellent edge blending for a natural, professional finish.
Note: Proper training is recommended for safe use and removal should be done with silicone-based removers to avoid skin irritation.
4. Gelatin Adhesive
Gelatin adhesive works well for lightweight prosthetics, small wounds, scars and other skin appliances, making it a popular choice in theater or low-budget film productions. It is skin-safe, easy to prepare and can also double as a material for building texture directly on the skin.
Gelatin adhesive provides temporary adhesion and works well for short-term effects. It is not suitable for heavy or long-duration applications.
5. Liquid Latex
Liquid latex serves as both an adhesive and a sculpting material, perfect for attaching prosthetic pieces, creating wounds, scars, or textured SFX details. It is flexible, dries quickly and can be layered for realistic results. While generally safe for most skin types, liquid latex may irritate sensitive skin and is not strong enough for heavy prosthetics or extended wear.
Proper removal is important to prevent skin damage.
6. FX Tape
FX tape provides a quick and temporary solution for securing prosthetics, wigs, or costume pieces, often used in stage performances or for on-the-spot fixes. Its easy application and removal make it convenient for short-term use.
However, FX tape is not suitable for long-duration wear or close-up film work and adhesion can be affected by sweat or movement.
Pro tip: At Cinema Makeup School, we offer hands-on special effects makeup courses where our instructors teach everything from material handling and adhesive selection to prosthetic application and designing camera-ready makeup looks. While guides and online resources are helpful, real-world training and professional guidance make a major difference.
Related Articles –
Different Types of Scar Wax and Their Uses in SFX Makeup
How Mannequins Help Beginners Create SFX Makeup Characters?
Must-Have Special Effects Makeup Tools Every Artist Should Own
Comparing Adhesive Types
| Adhesive Type | Best For | Hold Strength | Skin Sensitivity | Removal Difficulty |
| Spirit Gum | Fake mustaches, beards, eyebrows, lightweight prosthetics, small facial appliances; theatrical makeup | Light | Moderate | Easy |
| Pros-Aide Adhesive | Foam latex appliances, lightweight prosthetic pieces; film, TV, theater | Strong | Moderate | Moderate (requires water) |
| Telesis Silicone Adhesive | Silicone prosthetics, encapsulated appliances; long-wear, HD/film applications | Very Strong | Low-Moderate | Hard (requires silicone remover) |
| Gelatin Adhesive | Lightweight prosthetics, small wounds, scars; theater or low-budget productions | Light | High | Easy |
| Liquid Latex | Attaching prosthetic pieces, creating wounds, scars and textures | Moderate | Moderate-Low | Moderate |
| FX Tape | Securing prosthetics, wigs, costume pieces temporarily; stage or quick fixes | Light-Moderate | High | Easy |
If you’re interested in learning special effects makeup in a real studio environment, we invite you to take a tour of our campus and explore our SFX makeup training programs.
Cinema has always been about illusion. From early black-and-white films to today’s visually rich blockbusters, filmmakers have constantly searched for ways to make stories feel more believable, emotional and immersive.
As technology has evolved, makeup artists and filmmakers now rely on both special effects makeup and digital effects to bring characters to life on screen. Although both techniques aim to transform reality, they achieve this in very different ways. One is grounded in physical craftsmanship and hands-on artistry, while the other is shaped by technology, software and post-production processes.
Let’s explore these two approaches in depth, examining their differences and creative roles to help aspiring artists understand where each technique fits.
What’s Involved in Special Effects Makeup?
Special effects makeup combines art and technique to bring characters to life on screen. It includes understanding the character, sculpting and designing prosthetics, creating molds and casts, applying and blending pieces on the actor and maintaining the look during filming to ensure realism and consistency.
1. Concept and character understanding
The process begins with a detailed understanding of the character and the story. Special effects makeup artists study the anatomy of both the character and the performer to understand bone structure, muscle movement, skin behavior and proportions.
Reference images, sketches and real-world observations are used to plan how the makeup will sit on the face or body and how it will behave during movement and expressions. This stage helps artists decide the scale, placement and level of detail required so the final makeup looks natural and functional on camera.
2. Design and sculpting
Based on the approved concept, sculpting is done directly on a life cast or reference of the actor. Artists focus on anatomical accuracy, symmetry and scale. Even small errors in proportion can restrict facial movement or look unnatural on camera. Sculpting also defines surface details such as wrinkles, pores, scars, or wounds, which are critical for close-up shots and high-definition filming.
3. Molding and casting
Once the sculpture is finalized, molds are created to copy the design exactly as it was sculpted. This determines how accurately the details from the sculpt, such as skin texture, wrinkles, scars, or wounds, will appear in the final prosthetic. A precise mold also allows the same design to be reproduced consistently for multiple shooting days.
Casting involves selecting appropriate materials that are flexible, skin-safe and suitable for the demands of filming. The selected material must move naturally with the actor’s expressions, remain lightweight for long wear and withstand heat, sweat and extended shooting hours.
Learn How to Make SFX Makeup Last Longer on Skin?
4. Application and blending
When the prosthetic pieces are ready, they are carefully positioned to match the actor’s facial or body features. The edges are blended into the natural skin so they are not visible on camera. Color matching and texturing are built in layers to ensure the makeup responds realistically under different lighting conditions and camera lenses.
5. Continuity and on-set maintenance
During filming, special effects makeup can change due to long hours, bright lights, actor movement, or contact with costumes and props. SFX artist regularly checks the makeup between takes to make sure nothing has shifted, faded, or peeled. If needed, small fixes and touch-ups are done on set so the makeup continues to look natural and consistent on camera.
Role of Digital Effects in Character Design and Filmmaking
Digital effects help artists plan and improve characters before they appear on screen. This includes improving character designs with textures and color, creating detailed creature concepts, retouching images for portfolios and providing visual references to support special effects makeup.
1. Enhancing Character Design
Digital FX allows artists to refine and enhance character designs by adding textures, color depth and visual details that support the overall look. This helps artists visualize how a character will appear on screen before makeup or prosthetics are applied.
2. Creating Creature Concept Art
Digital tools help artists create creature and character designs faster. By working in layers, artists can try different shapes, features and ideas and make changes without having to redo the entire design. This makes the process easier and is especially useful for concept artists and SFX makeup labs.
3. Professional Image Retouching
Image retouching is used to clean up and polish character designs for portfolios and presentations. Artists learn how to correct skin tones, refine edges, balance lighting and enhance important details while keeping the character looking natural and believable.
4. Supporting Special Effects Makeup
While characters are designed with special effects makeup for movies and television, digital tools help artists plan prosthetics, textures and color choices in advance. These designs serve as visual references during sculpting and makeup application, making it easier to create accurate and consistent character looks.
Difference Between Special Effects Makeup & Digital Effects
| Aspect | Special Effects Makeup | Digital Effects |
| Primary Purpose | Physically transforms an actor’s appearance using makeup and prosthetics | Develops, refines and enhances character designs using digital tools |
| Stage of Production | Used mainly during filming and on set | Used before filming for planning and after filming for refinement |
| Materials & Tools | Latex, silicone, foam, molds, paints, adhesives | Photoshop, drawing tablets, layered digital files |
| Actor Interaction | Applied directly to the actor’s face or body | Used as visual references or polished final images |
| Flexibility for Changes | Changes require reworking or reapplying makeup | Changes can be made quickly without starting over |
| Best For | Injuries, aging, creatures, prosthetics and realistic transformations | Concept art, portfolio images, design planning and visual refinement |
| Role in Character Creation | Brings the character to life physically on set | Helps plan, enhance and present the character visually |
Related Articles:
How SFX Artists Design Fake Nose Prosthetics?~
Different Types of Scar Wax and Their Uses in SFX Makeup
How to Work with Latex, Silicone and Prosthetics Safely?
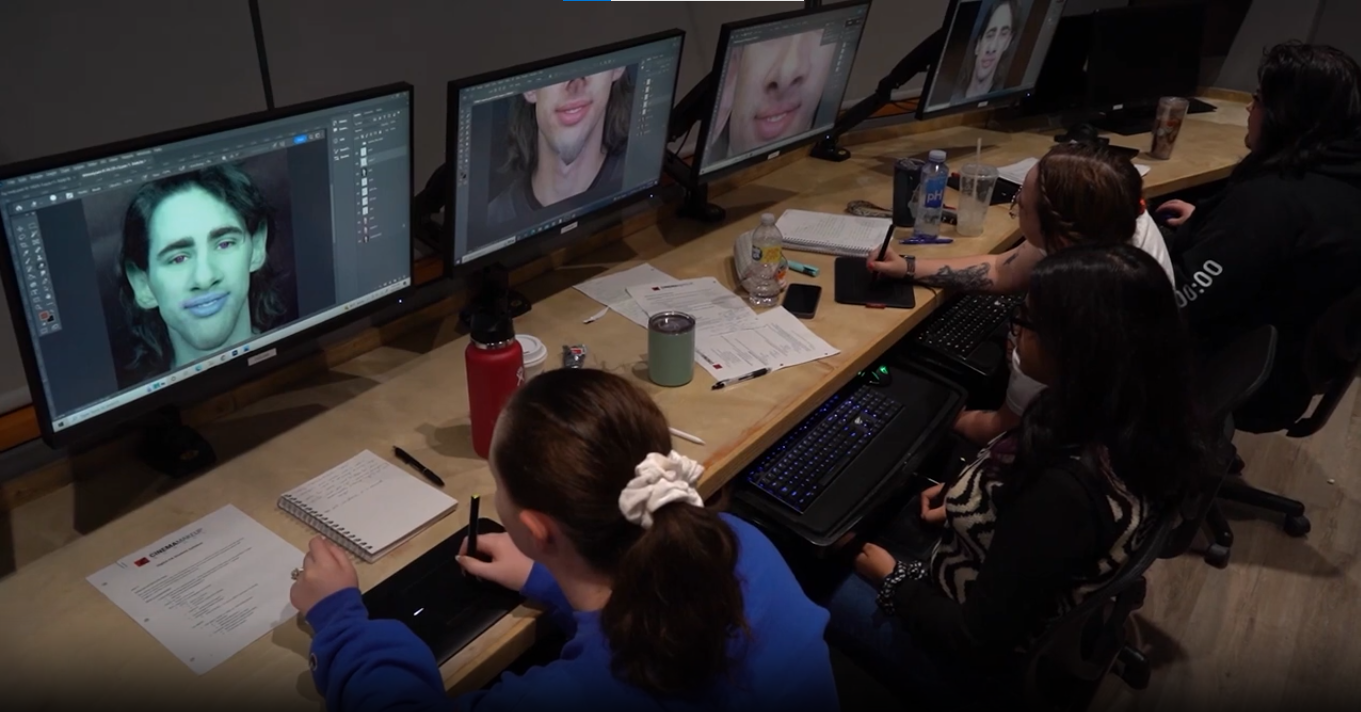
Learn SFX Makeup and Digital FX at Cinema Makeup School
Whether you’re just starting or looking to take your makeup skills to the next level, Cinema Makeup School is the perfect place to grow. We offer hands-on Special Effects Makeup and Digital FX courses to equip artists with the skills to design, create and bring characters to life for film, television and stage.
In our Special Effects Makeup course, you will learn how to turn your character ideas into realistic, camera-ready looks. The course covers everything from correcting a life cast of your model, sculpting faces & creatures, creating custom teeth and dental appliances, to mold making, foam latex casting and applying and painting prosthetics.
Our Digital FX course is a one-week crash course designed to teach you how to plan, design and refine characters digitally using Adobe Photoshop and a Wacom drawing tablet, creating detailed concept art, retouching images for portfolios, overlaying textures, recoloring and producing polished visual references to support SFX makeup work.
Visit our campus to explore how our courses can help you build your skills and start a successful career in Special Effects Makeup.
Special effects makeup is a skill-driven industry where talent alone is not always enough to build a successful career. While strong techniques and creativity are essential, connections often play an equally important role. Many SFX artists find jobs through people they meet during training, on film sets, at workshops, or within online professional communities.
For aspiring artists, networking can feel confusing or challenging at first. You may wonder who to approach, what to say, or how to build connections without sounding pushy or inexperienced.
Let’s explore networking strategies that help aspiring SFX artists at different stages of their careers.
How to Network Effectively as a SFX Makeup Artist?
Networking in SFX makeup includes gaining on-set experience, connecting with classmates and instructors, collaborating with models, attending events, joining online communities, improving your skills, using social media effectively and presenting yourself professionally.
Let’s explore in detail:
1. Work as an Assistant
Assistant roles allow aspiring SFX artists to gain on-set experience while working closely with experienced professionals. These roles help build familiarity with industry workflows and create opportunities to develop professional relationships over time.
While assisting:
- Arrive early and be prepared
- Stay organized and manage tools properly
- Follow production rules about sharing work publicly
2. Use Your Training Time to Build Connections
Many beginners wait until they finish their training to start networking. This is a common mistake. Your learning phase is actually one of the best times to build connections because everyone is in the same place, learning and growing together.
Connect With Classmates
Your classmates can become your first professional network. Some may go on to assist on sets, work in studios, or even lead makeup departments in the future. Treat classmates with respect, share tips or resources and collaborate whenever possible. Staying in touch after the course ends helps maintain these relationships, which can lead to future opportunities or partnerships.
Build Strong Relationships With Instructors
Instructors notice students who are on time, pay attention and try to get better every day. Listening, asking questions and following their guidance can lead to advice, support, or even future job opportunities.
At Cinema Makeup School, our students go on to work on major projects and their alumni credits show the kinds of opportunities you can get.

3. Attend Industry Events and Workshops
Industry events and workshops are a great way to meet people who work in SFX and learn from them directly. You don’t need to talk to everyone, just focus on a few people and show genuine interest. Watching and learning is just as important as introducing yourself.
After an event, try to stay in touch. Even a short thank-you message or comment about something you learned can help you build a connection.
4. Use Social Media the Right Way
Share Your Work Consistently: Post clear photos or videos of your makeup projects. Don’t just show the finished look, share your process too. This helps others see what you can do and shows how you work step by step.
Engage With Others: Comment on other artists’ work with honest and encouraging feedback. Ask questions when you want to learn something new and share tips, tricks, or lessons from your own experience. Being active and supportive online helps you build connections.
Be Genuine: Avoid copying someone else’s work or using heavy filters that hide details. Professionals notice honesty and clarity and showing your real skills will get you noticed.
5. Collaborate With Models
Working with models helps you practice makeup on people and create looks that will be shown to a wide audience. This is a great way to try new techniques and see how your work appears on camera.
Stay in touch with the models you work with; they can refer you to others or invite you to new projects. Keep records of your work with them, like photos or videos, to include in your portfolio.
6. Join Online Communities and Forums
Online communities allow you to learn and network even if you are not in a major film city.
Look for SFX groups on Facebook, Reddit, or specialized forums where artists share tips, tutorials and job opportunities. Participate actively by asking questions, sharing your work and giving feedback to others.
Being part of these communities helps you stay updated on trends, discover new techniques and connect with people who might collaborate with you.
7. Keep Learning and Improving Your SFX Skills
Networking is important, but your skills are what make people notice you. The more you practice and learn, the more confident and capable you become on set or in collaborations.
Cinema Makeup School is recognized as one of the best special effects makeup schools for offering hands-on training in film, TV and theater makeup. Our courses cover everything from prosthetics and creature design to digital FX and advanced techniques.
Continuing to improve your skills helps you stay up to date with industry trends.
8. Present Yourself the Right Way
You should be able to explain who you are and what you do confidently. A strong introduction helps people remember you and understand your skills.
Include the following in your introduction:
- Mention that you are an aspiring or practicing SFX makeup artist.
- Highlight your specialty, such as prosthetics, creature makeup, or digital effects.
- Briefly mention your training or projects you’ve worked on.
Related Blogs –
Questions Every Special Effects Makeup Artist Should Ask Clients
Top Career Mistakes New SFX Makeup Artists Make (and How to Avoid Them)
How to Set Your Rates as an SFX Makeup Artist?
What You Should Avoid While Networking?
- Don’t pressurize people for jobs or favors. Build relationships naturally over time.
- Be honest about your experience. Professionals appreciate sincerity.
- If someone gives you advice or helps you, a simple thank-you or feedback shows professionalism.
- Avoid posting unprofessional comments, copying work, or using misleading images on social media.
Ready to take the next step in your SFX makeup career? Book a tour of our campus today and see how Cinema Makeup School can help you turn your skills into real-world opportunities. You can also checkout why Cinema Makeup School is a good fit.
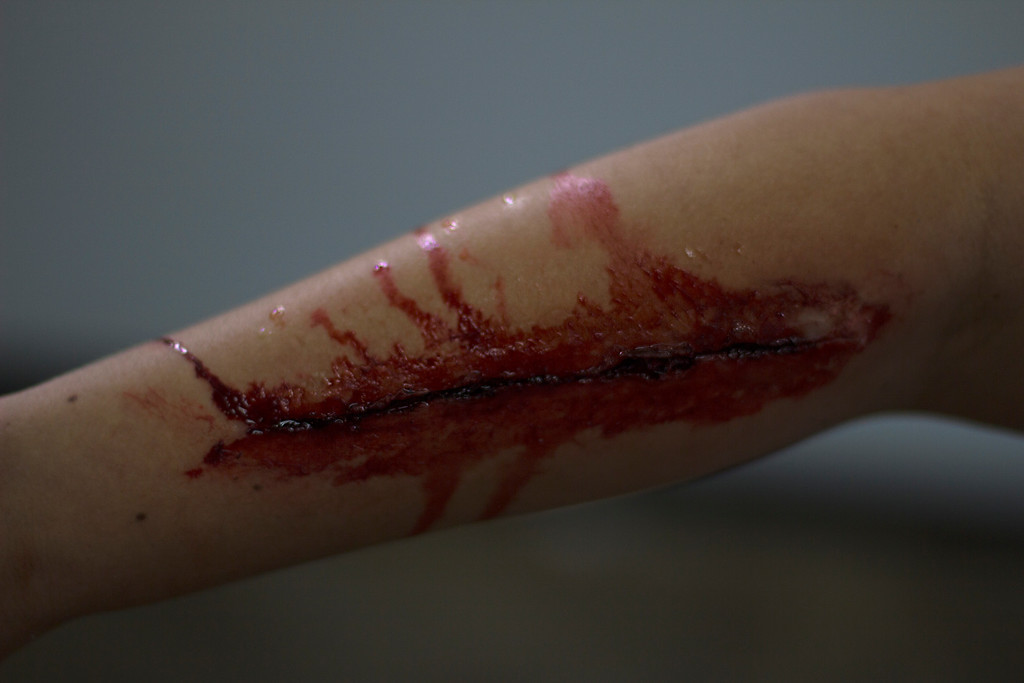
Blood plays a huge role in special effects makeup. From small cuts and scratches to full horror scenes, realistic fake blood instantly makes the effect believable. But not all blood products work the same way. Artists often choose between oil-based and water-based blood formulas.
At first glance, both may look similar in the bottle. However, their behavior on skin, costumes, prosthetics and camera is very different. In this guide, we will understand the differences to help you create believable blood effects, avoid messy mistakes and choose the right product for each project.

Which Looks Require Oil-Based Blood in SFX Makeup and Why?
Oil-based blood is made using oils or silicone-like ingredients that prevent it from drying out. It stays wet, glossy and movable for a long time, making it ideal for close-up and dramatic shots. This versatile formula is perfect for fresh wounds, prosthetic applications, high-definition filming, long-duration scenes, gore and creature effects and silicone-based character work.
1. Fresh Open Wounds and Deep Cuts
Fresh wounds need blood that appears wet, thick and active. Oil-based blood stays glossy and fluid, allowing it to gather naturally inside cuts and gashes and move slowly, just like real blood.
2. Prosthetic Wounds and Appliance Makeup
Prosthetic appliances made from latex or silicone require blood that will not break down materials or lift edges. Oil-based blood sits smoothly on prosthetics and blends well with sculpted textures, maintaining the integrity of the makeup throughout wear.
3. Close-Up Film and Camera Shots
High-definition cameras capture every detail, including shine and texture. Oil-based blood reflects light more evenly, helping the blood appear realistic and well-defined on camera.
4. Long-Duration Scenes and Multiple Takes
Oil-based blood remains consistent for extended periods, making it ideal for scenes that require multiple takes or long filming hours. Since it does not dry quickly, it reduces the need for frequent reapplication and helps maintain continuity between shots.
Learn How to Make SFX Makeup Last Longer on Skin?
5. Gore, Horror and Creature Makeup Looks
Horror and creature designs rely heavily on thick blood, natural blood flow and layered textures. Oily blood allows controlled collection and slow movement, adding weight and realism to extreme injury and creature makeup.
6. Silicone-Based Character Effects
Silicone surfaces repel liquids, so blood with oil adheres better to silicone skins and advanced FX materials. This ensures a realistic appearance without beading, separation, or lifting.
Learn What Do SFX Makeup Artists Use for Fake Blood?
5 Common Applications for Water-Based Blood
Water-based blood is lightweight, fast-drying and easy to clean, making it ideal for situations where convenience and repeated use matter. Its versatility makes it perfect for stage and theater performances, student practice, temporary cosplay or costume effects, quick minor injuries and safe application on skin and clothing.
1. Stage and Theater Makeup
Water-based blood is ideal for stage performances where actors need quick resets between scenes. It dries fast, washes off easily and prevents smudging or staining costumes while still creating realistic injury effects.
Check out: What is the Difference Between Movie and Stage Makeup?
2. Training and Student Practice
Aspiring makeup artists benefit from water-based formulas because they are easy to apply, work with and clean up. It allows learners to practice cuts, gashes and splatter techniques without worrying about permanent stains.
3. Cosplay, Halloween and Costume Effects
Artists often use water-based blood for temporary looks in cosplay, Halloween, or other short-term costume makeup. Its lightweight texture ensures comfort during wear and it can be easily removed after a few hours, making it ideal for temporary or repeated applications.
4. Quick Blood Effects for Minor Injuries
For minor wounds, scratches, or small blood sprays, water-based blood works best. Its fast-drying formula allows artists to create realistic superficial injuries without needing continuous wetness.
5. Safe Use on Skin and Costumes
Because it’s easy to wash off, water-based blood minimizes the risk of staining clothing or causing irritation on the skin. This makes it a reliable choice for live performances and repeated applications.
Get Hands-On SFX Training to Master Blood Effects
While online guides can help you create impressive blood effects, nothing compares to hands-on training. At Cinema Makeup School, students receive expert tips and guidance from instructors who are actively working on major film and theater projects.
Practicing blood effects on your own is a great start, but there are professional techniques, tricks and workflows that can only be learned from experienced artists. Learning the correct methods, handling materials properly and understanding the professional approach to SFX makeup are all essential skills that can take your career to the next level.
Watch our Special Makeup Effects Class Blood Demo and see students in action using a blood cannon, blood bladders and other realistic blood effects. Check more inspiration from our Pinterest, managed by 84pins.
Oil-Based vs Water-Based Blood: Quick Comparison
| Feature | Oil-Based Blood | Water-Based Blood |
| Finish | Wet and glossy | Semi-matte to dry |
| Drying Time | Very slow | Fast |
| Cleanup | Needs removers | Soap and water |
| Camera Use | Excellent for film | Better for the stage |
| Prosthetics | Highly compatible | Limited compatibility |
| Costumes | High staining risk | Safer for fabric |
| Skill Level | Intermediate to advanced | Beginner-friendly |
Pro Tips for Using Blood Effects in SFX Makeup
- Always test blood on skin and fabric before application
- Layer colors for depth – dark reds, browns and blacks add realism
- Use sponges, brushes and droppers for different textures
- Seal prosthetics before applying water-based blood
- Remove oil-based blood with oils, not harsh scrubbing
If you’re ready to take the next step in your SFX makeup journey, take a tour of our campus today!
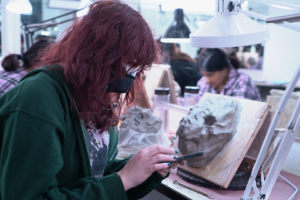
Creating a detailed clay sculpt in SFX makeup can be incredibly satisfying – the shapes, textures and features often look perfect at first glance. But when it comes to making a mold, things don’t always turn out the way you expect. Fine details may blur, edges can lose definition, or some details don’t copy well into the mold.
In this blog, we will explain the reasons why a sculpt does not form correctly in the mold. We will also cover practical solutions and key considerations that help artists sculpt with molding and casting easily.
Difference Between Sculpting and Molding
In SFX makeup, sculpting and molding are two important steps for making prosthetics. Sculpting is the process of creating an original design by hand using materials such as clay, wax, or similar substances.
This is where you shape all the details, like wrinkles, facial features, or creature parts, until it looks just right.
After the sculpture is ready, the next step is molding. It refers to making a negative copy of the sculpture using materials like silicone, plaster, or latex. This mold captures every detail and lets you make multiple copies of the piece.
Why Your Mold Can’t Match Your Clay Sculpt?
When creating molds from clay sculptures, it’s common for details or shapes to get lost, distort, or fail entirely. These issues usually arise from technical factors such as undercuts, thin areas, parting line placement, material choice, or sculpting technique. Understanding these challenges helps artists plan and execute molds that faithfully capture every detail of their original sculpture.
1. Undercuts Are Too Deep or Unplanned
Undercuts occur when part of the sculpt curves inward and locks behind another area. While undercuts may look realistic in clay, they can trap mold material during demolding. This can cause tearing, stretching, or distortion in the mold or the casting.
If undercuts are not planned according to the mold type being used, they become one of the most common causes of mold failure.
2. Fine Details May Not Show in the Mold
Sometimes, a clay sculpture can look very detailed because of shadows and lighting. Wrinkles, pores and small textures may seem sharp and clear while you’re sculpting.
But when you make a mold, the shadows go away and the mold only captures the actual depth of your sculpt. If the details aren’t carved deep enough, they can look soft, weak, or even disappear in the final cast.
3. Thin Areas Cannot Support Casting Materials
Clay can support thin shapes easily, but many casting materials cannot. Thin noses, eyelids, lips and sharp edges may collapse, stretch, or tear during demolding or application.
If the sculpt does not have enough structural thickness in key areas, the final casting may lose its original shape and durability.
4. Poor Placement of Parting Lines
Parting lines are where sections of the mold meet. If important details are placed directly on these lines, they may become soft or uneven in the casting.
This issue is usually the result of not planning parting lines early in the sculpting stage. Careful placement helps protect important surface details.
5. Clay Type and Condition Affect the Mold
The kind of clay you use and its condition, can make or break your mold. Very soft or overly oily clay can shift or sag while applying silicone, causing details like wrinkles, pores, or fine textures to lose their shape. Some clays contain sulfur or other chemicals that can prevent silicone from curing properly, which stops the mold from setting correctly.
Even temperature, humidity and cleanliness can affect how well the clay holds its shape during molding. Choosing the right clay and keeping it in good condition ensures your mold captures every detail of your sculpt accurately.
Learn What Kind of Clay Is Best for SFX Sculpting?
6. Over-Smoothing Removes Important Surface Information
Excessive smoothing can make a sculpt look clean in clay, but it removes small surface variations that help molds capture realism.
Skin texture, subtle imperfections and natural unevenness are important for realistic castings. Without them, molds produce flat and artificial-looking results.
7. Sculpting Technique and Hand Movements
The way you handle your tools and clay while sculpting can also affect the mold. Heavy or uneven pressure, dragging, or overworking certain areas can compress or distort details. Even subtle hand movements can flatten textures, which may not appear clearly when the mold is made. Practicing smooth, controlled strokes and building up details gradually helps ensure your sculpt transfers accurately into the mold.
Can Professional Training Help You Improve Your Mold Making Results?
Absolutely. Mold making is a technical skill that requires more than just artistic talent. At Cinema Makeup School, we offer professional Special Effects Makeup courses where you’ll learn how to sculpt, mold and cast like industry professionals. Our structured training provides hands-on practice and insider knowledge that can significantly improve your mold-making results. You will:
- Learn from experienced instructors who actively work on film, TV and theater projects, gaining insights from real industry experience.
- Understand materials in depth, including silicone, latex, plaster and resins and how to handle them for perfect molds every time.
- Build confidence by practicing with professional guidance and mastering techniques that reduce mistakes.
See how our Emmy-winning FX artist and instructor Andy Schoenberg guides Triana Candela in sculpting and prepping a prosthetic – https://youtu.be/YR9oK92qcNA?si=vEGvg9G-ntAZ4gFW
More Helpful Blogs –
How SFX Artists Design Fake Nose Prosthetics?
How to Work with Latex, Silicone and Prosthetics Safely?
Top Career Mistakes New SFX Makeup Artists Make (and How to Avoid Them)
How to Make Molds Last Longer?
A well-made mold is a valuable tool, but without proper care, it can wear out or get damaged quickly. Understanding how to handle, store and maintain molds ensures they remain durable and produce consistent, high-quality casts over time. The following tips outline key strategies to extend the life of your molds and protect your investment.
- Choose Durable Mold Materials: Not all mold materials are created equal. High-quality silicone or specialized latex lasts longer and resists tearing, shrinking, or warping.
- Proper Storage: Store molds in a cool, dry place away from direct sunlight and heat. Excessive heat can deform the mold, while humidity can affect the material’s flexibility.
- Clean and Dry Molds After Each Use: Residue from casting materials can degrade mold surfaces. Gently clean molds with mild soap and water after each use, making sure they are completely dry before storage. Avoid harsh chemicals that could weaken the mold material.
- Use Release Agents Correctly: Applying a suitable release agent every time you cast protects the mold from sticking, tearing, or becoming damaged by the casting material. This is especially important for thin or detailed molds.
- Handle Molds Gently: During demolding, avoid pulling or stretching the mold excessively. Flex the mold carefully around the edges and remove the cast slowly to prevent tears or permanent deformation.
If you want to improve your sculpting, molding and casting skills, book a tour of our SFX Makeup School, located in Los Angeles, USA.
In special effects makeup, the smallest choices often make the biggest difference. From shaping and molding to applying and blending, every step affects how the final look appears on screen. One important factor in this process is the type of prosthetic used. The weight of a prosthetic can influence comfort, realism and how well the makeup holds up during long shooting hours.
When artists understand how different prosthetic weights behave on the skin, they are able to create makeup that looks natural, moves well and lasts throughout the day.
In this blog, we will cover everything artists need to know about choosing between heavy and lightweight prosthetics and how to use them effectively in SFX makeup.
What Are Prosthetics in SFX Makeup?
Prosthetics are artificial pieces applied to the skin to change facial or body features. These can include scars, burns, creature features, aging effects, fantasy characters and horror wounds.
Prosthetics are usually made from materials like:
- Foam latex
- Silicone
- Gelatin
- Latex
- Encapsulated silicone
The weight and thickness of the prosthetic determine whether it is considered heavy or lightweight.
Check out: Foam Latex vs Silicone: Choosing the Right Material for SFX Prosthetics
When to Use Lightweight Prosthetics?
Lightweight prosthetics are best suited for makeup looks that need to appear natural, comfortable and flexible during wear.
1. Close-up and high-definition camera work
Lightweight prosthetics have thin edges that blend smoothly into the skin. This makes them ideal for high-definition filming where even small details are visible.
2. For long shooting hours
Actors can wear lightweight prosthetics for many hours with less discomfort. They reduce pressure on the skin and help prevent fatigue during extended shoots.
3. Scenes that require strong facial expression and dialogue
Lightweight prosthetics move easily with facial expressions, allowing clear dialogue delivery and natural emotional performance.
4. Aging makeup and subtle character changes
Fine wrinkles, soft skin folds and gentle facial changes appear more realistic when created using thin and flexible materials.
5. Fast application and easy blending needs
Lightweight prosthetics take less time to apply and blend, making them useful for fast-paced shoots or learning environments.
When to Use Heavyweight Prosthetics?
Heavyweight prosthetics are used when a makeup look requires strong shape, durability and dramatic transformation.
1. Creature and fantasy character designs
Large facial structures, bold character features and non-human looks require thicker prosthetics that can support complex shapes, maintain stability and hold their structure throughout the performance.
2. Action-heavy and stunt-based scenes
Heavy prosthetics stay more secure during intense movement, making them suitable for fight scenes, stunts and physically demanding performances.
3. Stage and theatrical makeup
Stage performances demand makeup that remains clearly visible from a distance. Heavyweight prosthetics help create stronger facial shapes and defined features, allowing the character’s look to stay clear under bright stage lighting and across large viewing spaces.
4. Detailed textures and strong surface depth
Severe scars, damaged skin, bone structures and thick wound effects need heavier materials to achieve proper depth and realism.
How Professional SFX Makeup Training Helps You Make the Right Choice?
Choosing between heavy and lightweight prosthetics can be challenging, especially for beginners. Making the wrong choice can affect the realism, comfort and durability of a makeup look. This is where professional SFX makeup training can make a significant difference.
At Cinema Makeup School, students gain hands-on experience with different prosthetic materials, application techniques and design strategies. Through structured courses and practical labs, aspiring artists learn to handle both heavy and lightweight prosthetics with confidence.
By the end of the training, students are able to professionally evaluate each project, select the right materials and create SFX makeup that looks realistic, moves naturally and meets the needs of any production.
Quick Comparison: Lightweight vs. Heavyweight Prosthetics
| Feature/Factor | Lightweight Prosthetics | Heavyweight Prosthetics |
|---|---|---|
| Material & Thickness | Thin, flexible and soft; blends easily into the skin | Thick, dense and rigid; holds strong shapes and structure |
| Comfort & Wear Time | Comfortable for long shoots; reduces skin strain and fatigue | Heavier on the skin; best for short-duration use |
| Facial Movement | Moves naturally with expressions; ideal for dialogue-heavy or emotional scenes | May restrict facial movement; suited for less expressive roles or brief appearances |
| Camera & Detail | Best for close-up and high-definition shots; thin edges create seamless blends | Works well for wide shots; edges may be visible in close-ups, but the structure is clear from a distance |
| Best For | Aging makeup, subtle character changes, natural looks, fast application | Creature designs, fantasy characters, stage/theatrical performances, detailed textures like scars and wounds |
| Durability | Moderate; suitable for controlled environments | High; withstands stunts, physical action and challenging shooting conditions |
| Application Time & Skill Level | Quick to apply and blend; beginner-friendly | Requires longer application, advanced blending and higher skill |
| Cost / Budget | Usually more affordable; good for low-budget or fast-paced projects | Higher cost due to materials and labor; suited for large-scale productions |
| Actor Comfort & Safety | High; reduces fatigue and skin stress | Can cause strain; requires careful application to protect sensitive skin |
| Visual Impact | Subtle, natural and realistic | Bold, dramatic and highly structured |
Related Articles –
How to Make SFX Makeup Last Longer on Skin?
How to Work with Latex, Silicone and Prosthetics Safely?
How Movie Makeup Changes Audience Perception of a Character?
Key Factors to Consider When Choosing Prosthetics
Choosing the right prosthetic is not only about how the final makeup looks. Several factors affect how well the prosthetic performs during application, filming and wear. Understanding these factors helps artists avoid common problems and achieve professional results.
1. Purpose of the makeup look
The first thing to consider is what the makeup is meant to achieve. A subtle aging effect, a realistic wound, or a full creature transformation will each require different prosthetic weight and structure. Matching the prosthetic type to the character design ensures the makeup supports the story.
2. Duration of wear
How long a prosthetic needs to stay on the actor’s skin is an important consideration. Heavy prosthetics work well for short scenes, but for long shoots, lighter options are preferable as they keep the actor comfortable and reduce skin strain.
3. Level of facial movement needed
Some roles require strong expressions, emotional reactions, or continuous dialogue. Prosthetics should allow natural movement without cracking, lifting, or restricting the face.
4. Shooting environment and conditions
Indoor studio shoots, outdoor locations, heat, humidity and physical activity can all affect prosthetic performance. Heavier prosthetics tend to hold up better under demanding conditions, while lighter ones perform well in controlled environments.
5. Camera distance and detail level
The distance between the camera and the actor matters. Close-up shots reveal edges, texture and blending quality, making thin prosthetics more suitable. Wider shots allow for thicker builds without showing fine details.
6. Actor comfort and skin safety
Comfort should never be ignored. Heavy prosthetics can cause strain, especially on sensitive areas like the jaw or eyes. Considering skin type, sensitivity and overall comfort helps protect the actor and ensures smoother shoots.
7. Application time and skill level
Some prosthetics require advanced blending techniques and longer application time. Artists should choose prosthetics that match their experience level and the time available on set.
8. Budget and production scale
Materials, labor and preparation time all affect cost. Smaller productions often benefit from simpler, lightweight prosthetics, while larger productions can support complex heavyweight designs.
Book a tour of our special effects makeup school in Los Angeles and begin your journey in SFX artistry, learning hands-on techniques from industry professionals.