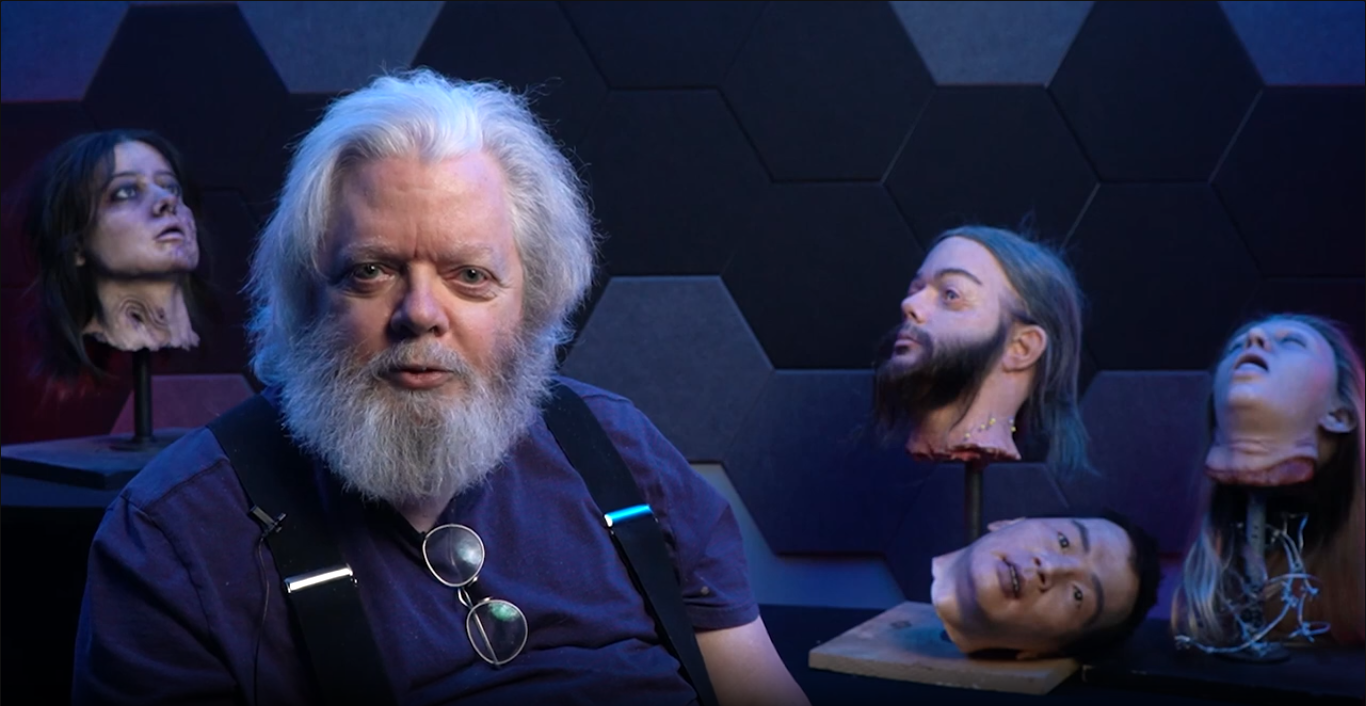
In special effects makeup, certain props have the power to leave audiences both mesmerized and unsettled. One of the most iconic examples is the silicone severed head – a prop that, when done well, is indistinguishable from reality. Whether it’s for a high-budget film, a gritty TV crime drama, or a hyper-realistic haunted attraction, crafting a photo-realistic silicone head requires a combination of artistry, technical skill and attention to detail.
In this guide, we’ll break down the process step-by-step, from initial life casting to final detailing, so you can create a severed head prop that holds up under the scrutiny of close-up cameras.
Why is Silicone the Preferred Material for Creating Realistic Props?
Before diving into the process, it’s important to understand why silicone is preferred for creating life-like props over other materials like latex or foam.
- Silicone’s translucency mimics human skin in a way that no other medium can.
- A silicone head can withstand heavy handling on set without tearing or losing shape.
- Specialized silicone paints allow for subtle, layered coloring that makes skin tones look natural.
- Silicone retains its shape but can also be manipulated for expressions or subtle posing.
For productions that require head severed props up-close and under HD lighting, silicone is the material of choice.
Related Article – Foam Latex vs Silicone: Choosing the Right Material for SFX Prosthetics
How to Create Silicone Severed Heads?
Creating a hyper-realistic silicone severed head involves careful planning, detailed sculpting and expert molding techniques to ensure lifelike texture, color and form. Let’s go through in depth details:
Step 1: Life Casting the Subject
To create a photo-realistic molded head, the process starts with making an exact life cast of the subject’s head and shoulders, capturing every contour, proportion and facial detail with precision. Using skin-safe alginate or platinum-cure silicone, the mold material is applied evenly over the subject’s face, ears and head, with hair or bald caps in place to protect hair and maintain clean edges.
Plaster bandages are then layered over the mold to create a rigid shell for stability during casting. If casting the full face, straws are positioned for breathing throughout the process. Once the molding material has fully set, the shell and mold are carefully removed, preserving an exact impression of the subject for the sculpting and casting stages that follow.
Pro Tip: If the severed head prop needs an open mouth or specific facial expression, sculpt adjustments can be made later in the clay stage.
Learn What Kind of Clay Is Best for SFX Sculpting?
Step 2: Sculpting and Refining the Mold
With the life cast in hand, the next step is refining it for silicone casting.
- Clean up imperfections: Remove bubbles, mold lines and any deformities.
- Add injury details: For a decapitated head prop, you’ll need to sculpt the neck wound. This can include ragged flesh, exposed vertebrae, or coagulated blood textures, depending on the production’s needs.
- Expression adjustments: Modify the position of the brows, lips, or eyes to convey the desired emotion.
Step 3: Creating the Production Mold
To cast in silicone, you’ll need a two-part epoxy or fiberglass mold of your sculpture.
Why Epoxy or Fiberglass?
- These materials hold fine details perfectly.
B. They are strong enough to withstand multiple castings.
C. They resist the heat generated by curing silicone.
Molding Steps:
The molding process begins by building a clay parting wall around the sculpt to define the separation between the mold halves. Once the wall is in place, mold release agents are applied to ensure that the materials don’t stick to the sculpt or each other.
Then, epoxy or fiberglass is carefully laid up to create the first half of the mold, ensuring full coverage and strength. After this half has cured, the process is repeated for the second half, resulting in a complete, durable mold ready for casting.
Tip: If you want to learn epoxy mold making, explore our beauty makeup course.
Step 4: Casting the Silicone Head
This is where the magic happens.
Choosing the Right Silicone:
- Use platinum-cure silicone for the most realistic skin translucency and durability.
- Consider gel-filled silicone for weight and softness closer to a real human head.
Casting Process:
- Mix silicone with pigment to create a base skin tone.
2. Brush a thin layer into the mold to capture detail.
3. Fill the rest using a slush casting or roto casting method.
4. Allow to cure fully before demolding.
Step 5: Seaming and Patching
After demolding, you’ll notice seam lines where the mold halves joined. Carefully trim away any flashing with a scalpel, then fill and smooth the seams using matching silicone mixed with a thixotropic agent.
Use silicone solvent to soften and blend the edges for a smooth finish. Fill in any air bubbles or casting flaws so the silicone head appears seamless and ready for even the closest camera angles.
Step 6: Painting for Realism
Raw silicone may look like skin, but without paint, it won’t pass for real. Let’s explore various airbrushing and hand-painting methods to add lifelike color and dimension to your sculpture.
- Use silicone-based paints for maximum adhesion.
- Layer washes of reds, blues and yellows to mimic skin depth.
- Add freckles, veins and subtle blemishes for authenticity.
- Darken and bruise areas around the wound if making a head Halloween prop or horror effect.
Get to know: How to Create Realistic Wounds and Scars with Prosthetics?
Step 7: Adding Hair, Eyes and Teeth
These finishing details make the difference between a “good” and a “jaw-dropping” severed head prop.
Below are the key stages involved in the molding process:
1) Hair Punching: Insert strands of hair one at a time for a natural hairline. Synthetic or real human hair can be used.
2) Eyes: Install acrylic or glass eyes, matching the iris color to the subject.
3) Teeth: Denture-grade acrylic teeth or cast replicas can be placed if the mouth is open.
Step 8: Wound Detailing and Gore Effects
For horror and crime scenes, the neck wound often becomes the central point of attention, so start by building up realistic tissue using tinted silicone gel. To enhance the effect, create depth with darker reds and purples for fresh wounds, while incorporating browns and blacks to suggest older injuries.
Finish the look by applying coagulated blood gel for a wet, glossy texture that catches the light. This combination of layers and color variation ensures your decapitated head prop doesn’t just look real, it provokes the exact shock and unease you’re aiming for.
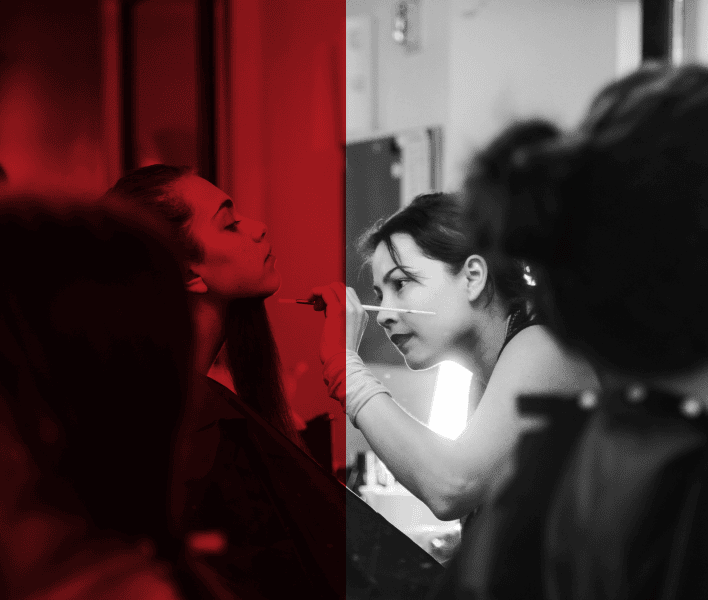
Curious about how these techniques come to life in a professional setting? Watch this behind-the-scenes video from our high-fashion makeup program to see students bringing creativity and precision together on set and imagine what you could accomplish with the right training.
Step 9: Caring for Your Severed Head Prop
Once your silicone severed head prop is complete, you’ll want to make sure it lasts for many projects to come. While silicone is tough and resistant to damage, neglect or poor storage can still shorten its lifespan. By following a few simple care steps, you can keep your prop looking as realistic and pristine as the day you made it.
- Store in a cool, dust-free environment.
- Wrap in soft cloth during transport to avoid surface scratches.
- Clean with isopropyl alcohol and a soft brush if needed.
Important Note: If you want to take your skills to the next level, learning directly from industry experts can help you refine your craft and push the limits of what’s possible in special effects makeup. Cinema Makeup School stands out as one of the top SFX makeup schools in Los Angeles, USA. We invite you to book a tour of our campus and take the first step toward becoming a professional SFX makeup artist.
Mastering the art of making a realistic silicone severed head is about combining creativity, precision and the right techniques to achieve a prop that captivates and convinces. From sculpting and molding to painting and finishing, each stage plays a vital role in bringing your vision to life.
With practice, patience and attention to detail, you can craft professional-quality severed head props that stand out in films, haunted attractions, or even personal collections.