Few things scream horror, trauma, or Halloween drama quite like a gruesome set of fake stitches. For creating stitched lips, a Frankenstein-inspired scar, or cosplay staples that look disturbingly real, the art of fake stitches with makeup is one of the most effective SFX tricks in your arsenal.
In this blog, we’ll walk you through how to make fake stitches with makeup step by step. We’ll explore various methods, materials and pro techniques used by top special effects makeup artists.
Why Fake Stitch Makeup Is a Must-Have Skill?
Fake stitches makeup isn’t just a Halloween trend; it’s a staple in horror films, crime dramas, cosplay conventions and even music videos. The versatility of stitches, clean surgical lines, crude thread pulls, or rusty wire staples lets you tell an entire story on the skin.
Popular types include:
- Stitched Lips Makeup
Turn silence into a statement. This eerie effect creates the illusion of sewn-shut lips, perfect for haunted characters, cursed beings, or freak show aesthetics. It’s shocking, dramatic and instantly memorable. - Stitched Face Makeup
From forehead scars to jawline closures, stitched face makeup helps craft Frankenstein monsters, undead creatures, or post-surgery sci-fi hybrids. It’s ideal for both horror and body modification looks. - Fake Staples for Cosplay
Metallic, gritty and painful-looking, fake staples simulate high-tech injuries or military repairs. Think androids, war survivors, or cyberpunk rebels patched together after battle. - Stitches Halloween Makeup
Want a versatile horror look? Combine stitches with clown designs, doll faces, or melting skin effects. This style gives you endless freedom to be creative, creepy, or even cute-grotesque.
Materials You’ll Need to Create Fake Stitches
Before we dive into the step-by-step, gather your tools. Here’s what the pros typically use for creating realistic stitched skin:
Essential SFX Kit:
| Product | Purpose |
| Liquid latex or scar wax | To build and shape the raised wound areas |
| Foundation and face paint | To blend fake skin into your real skin tone |
| Fake blood | Adds a fresh or clotted wound effect |
| Cotton or tissue | For texture and depth |
| Spirit gum or pros-aide | For adhering thread or staples |
| Thread, yarn, or dental floss | For creating the actual stitches or staples |
| Alcohol-activated palette | To color bruises, shadows and healing tones |
| Tweezers or a sculpting tool | To create stitch holes |
Caution: Always test materials on a small skin patch to avoid allergic reactions.
Step-by-Step: How to Make Fake Stitches With Makeup
Creating realistic stitched effects isn’t just about gluing thread to skin; it’s about storytelling through texture, shape and color. Here’s a complete guide to excel in this powerful SFX technique:
Step 1: Prep the Skin
Start with clean, dry skin. Oils, dirt, or leftover makeup can weaken your materials and cause peeling or discomfort.
- For face or lip applications, gently exfoliate using a soft scrub.
- Apply a light moisturizer or barrier spray to protect sensitive skin, especially around the lips or eyes.
- Optional: Apply a thin layer of castor seal over your skin if using wax. It helps products stick better and gives you an even surface to work on.
Pro Tip: Mark your stitch zone lightly with tape or eye pencil to avoid placement mistakes.
Step 2: Sketch the Wound Shape and Stitch Pattern
Use a white eyeliner pencil to map out the shape and placement of the wound and stitches.
- Draw a central cut or gash where the “wound” will be.
- Lightly mark where each stitch entry and exit point will go, spacing them about 0.5–1 cm apart, depending on the desired style.
- Keep your lines asymmetrical for horror or trauma themes and straight & clean for surgical or sci-fi looks.
Think of this as the blueprint; spacing and direction matter, especially in stitched lips or surgical themes.
Step 3: Build Up Skin Texture With Latex or Wax
Use liquid latex, scar wax, or gelatin to create realistic raised skin around the wound. Each gives a slightly different finish:
- Latex: Ideal for flexible areas (face, hands). Apply in thin layers with a sponge and dry between coats.
- Scar wax: Best for controlling shape & sculpting deep ridges. Use a spatula or fingers.
- Gelatin: Perfect for organic, uneven wound textures. Heat slightly and shape with a brush or stick.
Technique:
- Apply your base product along the wound outline.
- Use a spatula or wet fingers to feather edges into the skin.
- Press small pieces of cotton or tissue into the latex to add volume or simulate ripped flesh.
- Sculpt raised edges or ridges with your tool; these simulate trauma and tension in the skin.
Step 4: Paint for Realism
Once your texture is dry, it’s time to color the wound and surrounding skin for realism and depth.
Start by applying your foundation or base paint over the prosthetic to blend with your natural skin tone.
Then, layer in the drama:
| Color Palette | Usage |
| Deep red + burgundy | Fresh blood, inner wound tissue |
| Blue + purple | Bruising, oxygen loss, trauma |
| Green + yellow | Aged or infected wounds |
| Brown + black | Scabbing, dirt, or dried blood |
Use stippling techniques for a natural mottled look. Alcohol-activated paints offer translucent layering and water resistance, ideal for detailed bruising and blending.
Recommendation: Use small brushes for detail and sponges for mottling or fading edges. Add depth using shadows around the wound edges.
Step 5: Add the Stitches or Staples
Now, turn that painted gash into a stitched masterpiece.
For Traditional Thread Stitches:
- Cut black thread, dental floss, or yarn into short lengths (1–2 inches).
- Carefully position the threads across the wound using tweezers for precision.
- Glue each end into the wound edge using spirit gum or Pros-Aide.
- Push them slightly into the latex to mimic skin being pulled tight by the thread.
For Cross-Stitches or Decorative Looks:
- Crisscross threads over the gash for a stylized, stitched-up aesthetic.
- You can create Xs, zig-zags, or even patterned stitches depending on your character.
For Fake Staples:
- Trim small segments of wire or toothpicks, each about 1 to 1.5 cm long.
- Paint them metallic gray or silver.
- Glue into place parallel across the wound using spirit gum.
Useful Tip: Vary thread tension and angle slightly for a distressed, painful look. Use a thinner thread for surgical realism and a thicker thread for horror or fantasy.
Step 6: Add Blood, Bruising & Final Details
Drip or dab fresh fake blood into and around the wound to create a lifelike appearance. For oozing effects, allow the blood to run naturally from the stitches, giving a freshly torn look.
To simulate clotted or dried blood, apply a thicker blood paste or a DIY mix of corn syrup and cocoa powder. Enhance the trauma by stippled bruising, blend deep red and purple shades outward from the wound using a sponge for a realistic gradient.
For added depth, apply rigid collodion beside the stitches to create puckered, indented scar tissue that mimics the skin being pulled tight by tension.
Balance is key: enough blood to look fresh or nasty, but not so much that it hides your stitching work.
Related Article: What Do SFX Makeup Artists Use for Fake Blood?
Optional: Seal and Set
- Once your look is complete, use a setting spray to keep everything in place, especially for long shoots or Halloween parties.
- Use fixative sprays over thread or staples to ensure durability.
- For HD photography, lightly powder over shiny areas to reduce glare.
Suggested Readings:
SFX Burn Makeup Techniques Every Artist Should Know
How to Apply Latex & Vinyl Bald Caps in Character Makeup
What Are Prosthetic Masks in Special Effects Makeup?
Common Mistakes to Avoid While Applying Stitch Makeup
Applying fake stitch makeup takes precision. From blood placement and blending to stitch spacing and adhesive choice, even small missteps can ruin the realism. Here’s a quick breakdown of the most common mistakes to avoid for a clean, believable result:
- A) Overusing blood: Too much fake blood can hide your stitch details.
- B) Poor blending: Make sure latex edges fade naturally into the skin.
- C) Unrealistic spacing: Stitches too close or far apart can ruin believability.
- D) Using the wrong adhesive: Spirit gum is best for prosthetics and threads; don’t rely on regular glue.
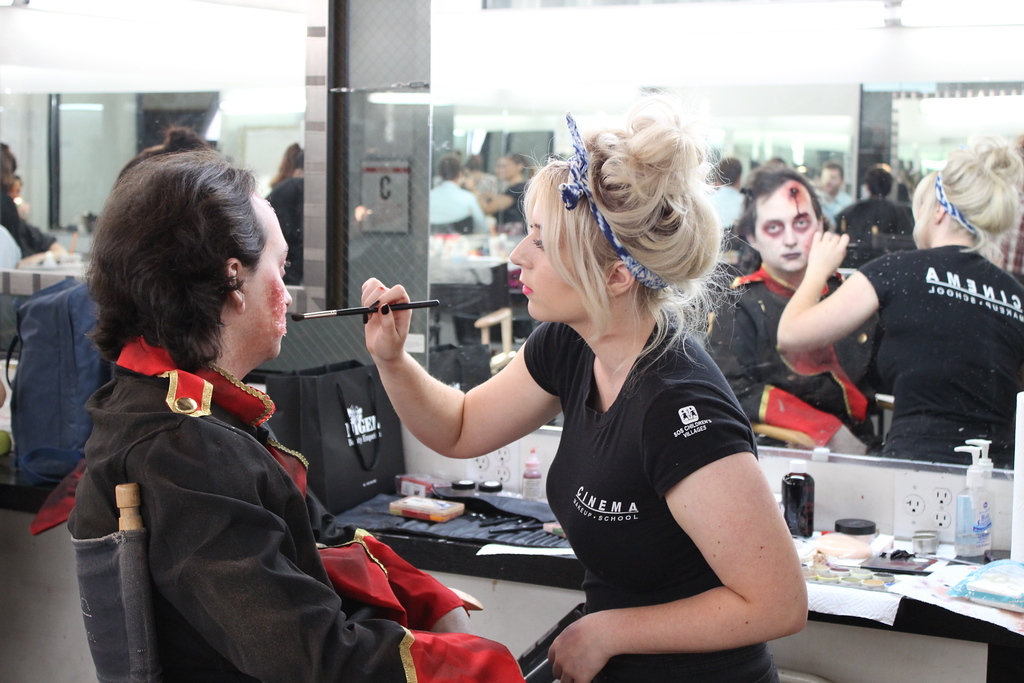
Watch our students bring cinematic makeup to life.
Want to Take Your Special Effects Makeup Skills from Good to Gory Great?
If you’ve made it this far, chances are you don’t just want to copy a Halloween tutorial; you want to master the real craft. That’s where Cinema Makeup School comes in.
As a part of Cinema Art College Corporation, we don’t just teach stitches, we teach transformation.
From stitched lips to full creature builds, our industry-led courses cover SFX makeup, prosthetics, character creation, beauty and beyond. You’ll learn in a real studio environment, using Pro Tools and working alongside artists who’ve designed monsters for the big screen.
If you’re serious about bringing your makeup dreams to life, enroll now.
Practice, experiment and don’t be afraid to get a little messy, because the best SFX looks are the ones that make people do a double-take.