Creating realistic burn effects is one of the most jaw-dropping and technically challenging skills in special effects makeup. From smoldering skin to layered tissue trauma, SFX burn makeup brings drama and believability to film, TV, theatre and even haunted attractions. But behind every convincing burn lies careful technique, the right materials and an understanding of anatomy and storytelling.
This blog will guide you through essential burn special effects makeup methods, tools and tips.
What Is SFX Burn Makeup?
SFX burn makeup is a specialized area of special effects makeup focused on recreating burn injuries, from light surface redness to deep, severe tissue damage. These effects are designed for screen, stage, cosplay and Halloween, helping to tell stories of survival, horror, or transformation.
Unlike regular makeup, this style often incorporates prosthetics, tissue buildup, latex, gel effects and complex color layering, all techniques that must be mastered with safety, precision and creativity.
Types of Burn Effects in SFX Makeup
Each degree of burn requires a different approach to makeup application. Here’s a breakdown:
1. First-Degree Burn
- Look: Redness, irritation, slight swelling.
- Technique: Use a red cream base or alcohol-activated paint, blended with slight yellow and pink tones. Apply a light amount of texture for a subtle effect.
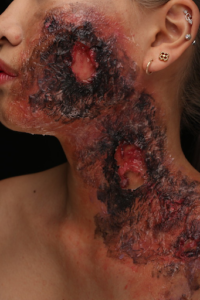
2. Second-Degree Burn
- Look: Blistering, deeper redness, wetness.
- Technique: Layer gelatin, collodion, or latex to simulate raised blisters. Use a glossy finish to mimic moisture and carefully stipple color for realism.
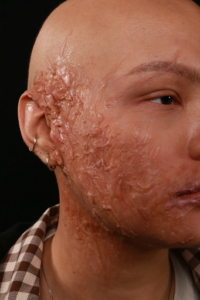
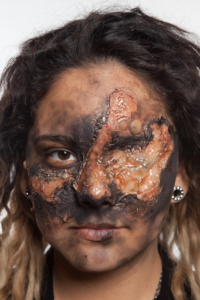
3. Third-Degree Burn
- Look: Charred, blackened tissue, cracked skin.
- Technique: Sculpt or apply prosthetics with depth, using cotton and latex or silicone. Charcoal tones, dried blood and textured sponges are key here.
Understanding these levels is crucial for realism and for creating burn makeup that not only looks the part but supports the story being told.
Must-Have Tools & Materials for Burn Makeup
Creating realistic and impactful fake burn makeup requires more than just artistic flair, it demands the right tools, materials and a deep understanding of how to use them safely and effectively.
Key materials include liquid latex and cotton for creating texture, gelatin to form blisters, silicone for long-lasting prosthetics, rigid collodion to mimic scars, alcohol-activated paints for coloring and blood gels and pastes to simulate realistic wounds.

Here’s a breakdown of essential materials every aspiring SFX makeup artist should be familiar with:
1. Liquid Latex & Cotton
A time-tested, budget-friendly duo, liquid latex and cotton work together to create textured skin, peeling flesh and raised areas. By layering and sculpting with a spatula or fingers, you can build dimensional burns that hold color well and withstand movement.
2. Gelatin
Gelatin is a versatile material used to replicate soft blisters and bubbled skin. This material melts for easy skin application and can be sculpted before it hardens. It’s especially useful for second-degree burn effects due to its flexibility and translucency.
3. Silicone
For professional-level results, silicone offers a durable, reusable solution. It mimics the skin’s elasticity, making it ideal for high-end prosthetics. Silicone is commonly used to make reusable burn prosthetics that feature lifelike edges and textures, allowing them to blend naturally with the skin.
4. Rigid Collodion
Rigid collodion is excellent for creating sunken scars and puckered skin, perfect for simulating healed or older burn wounds. It works by contracting as it dries, pulling the skin inward for a natural indentation effect.
5. Alcohol-Activated Paints
These paints are a go-to choice for painting over textured surfaces like latex, gelatin, or silicone. Their waterproof nature and pigment strength make them ideal for layering colors such as deep reds, purples and burnt blacks to create hyper-realistic skin trauma.
6. Blood Gels & Pastes
Finishing with blood effects adds realism and intensity to your burn makeup look. Gels and pastes come in different viscosities and shades, from fresh arterial red to thick, darkened scabbing, to help tell the story of a recent injury or long-healed wound.
Quick Tip: Always test materials on the skin beforehand to prevent allergic reactions and work in a well-ventilated area. Understanding how different materials react to heat, light, and motion is essential to ensuring both safety and a realistic effect.
Check out our store for high-quality SFX products.
Step-by-Step: How to Create a Realistic Burn Makeup Look?
Creating realistic burn makeup involves careful layering of textures, color blending and detailed effects to mimic the appearance of skin trauma. This guide covers essential techniques to build convincing burns, whether blistered, charred, or scarred, helping you achieve authentic special effects makeup for any burn severity.
Step 1. Prep the Skin
Before applying any product, the skin must be clean, dry and free of oils. This ensures better adhesion and prevents discomfort for the model or actor.
- Clean the skin using witch hazel or a mild cleanser to prep the area.
- Apply a barrier spray or a thin layer of adhesive (like Pros-Aide) to protect the skin and enhance durability.
- If you’re working on a large area or for extended wear, consider using a bald cap or prosthetic base to minimize skin contact.
Step 2. Build Texture with Latex & Cotton
This is where the fake burn makeup starts to take shape.
- Apply liquid latex to the skin with a sponge or single-use applicator.
- Tear small pieces of cotton or tissue and layer them into the latex while it’s still wet.
- Sculpt the surface with a spatula, shaping wrinkles, ridges and broken skin textures that mimic damaged tissue.
- Let each layer dry before adding another to avoid clumping or sliding.
Pro Insight: Varying the height and shape of the latex build-up creates a more natural, chaotic burn pattern.
Step 3. Add Blisters with Gelatin
Second-degree burns are characterized by painful blisters. Use gelatin to replicate this critical element:
- Melt gelatin (usually in a microwave) until smooth and slightly warm.
- Carefully spoon or drip the gelatin onto the textured surface to form bulbous blisters or raised fluid-filled areas.
- Manipulate the edges with a spatula while it cools to shape them realistically.
You can layer multiple gelatin applications to create different blister depths and sizes.
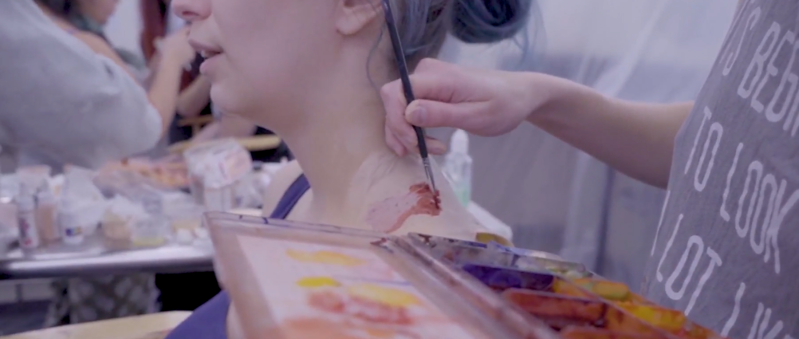
Step 4. Paint the Trauma Base
Now it’s time to color the burn with depth and dimension using alcohol-activated paints or cream-based pigments.
- Begin with deep reds as the primary undertone – this represents inflammation and vascular damage.
- Blend in dark purples, burgundy and even hints of yellow to simulate bruising and infection.
- For the outer edges, soften the tones to blend into the natural skin, mimicking the way real burns fade.
Use sponges, stipple brushes, or even toothbrushes to create organic, broken patterns in the pigment.
Step 5. Add Detail & Depth
Small touches bring realism to your SFX makeup burns.
- Use a fine brush to paint broken veins, coagulated blood, or burned capillaries.
- Add rigid collodion in select areas to simulate puckered or tightened skin around healed zones.
- Lightly apply black or brown pigment near edges to suggest charring or older burn areas.
- For third-degree enhancements, darker gray or charred tissue textures may be used carefully.
Step 6. Simulate Oozing with Gloss
Nothing sells trauma like a realistic wet finish.
- Apply clear gel, glycerin, or FX gloss products to the burn site to simulate oozing wounds, sweat, or fluid from burst blisters.
- Concentrate gloss around the gelatin blisters or in crevices where fluid would naturally collect.
This creates an uncomfortable, visceral shine that heightens realism on camera.
Step 7. Set & Seal Your Work
Once you’re satisfied with the texture and paint, lock it in.
- Use a professional makeup setting spray to prevent smudging or running.
- For long shoots or performances, apply a layer of sealer or powder to reduce tackiness and increase wear time.
Pro Tip: Reference real burn images from medical sources to better understand wound depth, color transitions and healing stages. Always approach this research ethically and responsibly.
Creating authentic burn special effects makeup takes time and practice, but mastering these techniques can make your work stand out, whether you’re preparing for a film shoot, a haunted house, or a student showcase.
With the right tools, a trained eye and a commitment to detail, even beginners can start crafting show-stopping SFX burn looks that leave a lasting impact.
SFX Makeup Reads You Can’t Miss:
Foam Latex vs Silicone: Choosing the Right Material for SFX Prosthetics
What Do SFX Makeup Artists Use for Fake Blood?
How to Create Creature Design Using Latex, Silicone & Prosthetics?
Learn Special Effects Makeup at Cinema Makeup School
If you’re passionate about bringing lifelike injuries, creatures and cinematic illusions to life, there’s no better place to build your foundation than Cinema Makeup School. As part of Cinema Art College Corporation, a broader institution dedicated to creative education, we’re committed to nurturing the next generation of makeup artists.
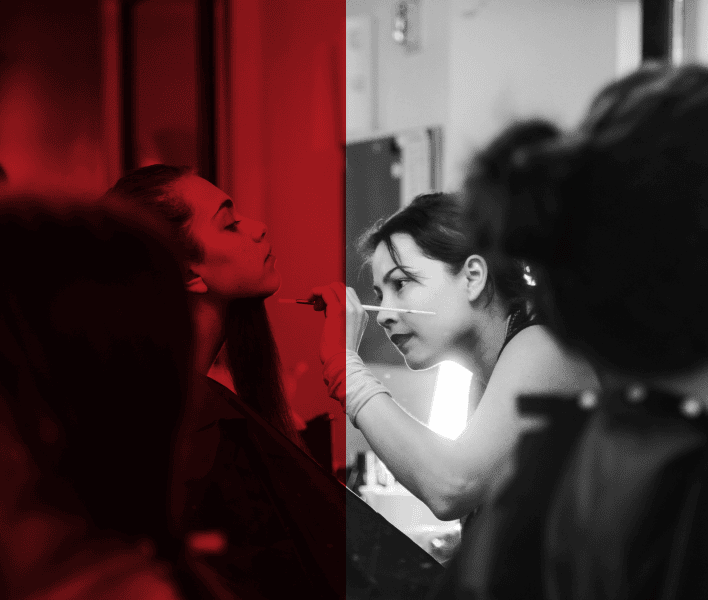
Here, students go beyond theory, they train hands-on with industry-standard products, professional equipment and expert instructors who actively work in film, TV and live entertainment.
From SFX burn makeup and trauma simulation to full character transformation, our programs are designed to teach the craft at every level.
Take a look at our students’ incredible work!
Burn effects challenge every SFX makeup artist to think critically, sculpt creatively and paint with precision. With the right techniques and materials, you can transform any character with layers of texture, trauma and visual impact.
Keep pushing boundaries, study real-life references and refine your process; every burn you create adds to your storytelling power.