In film and television, prosthetic makeup is judged under conditions that expose every technical flaw, including high-resolution cameras, controlled lighting setups and extreme close-ups. Under these conditions, even a slightly visible edge, uneven texture, or incorrect surface finish will immediately reveal the prosthetic.
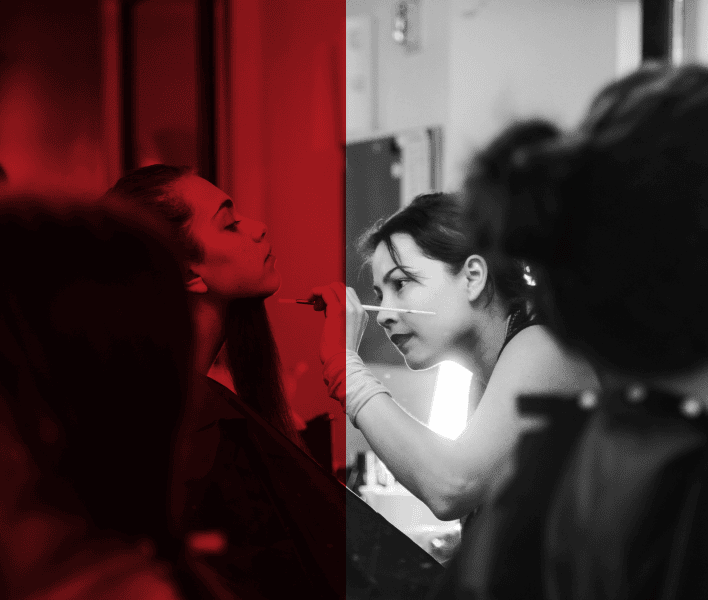
Blending is the stage where a well-sculpted and well-applied appliance either holds up or fails. This process involves controlling edge thickness, managing adhesive behavior, replicating skin texture and ensuring that both the prosthetic and natural skin respond identically to light.
Let’s break down how SFX makeup artists blend prosthetic edges using latex and silicone.
Which Factors Affect Prosthetic Blending
Blending prosthetics is not a single fixed process. It is controlled by technical factors that determine how the edge behaves, how the material integrates with skin and how the final result appears on camera. Understanding these factors is essential before applying any blending technique.

1. Edge Thickness and Appliance Quality
The thinner the edge, the easier it is to blend. Professionally made prosthetics are designed with tapered edges that sit flush against the skin. Thick edges require more correction and often remain visible under lighting.
2. Material Type (Latex vs Silicone)
Material determines the blending method. Latex allows layering and feathering, while silicone requires precision placement and paint integration since it cannot be dissolved or built up in the same way.
3. Adhesive Selection and Application
Different materials require different adhesives and the application technique affects edge visibility. Excess adhesive creates buildup and shine, while insufficient bonding leads to lifting, both of which expose the edge.
Check Out: Which Adhesives Are Used in Professional SFX Makeup?
4. Surface Texture Requirements
Skin is not uniform. The prosthetic must match skin texture, fine lines and irregularities in the surrounding area. The blending approach changes depending on where the appliance is placed.
5. Lighting and Camera Conditions
Blending that looks correct in neutral lighting may fail under directional or high-intensity lighting. Camera resolution and lens proximity influence how precise the blend needs to be.
6. Application Control and Technique Execution
The precision of application directly affects the final blend. Uneven layering, poor adhesive control, or incorrect stippling can create visible edges even when the material and appliance are correct. Consistent pressure, controlled product use and accurate technique are required to maintain a clean transition between the prosthetic and skin.
Note: When it comes to technique execution, structured SFX makeup training makes a measurable difference. Controlled application, edge handling and material-specific blending are skills developed through guided practice rather than trial and error.
At Cinema Makeup School, we offer a range of special effects makeup courses. You can apply for courses in prosthetic application, character makeup, creature transformation, digital FX and more, all focused on industry-standard techniques and on-set workflows.
How to Blend Latex Prosthetics
Latex prosthetics are blended by building and feathering material over the edges. The process focuses on controlled layering, texture matching and surface finishing to gradually eliminate the transition between the prosthetic and skin.
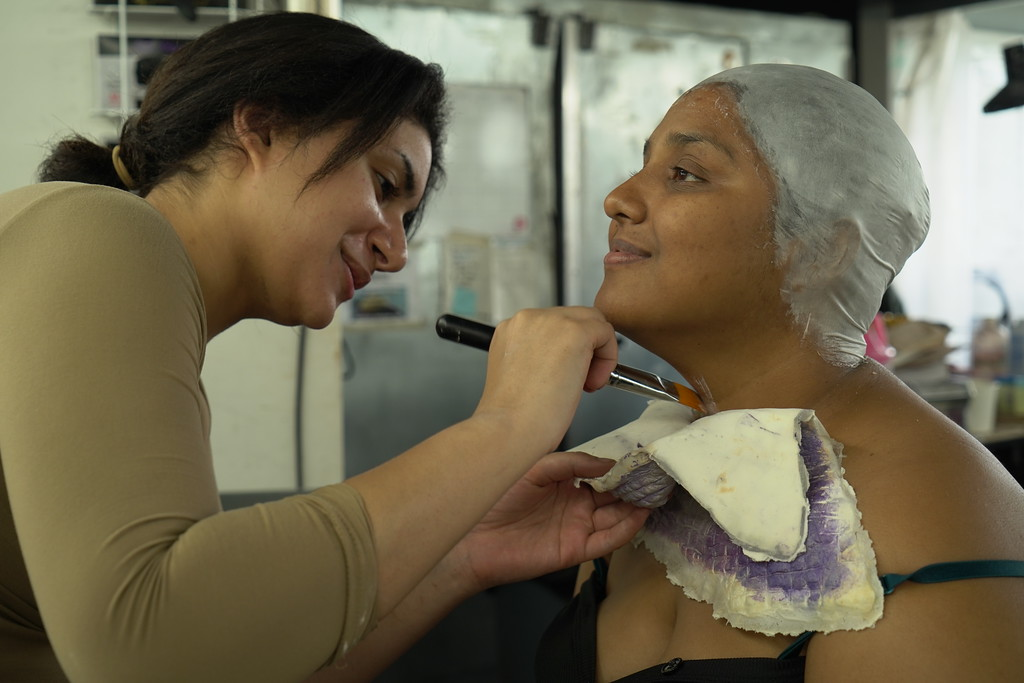
Step 1: Secure the Prosthetic Properly
The prosthetic must be fully adhered before any blending begins. Press it down from the center outward to remove air pockets and ensure even contact. Pay close attention to the edges; if they are not sitting flat at this stage, they will remain visible no matter how much blending is applied later.
Step 2: Apply Liquid Latex to the Edges
Use a sponge or stipple tool to apply a thin layer of liquid latex over the prosthetic edge. Avoid brushes, as they create streaks and uneven buildup. Extend the latex slightly onto the natural skin to begin forming a transition zone rather than a hard line.
Step 3: Build in Thin, Controlled Layers
Latex blending works through a gradual buildup. Apply multiple thin layers instead of one thick coat. Each layer must dry completely before the next is added. Thick or rushed application creates raised edges that become visible under lighting and in camera close-ups.
Step 4: Feather the Transition Area
With each additional layer, extend slightly farther onto the skin. This softens the transition and removes the visual boundary between the prosthetic and natural skin. The goal is to spread the edge across a wider area so it becomes undetectable.
Step 5: Stipple for Texture Matching
Once the edge is physically blended, the surface must match the surrounding skin. Latex dries with a uniform finish, which does not resemble real skin. Use a stippling motion to create an irregular texture that mimics natural variation. This step is essential for realism.
Read this blog to know more about the stippling techniques.
Step 6: Set and Control the Surface Finish
Apply translucent powder to remove any remaining tackiness and reduce unwanted shine. This step stabilizes the surface and prepares it for color application. Unsealed latex can appear shinier than the surrounding skin, which makes the edge more visible under lighting.
Step 7: Apply Color to Integrate the Prosthetic
Apply makeup over both the prosthetic and the surrounding skin. Match the skin tone and undertones so there is no visible difference between the two areas. Apply the color in thin layers, gradually adjusting until it matches the skin. Lightly extend the makeup beyond the prosthetic edge to remove any visible boundary. Avoid heavy coverage, as it can hide the texture and make the surface look flat.
Step 8: Inspect Under Multiple Lighting Angles
Evaluate the blend under direct and side lighting. An edge that appears clean from one angle may become visible under another. This step ensures the blend will hold under filming conditions, not just in neutral prep lighting.
More Helpful Blogs:
How Concept & Color Theory Boost Your Creature Design Skills
Why SFX Makeup Artists Should Study Human Anatomy for Sculpting Realistic Prosthetics?
What Are Prosthetic Masks in Special Effects Makeup?
How to Blend Silicone Prosthetics
Silicone prosthetics require a precision-based approach. Since the material cannot be layered or dissolved, blending depends on thin edges, accurate placement and controlled color integration to make the prosthetic and skin appear as one continuous surface.
Step 1: Apply and Secure the Prosthetic
Use a silicone adhesive to attach the appliance. Press it evenly into place without shifting. The goal is to achieve full contact across the entire surface, especially at the edges. Any uneven placement will be difficult to correct later.
Step 2: Remove the Cap Plastic (if encapsulated)
Most professional silicone prosthetics are encapsulated with a thin outer layer. Use isopropyl alcohol to dissolve this cap plastic. As it breaks down, it reveals an ultra-thin edge that sits closer to the skin and is easier to hide.
Step 3: Refine the Edges with Minimal Product
Once the edge is exposed, refinement must be done carefully. If needed, use a very small amount of adhesive or blending medium to secure it further. Apply using tapping motions only. Dragging tools across the edge can lift or distort it.
Step 4: Maintain Edge Thinness
Unlike latex, silicone cannot be built up to hide edges. Any additional product increases thickness and creates a visible ridge. The blending process depends on preserving the thinness of the original edge rather than modifying it.
Step 5: Match Surface Texture Subtly
Silicone surfaces can appear smoother than natural skin. Use light stippling to introduce texture, but keep the application controlled. Overworking this step can damage the edge or create unnatural patterns.
Step 6: Apply Color in Controlled Layers
Use alcohol-activated paints or silicone pigments to build color gradually. Focus on matching not just the surface tone, but also the undertones and translucency of the skin. Thin layers allow the prosthetic to retain depth and realism.
Step 7: Extend Color Beyond the Prosthetic Edge
Blend the paint slightly onto the surrounding skin. This removes any remaining visual separation and helps unify both surfaces into a single continuous appearance.
Step 8: Evaluate Under Production Lighting Conditions
Check the final result under strong, directional lighting and at close range. Silicone blending must hold under high-resolution cameras, where even minor inconsistencies become visible.
Explore how professional SFX makeup training works at Cinema Makeup School. Book a campus tour, available both in person and online, to see the learning environment, techniques and hands-on approach used to train aspiring artists.