From monstrous creatures and hyper-realistic wounds to intricately crafted prosthetics, SFX sculpting starts with choosing the right clay. But with so many materials available, how do you know which one fits your project best?
Whether you’re designing a prosthetic appliance, sculpting a maquette, or prepping for a character bust mold, this guide will break down the various sculpting clay types, their ideal uses and how to avoid common sculpting issues like cracking or sagging along the way.
Get ready to dive in and shape something extraordinary.
Why Clay Matters in Special Effects Makeup?
In special effects makeup, clay plays a critical role in bringing concepts to life. Before any prosthetic is molded, painted, or applied to an actor, it begins with a sculpt and that sculpt depends entirely on the quality of clay. This material isn’t just a surface to work on, it’s the base that shapes every fine detail, texture and form used in film, television, or stage productions.
Choosing the right clay for sculpting impacts everything from how realistic your design looks to how successfully it can be molded. If your clay lacks strength, flexibility, or detail retention, your entire sculpture can suffer, leading to lost texture, warping, or failure during the mold-making process. On a professional set, that means wasted time, materials and opportunity.
The value of clay also lies in how well it responds to tools and techniques. High-end sculpting clay allows for sharp lines, skin textures and anatomical accuracy that are essential for believable prosthetic work. On the other hand, using low-grade or incorrect clay can cause cracks, slumping, or poor mold release.
Main Categories of Sculpting Clay for Special Effects Makeup
All sculpting clays fall into a few main categories. Here’s a breakdown:
| Clay Type | Base Type | Reusable | Mold Friendly | Best For |
| Monster Clay® | Oil-Based | ✅ Yes | ✅ Excellent | Detailed prosthetics, busts |
| Chavant NSP | Oil-Based | ✅ Yes | ✅ Excellent | Character design, lifelike textures |
| Plastilina | Oil-Based | ✅ Yes | ✅ Good | Body parts, general SFX sculpting |
| WED Clay | Water-Based | ❌ No | ⚠️ Needs sealing | Life-size busts, fast concept sculpts |
| Air-Dry Clay | Water-Based | ❌ No | ❌ Poor | Quick textures, lightweight props |
| Polymer Clay (e.g., Sculpey) | Polymer | ❌ No | ❌ Not ideal | Miniature models, baked props |
Different sculpting clays offer different benefits. Monster Clay and Chavant NSP are top choices for detailed SFX work. Plastilina clay is great for practice and larger builds. WED clay suits fast, large sculpts. Polymer clay works for miniatures and tools, while Air-Dry clay is ideal for quick concepts. Let’s explore which types of sculpting clay best suit your next creation.
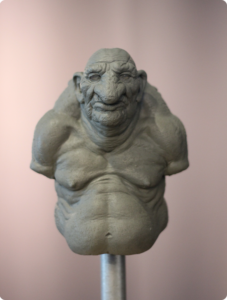
1. Monster Clay
Monster Clay is considered the gold standard in SFX sculpting. This oil-based clay is smooth, easy to work with and holds fine detail remarkably well.
Key Benefits:
- Reusable and Sulfur-Free: Safe for all molding materials.
- Temperature Sensitive: Softens when heated, hardens when cooled.
- Making a mold from Monster Clay is highly preferred in special effects makeup, as the clay captures fine textures accurately and ensures a smooth release during the molding process.
Use Case: Sculpting prosthetic appliances, creature faces and full busts.
Monster Clay is often the clay of choice in professional FX workshops and schools due to its performance and reliability.
2. Chavant NSP
Chavant NSP (Non-Sulfurated Plasteline) is another high-end, oil-based clay known for holding ultra-fine detail and being non-toxic.
Pros:
- Great for precision detail
- Comes in soft, medium and hard grades
- Won’t inhibit silicone molds
Use Case: Perfect for character design and hyper-detailed creature builds.
Caution: Due to its firmer consistency compared to Monster Clay, Chavant NSP can be harder to manipulate at room temperature and may need pre-warming with heat tools to avoid strain or loss of sculpting control.
3. Plastilina
Plastilina clay is a time-tested, oil-based clay for sculpting that has remained a staple in both SFX makeup and traditional sculpting industries for decades. Its non-drying, reusable nature makes it a practical choice for artists working on long-term projects or larger maquettes.
Pros:
- Easily Accessible: Available in most art supply stores and widely used in educational and professional settings.
- Budget-Friendly: More affordable than many high-end sculpting clays, making it ideal for large-scale builds or repeated practice.
- Good Working Time: Holds its shape without drying out, allowing for extended sculpting sessions without time pressure.
- Great for Bulk Forms: Performs well when blocking out larger shapes or body forms before detailing.
Caution: Some types of Plastilina clay may contain sulfur, which can react negatively with silicone mold materials. Always check the clay’s label before use. It can also become overly soft or oily in warmer temperatures, which may reduce sculpting precision.
Use Case: Best for practice sculptures, full-body creature builds and educational projects where cost, availability and long working time are key priorities.
4. WED Clay
WED (Walter E. Disney) clay is a water-based sculpting clay used primarily for large sculptures and fast turnaround times.
Why Artists Love It:
- Sculptures can be completed quickly
- Great for creating texture and expression
- Can be smoothed with water
Caution: WED clay dries quickly and can crack easily.
Wondering how to prevent clay from cracking when using WED? Always cover your sculpture with plastic and a damp cloth between sessions. Use a spray bottle to keep it hydrated.
Use Case: Ideal for theatrical busts, life-sized sculptures and rough drafts.
5. Polymer Clay
Polymer clay isn’t typically used in traditional SFX prosthetic work, but it still serves a useful role in certain aspects of the workflow, especially when creating miniatures, rigid props, or texture tools.
Why Use It:
- Perfect for Miniatures and Models: Polymer clay is excellent for small-scale figures, teeth sculpts, or character maquettes that don’t require molding.
- Hardens Permanently: Once baked, it cures into a hard, plastic-like finish that holds its shape and fine detail.
- Great for Props and Tools: Often used to create rigid components, texture stamps, or sculpting aids used in broader SFX workflows.
Caution: While useful in some applications, polymer clay molds are not recommended for SFX prosthetics. Once baked, the clay becomes brittle and lacks the flexibility needed for molding processes or wearable effects.
Use Case: Best for miniature sculpts, rigid prop elements, or custom texturing tools – not for flexible or skin-safe prosthetic applications.
6. Air-Dry Clay
Air-dry clay is a lightweight, beginner-friendly sculpting material that doesn’t require baking or special equipment.
Pros:
- No Heat Required: Dries on its own without the need for an oven or kiln.
- Good for Simple Projects: Useful for creating lightweight mock-ups, quick concept props, or non-flexible display pieces.
Caution: Air-dry clay is not mold-safe and lacks the flexibility and durability required for SFX-grade prosthetics. It’s also highly prone to cracking, especially when drying too quickly or applied in thick layers.
Use Case: Best suited for non-molded mock-ups, student practice, or concept design—not for wearable or moldable effects in professional settings.
FAQ: How Do You Keep Air-Dry Clay from Cracking?
To keep air-dry clay from cracking, start by kneading it well to remove air bubbles and ensure a smooth texture. Apply the clay in thin layers rather than thick sections, which helps it dry more evenly.
Let your sculpture dry slowly in a cool, shaded area, avoiding direct sunlight or heaters. Lightly misting the surface during sculpting can maintain moisture and prevent surface stress. Cracking often happens due to uneven drying or overworking, so handle the clay gently and allow time for each section to set properly.
Don’t miss these guides:
How to Create Creature Design Using Latex, Silicone & Prosthetics?
Foam Latex vs Silicone: Choosing the Right Material for SFX Prosthetics
How to Apply Latex & Vinyl Bald Caps in Character Makeup?
Oil-Based vs. Water-Based Clay – Which One Should You Use?
| Feature / Property | Oil-Based Clay | Water-Based Clay |
| Composition | Made with waxes, oils and fillers | Made with natural clay and water |
| Drying Time | Does not dry out; reusable indefinitely | Dries out over time (can be rehydrated temporarily) |
| Detail Retention | Excellent for fine detail; perfect for prosthetics and maquettes | Good for general sculpting, less ideal for high detail |
| Tool Compatibility | Works well with metal and heated sculpting tools | Can be used with traditional clay tools and brushes |
| Mold Compatibility | Ideal for silicone mold-making (if sulfur-free) | May not be compatible with all molding materials |
| Working Time | Unlimited; does not dry or cure unless intentionally heated | Limited working time before drying starts |
| Texture & Feel | Smooth, dense and waxy | Softer, more pliable; similar to ceramic clay |
| Reuse | Fully reusable | Partially reusable, can degrade over time |
| Best For | Professional SFX sculpts, prosthetics and maquettes | Practice busts, quick concept sculpting and educational use |
| Caution | Some types contain sulfur—check before mold-making | Tends to crack if dried unevenly or layered too thick |
Check out our YouTube channel to see how our students create jaw-dropping looks!
Deciding between oil-based and water-based clay comes down to the type of sculpture you’re making. If your project demands high detail, long working time and mold-readiness, such as prosthetics, creature busts, or character maquettes, oil-based clay is the better fit.
For quicker builds like practice busts, classroom models, or large-scale mockups where drying time and fine detailing aren’t as critical, water-based clay offers more flexibility and ease of use.
Read This: Need guidance on how to sculpt with clay? Look no further than Cinema Makeup School. Located in Los Angeles, California, USA, we’re proud to be one of the top special effects makeup schools, equipping students with hands-on experience and real-world projects guided by industry experts.
Interested in joining us? Take a tour of our campus today!
Essential Clay Sculpting Tools Every SFX Artist Should Own
No matter how skilled you are, your results will always reflect the quality of the clay sculpting tools you use. From building rough forms to refining skin textures, the right tools help you bring your creative vision to life with precision.
- Loop Tools: Essential for carving, shaping and removing clay while maintaining control over your forms.
- Rake Tools: Great for smoothing larger surfaces and creating subtle muscle transitions or volume shifts.
- Metal Spatulas: Used for fine detailing—perfect for adding scars, pores, wrinkles and skin folds.
- Heat Gun or Warming Tray: Must-haves when working with oil-based clays like Monster Clay or Chavant NSP, making the sculpting process smoother and more efficient.
- Spray Bottle (for water-based clay): Keeps your piece moist and workable, preventing cracking during long sculpting sessions.
Looking for professional clay or clay sculpting tools? Visit our store and explore industry-grade materials.
Are you passionate about crafting bruises, monsters, or futuristic characters through the magic of SFX makeup? Bringing characters to life with prosthetics, blood FX and sculpted detail isn’t just about creativity; it’s about mastering a craft that can open doors to exciting career paths across film, television, theater and beyond.
But let’s be real, passion alone doesn’t pay the bills.
At some point, every aspiring artist asks the same question: What kind of income can I expect in this field? That’s a valid and essential consideration when turning your talent into a sustainable profession. Understanding the earning potential of special effects makeup artists can help you make smarter career decisions and set realistic, confident goals for your future in the industry.
So in this blog, we’ll walk you through what special effects makeup artists typically earn in the U.S. and Canada, what impacts those earnings and how you can level up your skills to land better-paying opportunities in this competitive field.
SFX Makeup Artist Salary in the USA
Across the United States, the average annual salary of a special effects makeup artist is estimated to be around $55,000, based on industry-wide reports. However, this number can vary depending on factors like experience, job type and location. Entry-level artists may earn less, while seasoned professionals working on high-budget productions often command significantly higher rates. (2)
Let’s talk about Los Angeles, the center of film and TV production. If you’re beginning your SFX makeup journey there, you probably won’t be earning top dollar right away. Most artists early in their careers earn somewhere between $16 and $22 per hour, depending on their skill level and the project.
With consistent work throughout the year, many special effects makeup artists can expect to earn around $39,929 annually, according to industry data. For top-tier professionals, those with strong reputations or advanced techniques, earnings can climb significantly higher depending on the project and client base. (3)
Here is the estimated salary of special effects makeup artists based on experience level:
| Experience Level | Hourly Wage | Estimated Annual Salary |
| Entry-Level | $13 – $14 | ~$27,000 – $29,000 |
| Mid-Level | $16 – $22 | ~$33,000 – $46,000 |
| Top Earners (90th Percentile) | $27+ (est.) | ~$56,000 – $60,000 |
However, not all creative roles in the industry earn the same as an SFX makeup artist. Let’s take a look at some related positions and how their salaries break down annually, monthly, weekly and hourly:
| Job Title | Annual Salary | Monthly Pay | Weekly Pay | Hourly Wage |
| Artist Manager | $265,337 | $22,111 | $5,102 | $127.57 |
| 2D Artist | $139,581 | $11,631 | $2,684 | $67.11 |
| Clean Up Artist | $115,141 | $9,595 | $2,214 | $55.36 |
| Esthetician Makeup Artist | $56,683 | $4,723 | $1,090 | $27.25 |
| Freelance Production Artist | $55,236 | $4,603 | $1,062 | $26.56 |
(Source: https://www.ziprecruiter.com/Salaries/Special-Effects-Makeup-Artist-Salary-in-Los-Angeles,CA)
SFX Makeup Artist Salary in Canada
Heading north, the landscape changes slightly, but opportunities remain strong.
Based on data from Glassdoor, the average salary of an SFX Makeup Artist in Canada sits at approximately $62,400 per year, or around $30 per hour. This number aligns well with the national income averages in the creative field.
Here’s how it breaks down:
- 25th percentile: $45,000/year
- 75th percentile: $87,000/year
- 90th percentile (Top earners): $120,000+/year
Notably, around 65% of professionals in Canada report being satisfied with their compensation, suggesting stable earning potential in the region. (1)
? Note: All salary data referenced here is based on publicly available information from ZipRecruiter, Comparably and Glassdoor as of July 2025. Figures are approximations and meant to provide general guidance only.
Check out what our graduates have to say and watch our students craft jaw-dropping SFX looks behind the scenes – all on our YouTube channel – https://www.youtube.com/@Cinemamakeup/videos
What Influences a Special FX Makeup Artist’s Salary?
Several key factors shape a special FX makeup artist’s salary – experience, location, industry, work setup and specialized training all play a role in what you can earn. Here’s a breakdown of each:
A. Experience & Skill Level
As with most careers, your years in the industry play a huge role. Newcomers typically start with lower rates, while veteran artists with specialized techniques (like prosthetics or creature design) can charge premium prices.
You might be searching for How To Become a Makeup Artist for Films?
B. Your Location
Major production cities like Los Angeles, Toronto, Atlanta and Vancouver offer more opportunities and higher pay due to the volume of TV, film and commercial work.
C. Industry & Production Type
Working on a feature film, a big-budget series, or a branded commercial will often yield better compensation than small theater projects or student films.
D. Your Work Format: Freelance or Full-Time
Freelancers may have more flexibility in setting rates but face income fluctuations. Full-time roles might offer consistent pay, but often with capped growth.
Related Article: How to Become a Freelance Makeup Artist – Complete Guide
E. Education & Training
Artists trained in specialized techniques, like silicone molding, airbrushing, digital FX, or ZBrush sculpting, can command higher rates due to their niche skills.
If you’re looking to build these in-demand skills with industry-relevant tools and real-world application, visit Cinema Makeup School. We don’t just teach makeup, we train artists to master the techniques that production studios and creative directors actively seek. Whether you’re aiming to work in film, TV, or immersive media, this is where your advanced SFX journey levels up.

Get insights on: Career Options for Special Effects Makeup Artists
Smart Ways to Level Up Your Income As An SFX Makeup Artist
While talent gets you noticed, strategy gets you paid. From knowing your worth and showcasing niche skills to building a standout portfolio, learning new techniques and making the right industry connections, these smart moves can take both your craft and your paycheck to the next level. Let’s break it down:
1) Understand Industry Rates to Charge What You’re Worth
Before quoting a rate or accepting an offer, take time to explore typical pay scales in your area and niche. Knowing what others with your skill set earn helps you negotiate from a position of confidence.
2) Highlight the Skills That Make You Irreplaceable
If you’re skilled in specialized areas like prosthetics, digital sculpting, or high-end character effects, make those strengths known. Clients and employers pay more for artists who bring niche expertise to the table.
3) Build a Portfolio That Gets You Hired
A well-curated social media presence or website can attract better opportunities. Regularly posting your latest work helps you stay on the radar of producers, directors and potential clients.
4) Keep Evolving With In-Demand Techniques
The industry evolves fast. Learning new techniques like 3D printing, airbrush FX, or digital retouching keeps your work competitive and opens doors to higher-paying gigs.
5) Make Industry Connections That Lead to Real Opportunities
Conventions, trade shows and workshops are more than learning spaces; they’re networking goldmines. Building relationships with artists, directors and FX teams can lead to referrals and better-paying jobs.
Take a tour of Cinema Makeup School and explore the advanced SFX skills that could land you higher-paying jobs.
References:
- Glassdoor. (n.d.). Makeup and SFX artist salaries. Glassdoor. Retrieved July 21, 2025, from https://www.glassdoor.ca/Salaries/makeup-and-sfx-artist-salary-SRCH_KO0,21.htm
- Comparably. (n.d.). Salaries for special effects makeup artist. Comparably. Retrieved July 21, 2025, from https://www.comparably.com/salaries/salaries-for-special-effects-makeup-artist
ZipRecruiter. (n.d.). Special effects makeup artist salary in Los Angeles, CA. ZipRecruiter. Retrieved July 21, 2025, from https://www.ziprecruiter.com/Salaries/Special-Effects-Makeup-Artist-Salary-in-Los-Angeles,CA
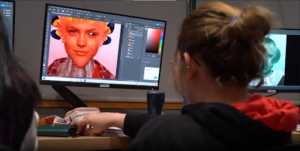
In 2025, the makeup and entertainment industries continue to blend practical and digital creativity. From blockbuster movies to Instagram portfolios, artists are expected to use digital tools fluently; that’s where Digital FX (also known as Digital Effects) steps in. Mastering Digital FX gives makeup artists, concept designers and content creators a powerful edge.
Learning Digital Effects isn’t just about knowing Photoshop; it’s about staying relevant, speeding up workflows and delivering polished, professional work across formats. If you want to evolve with the industry, now is the time to explore this creative powerhouse.
Let’s explore why enrolling in a Digital FX course in 2025 is a move that can transform your career.
Why Should You Learn Digital Effects?
Digital Effects give you a creative edge, speed and control in today’s evolving makeup industry. From faster concept design to polished portfolio presentation, Digital FX helps you blend practical and digital artistry, work more efficiently and stay ahead, even though tools like AI are rapidly evolving.
1. To Become a Dual-Powered Creator: Practical Meets Digital
Today’s artists don’t just sculpt prosthetics; they enhance them digitally. Makeup labs and creative studios demand artists who can concept, edit and polish work across both mediums. Being able to design a prosthetic and create a matching concept art digitally makes you far more versatile.
With Digital FX skills, you can sketch digitally before sculpting, send clean visual drafts to clients and combine traditional and modern workflows seamlessly, elevating your special effects makeup skills to a whole new level.
2. Digital FX Skills Give You a Creative Advantage That Lasts
In today’s makeup and design industries, being skilled with brushes and prosthetics is no longer enough. Digital FX training equips you with the ability to visualize, refine and present your work at a much higher level.
These skills allow you to:
- Create detailed concept art before sculpting
- Retouch photos to showcase your work professionally
- Communicate clearly with directors, editors and clients
- Build polished portfolios that grab attention
3. Speed Up Concept Creation for SFX and Creature Design
Designing monsters, aliens, or sci-fi characters used to require weeks of sketches and approvals. Not anymore.
Studios now want editable concept art fast. Deadlines are quicker and feedback comes faster than ever. With Digital FX skills, artists can create, modify and deliver detailed concept pieces quickly, thanks to smart layering, recoloring tools and digital brushes.
4. Make Your Portfolio Stand Out with Pro-Level Retouching
Your portfolio represents your artistry. If your images are poorly lit, cluttered, or unbalanced, it affects how your work is perceived, no matter how good the makeup was in person.
Learning digital retouching gives you the power to present your work at its best. Using professional techniques and digital tools, you’ll be able to:
- Fix lighting and shadows
- Adjust skin tones
- Correct color balance
- Remove distractions
- Add texture and depth
The result? A professional-looking portfolio that captures your skills and attention to detail.
5. To Streamline Your Workflow and Save Time
Learning Digital FX gives you more than creative control; it completely transforms how efficiently you work. Instead of starting every project from scratch, you’ll learn how to build with reusable file structures, smart editing techniques and non-destructive tools that save hours on each design.
With the right training, you’ll understand how to work non-destructively using adjustment layers, create reusable design elements with smart objects and speed up repetitive edits through actions and presets. Texture overlays and layered compositions let you experiment freely without starting over.
This means you can take on more projects, meet tighter deadlines and still produce high-quality results, without burning out. It’s the kind of skill that turns a good artist into a reliable, in-demand creative.
Curious how Digital FX works in real projects? Check the video –
6. You Will Stay Creatively in Control – Even as AI Evolves
One of the strongest reasons to learn Digital Effects today is to stay in command of your creative work, even as AI tools become more common. While automation can assist in certain tasks, it can’t match the trained eye, taste and decision-making of a real artist.
By learning Digital FX through professional tools like Photoshop, you’ll understand how to use AI features as creative support, not a replacement. You’ll know when to trust automation and when your artistic choices matter more. That balance keeps your work unique, intentional and professionally polished, something no AI can replicate on its own.
Check out more guides:
Career Options for Special Effects Makeup Artists
How to Create Creature Design Using Latex, Silicone & Prosthetics?
How 3D Printed Prosthetics Are Revolutionizing Movie Makeup?
Where to Start Your Digital FX Journey in 2025?
If you’re serious about stepping up your creative game, the Digital FX course at Cinema Makeup School is the perfect starting point. This intensive week-long training is designed for artists who want to blend traditional makeup techniques with digital artistry.
In just five days, you’ll build essential skills using industry tools like Wacom tablets and Adobe Photoshop, learn to create concept art, perform advanced photo retouching and manipulate layers, textures and colors like a pro. This course isn’t just about learning how to use software; it’s about building confidence to take on creative challenges in film, TV and portfolio development with ease and precision.
From concept artists to makeup designers and retouchers, the course is perfect for anyone wanting to modernize their toolkit and stay relevant in today’s fast-paced creative industry. By the end of the 40-hour course, you’ll be equipped to apply Digital FX techniques that enhance your creative work and help you stand out in competitive spaces.
Classes run Monday through Friday, right here at Cinema Makeup School in Los Angeles, California in the United States of America. Take a tour of our campus, explore real student work and see how our Digital FX course can sharpen your skills and shape your future.
FAQs
Q1. How is Digital FX different from VFX or 3D effects?
Digital FX focuses on 2D creative tools like photo editing, concept sketching, digital retouching and visual polish using Photoshop or similar programs. VFX (visual effects) usually involves motion graphics, CGI, or compositing.
Q2. What are the best tools for skin retouching in Photoshop?
Top tools include the Healing Brush, Clone Stamp, Spot Healing Brush, Frequency Separation and Dodge & Burn.
Q3. Can I learn skin retouching in Photoshop without prior experience?
Absolutely! The Digital FX course at Cinema Makeup School starts from the basics and builds toward pro-level retouching techniques. You’ll go from beginner to confident editor, even if you’ve never opened Photoshop before.
The field of Special Effects makeup is evolving and so is the way artists learn it.
Today, aspiring makeup artists can choose between two main paths: enrolling in an in-person special effects makeup course or joining a flexible, remote online SFX makeup course. Both offer valuable training, but each comes with its own approach, tools and experience.
As more students seek accessible and career-focused education, understanding the differences between online and classroom-based programs is crucial.
This blog will walk you through a detailed comparison of both formats. Whether you’re just getting started or considering a shift in your learning style, this guide will help you make an informed choice that fits your goals, schedule and learning preferences.
Let’s take a closer look at how these two learning methods compare in terms of environment, flexibility, materials, portfolio building and career outcomes.
Why Special Effects Makeup Courses are in Demand?
Special Effects (SFX) makeup is a unique combination of creativity and technical precision. It brings together prosthetics, latex, silicone molds, painting, airbrushing and even digital techniques to create realistic injuries, fantasy creatures and unforgettable character transformations.
What was once limited to film and television has now expanded into a wide range of industries – from video games and theme parks to theater, cosplay, haunted attractions and online content.
With the growing demand for more immersive and visually striking effects, the industry now requires more skilled MUAs than ever before. As a result, there’s been a noticeable rise in SFX makeup courses, both in-person and online, designed to train the next generation of artists.
Whether you’re planning to work on movie sets, design characters for live shows, or create digital-ready effects for your portfolio, getting the right training is a key step toward building your career.
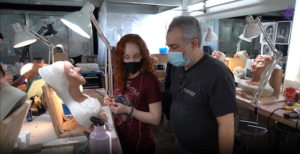
Worth Noting: Cinema Makeup School is dedicated to training aspiring makeup artists in the craft of special effects makeup. With a focus on both creativity and real-world application, we offer a range of programs that cover everything from prosthetics and character design to on-set techniques and digital FX. Students gain hands-on experience using industry-standard tools, working alongside experienced instructors who bring knowledge from film, TV and live entertainment. The goal is simple: to equip artists with the skills, confidence and professional foundation needed to succeed in the competitive SFX makeup.
Comparing In-Person and Online SFX Makeup Courses
To help you make an informed decision, we’ve broken down the core differences that cover key areas like learning environment, access to tools, scheduling flexibility, instructor interaction, portfolio development and career opportunities. Let’s take a closer look:
1. Learning Feels Different in a Physical Classroom and a Digital Space
In a classroom setting, you’re surrounded by instructors, peers, models and live demos. You can touch materials, feel textures and observe subtle techniques up close. This immersive setting mimics real-world scenarios and helps you build hands-on experience in a controlled, professional space.

Online learning takes place in a digital studio – your screen. Lessons may be live-streamed or pre-recorded, giving you the ability to pause, replay and learn at your own pace. While you won’t be in a physical room with others, features like virtual forums, live feedback sessions and student communities help you stay connected with instructors and classmates.
2. Tools and Materials: Provided or Self-Managed
When you attend an in-person special effects makeup training session, materials are usually provided as part of the program. Schools offer access to professional-grade prosthetic tools, airbrush kits, sculpting clay, lifecasting gear and more. Instructors often walk you through usage in real-time.
Online SFX Makeup Courses: In online formats, students typically purchase kits separately. Some platforms ship curated kits, while others provide supply lists. You’ll be working in your personal space. While you may not have access to every tool used in the industry, you’ll learn how to adapt and experiment. At CMS Digital Studios, materials are provided to you within the course price, as long as you live within the continental United States.
3. Fixed or Flexible Schedules? Choose What Fits You
One of the biggest advantages of online courses is flexibility. You can learn anytime, anywhere. This is ideal for working professionals, parents, or students with other commitments. Online learning adapts to your lifestyle, no matter your time zone or preferred study hours, including late-night sessions.
Physical classes operate on fixed schedules. This structure helps build discipline and routine, but it can be challenging for students with unpredictable commitments or limited flexibility.
4. Get Instructor Interaction Your Way
In-Person Courses: Face-to-face instruction allows for immediate feedback. Instructors can correct your hand position, tweak your brushwork, or demonstrate subtle detailing techniques on the spot. This real-time interaction helps refine your artistry.
Online SFX makeup courses provide feedback through recorded videos, messages, or virtual critiques. While instruction is delivered remotely, these formats still offer meaningful interaction and support throughout the learning process.
5. How You Network Depends on Where You Learn
Learning in a physical classroom puts you in direct contact with peers, instructors, models and actors, creating valuable opportunities for collaboration and connection. You’re part of a local creative environment, which can be especially helpful if you’re aiming to work in your city’s film, theater, or entertainment scene. Group projects, hands-on workshops and in-person events naturally foster a strong sense of community and teamwork.
Many online programs host student forums, Slack channels and private Facebook groups to help build community. However, the energy of a live studio, hallway banter, or lunchroom networking is hard to replicate virtually.
6. Your Wallet and Location Might Decide for You
Generally, online SFX makeup courses are more affordable. You save on housing, commuting and studio fees. Additionally, online learning is accessible globally – no need to relocate or travel.
In-person programs usually cost more because they include materials, studio access and hands-on training. They often offer stronger certifications and access to industry tools and connections. However, if you’re studying in a major city, additional expenses like travel, rent and living costs can increase your total investment.
7. Certification and Portfolio Building
Many in-person special effects makeup courses culminate in portfolio-ready photoshoots, film projects, or runway showcases. You work on camera-ready pieces with direction from industry experts. This real-world experience plays a key role in developing a strong portfolio, providing high-quality project work and visual documentation to effectively showcase your skills to potential employers and clients.
Online SFX makeup courses may provide portfolio assignments and suggest DIY photo setups to capture your work. Some offer feedback and review your work digitally. However, building a studio-quality portfolio at home requires extra effort and equipment.
Curious What Learning with Us Looks Like? Check out how students confidently craft complex SFX makeup looks!
8. Career Placement and Industry Exposure
In-person SFX makeup courses often include built-in opportunities to connect with the industry. These may involve career guidance, guest lectures from working professionals, on-set internships and networking events. Students might also attend conventions, job fairs, or live productions where they can build real-world connections and gain exposure to potential employers.
Many online courses offer career-focused resources such as resume reviews, portfolio feedback, alumni networks and virtual mentorship. Some programs also connect students with industry professionals through webinars, online events, or collaborative projects. While the format is remote, students can still build industry connections and gain career insights through digital platforms and global communities.
Don’t miss these guides:
Career Options for Special Effects Makeup Artists
How Cinema Makeup School’s SFX Makeup Course Brings Seasonal Characters to Life?
How To Become a Makeup Artist for Films?
Short on Time but Still Want Real-World Training?
No problem! Cinema Makeup School offers short-term bootcamps and workshops designed to deliver hands-on, practical training in a condensed time frame. Get more info here!
How to Choose the Right SFX Makeup Course Format?
Deciding between an in-person or online SFX makeup course depends on your goals, preferences and lifestyle. Both formats offer valuable training, but the right choice varies for each student. Key factors to consider include your career goals, learning style, schedule, budget, location and access to tools. Evaluating these areas will help you choose the format that best supports your path in special effects makeup.
- Career Goals – Consider the type of work you want to pursue and how each format supports that path.
- Learning Style – Think about how you absorb information best, hands-on instruction or flexible, self-paced learning.
- Schedule & Commitments – Factor in your availability, work hours, or family responsibilities.
- Budget & Location – Account for tuition, travel, housing (for in-person), or tech and materials (for online).
- Access to Tools – In-person courses often supply professional equipment; online learners may need to build their own kit over time.
Interested in Becoming an SFX Artist? Take a tour of Cinema Makeup School in Los Angeles today!
Makeup goes far beyond color and contour, it’s the art of complete transformation. If you’re aiming to craft creatures, sculpt wounds, or build unforgettable characters, one skill will push your artistry from impressive to legendary: mold-making.
Think about the most jaw-dropping special effects you’ve seen, those realistic burns, fantasy creatures, or full facial transformations. Behind each of those looks is a mold: carefully sculpted, cast and applied to turn imagination into reality.
Learning how to create custom molds is a foundational technique for any makeup artist who wants to go beyond beauty and into full-blown character design.
This guide will show you why mold-making is essential, how it fits into your career as a serious artist and even walk you through a beginner’s take on how to make molds that actually fit, flex and perform on set.
Mold-Making: Backbone of Professional Special Effects Makeup
Mold-making is the process of capturing the shape of a three-dimensional object (like a sculpted prosthetic piece) to reproduce it accurately in different materials, typically silicone, latex, foam, gelatin and more.
A mold allows for the creation of repeatable, custom-fit pieces that look lifelike, move realistically on the skin and stay consistent throughout production. It’s how movie monsters, aging makeup, fantasy creatures and even delicate beauty effects are brought to life.
Without mold-making, there is no full transformation, only half-finished illusions.
Learn How to Create Creature Design Using Latex, Silicone & Prosthetics?

Why Mold-Making Is a Must-Have Skill for Career-Focused Makeup Artists?
Learning mold-making empowers makeup artists to move beyond basic application and become full creative forces in production. It allows for original, reusable prosthetics, increases your value on set and enables hyper-realistic designs that meet today’s high-definition standards. From saving time and money to collaborating across departments, mold-making is an essential skill for any serious, career-focused SFX artist.
1. You’re Able to Unlock True Creative Freedom
When you know how to make molds, you’re no longer limited by what’s available off the shelf. You’re free to design custom prosthetics from scratch, sculpt your creature concept and turn it into a reusable, wearable piece that fits your exact artistic vision.
This freedom is especially important when working on productions that demand originality – horror films, sci-fi series, fantasy theater, cosplay competitions, or concept photo shoots. A mold you design can capture expressions, textures and asymmetries that no store-bought appliance ever could.
Bonus: Once you create a mold, you can reproduce it consistently, perfect for projects that require multiple takes, stunt doubles, or touring stage productions.
2. You Will Enhance Your Marketability in Film, TV & Theater
Today’s entertainment landscape demands versatility. Production teams aren’t just looking for makeup artists; they want creators who can conceptualize, sculpt, fabricate and apply. Mold-making proves you’re more than just an applicator; you’re a builder of characters from the ground up.
When you can take a design from idea to wearable prosthetic, you become invaluable to any project. Whether you’re working on a sci-fi epic, a period drama, or a live theatrical performance, your ability to mold custom pieces ensures every character looks distinct and production-ready.
Studios value artists who can bring their own creations to life because it saves time, reduces dependency on external vendors and guarantees originality.
3. Create Hyper-Realistic Prosthetics
In a high-definition age where every wrinkle and pore is captured on screen, realism is everything. Mold-making allows you to produce prosthetics that look natural, move with the actor’s face and hold up under close-up shots.
Silicone and foam latex are today’s go-to prosthetic materials because of their flexibility and skin-like quality. A well-made mold ensures that every cast is:
- Skin-tight for comfort and believability
- Repeatable for continuity across shooting days
- Every vein, pore and scar was sculpted with meticulous detail.
From burn scars and zombie bites to fantasy creatures and age prosthetics, everything starts with a good mold. The better your mold, the better your makeup.
4. You’re able to Save Time and Money
Investing time in mold-making may seem like extra work upfront, but it’s a huge time-saver. Once you’ve sculpted and molded a piece, you can replicate it quickly for future jobs, clients, or productions.
You also save money by not having to resculpt the same piece over and over again.
5. Collaborate Seamlessly with Other Creative Departments
SFX makeup artists frequently collaborate with costume teams, prop builders and VFX specialists to bring characters fully to life. When you understand mold-making, it becomes easier to build appliances that integrate with costumes, helmets, armor, or animatronics.
Your work becomes part of a larger visual story and your ability to design functional, wearable prosthetics that fit into the big picture strengthens your value across departments.
Learn Mold-Making at Cinema Makeup School
Want to bring your makeup creations to life from the ground up? You are at the right place! Cinema Makeup School’s Special Effects Makeup Course is built for artists ready to go beyond the basics.
At Cinema Makeup School, we offer hands-on training in sculpting, mold-making and prosthetic design that prepares students for real-world work in film, television, theater, cosplay and medical simulation.
Common Materials Used in Mold-Making
Understanding the different materials used in mold-making is essential for creating prosthetics that are effective, comfortable and production-ready. Each type of mold – silicone molds, plaster molds, latex molds, alginate molds, gelatin molds and polyurethane molds – serves a specific purpose in the special effects makeup industry.
Here’s a detailed look at each one, when to use them and why mastering them matters for every serious makeup artist:
A. Silicone Molds
Silicone molds are the gold standard in special effects makeup due to their flexibility, durability and ability to capture ultra-fine detail. These molds are commonly used to produce high-quality prosthetics that are applied directly to the skin.
Ideal for: Custom facial prosthetics, lifelike wounds, fantasy creatures and reuse.
If you need to create elf ears, burn scars, or a full-face creature appliance that’s reusable and flexible, silicone molds are your go-to.
Watch how silicone heads are created in this video:
B. Plaster Molds
Plaster molds or rigid molds are typically used to support flexible materials like silicone or gelatin. They’re also common for creating the initial positive cast from a life mold made with alginate.
Ideal for: Mother molds, lifecasting support and flat molds.
A plaster mold might be used to support a silicone lifecast of a model’s face, helping to keep the soft mold in shape while casting prosthetic pieces.
C. Latex Molds
Latex molds are traditionally used for making masks and small appliances. While they are less commonly used for high-end prosthetics today, they’re still useful for fast, low-cost applications and lightweight builds.
Ideal for: Mask making, haunted house props and hobby projects.
⚠️ Caution: Latex can degrade over time and isn’t ideal for high-detail or skin-contact prosthetics. It is great for making simple zombie masks or theatrical pieces that don’t require fine realism or skin-safe materials.
D. Alginate Molds
Alginate Molds are commonly used in lifecasting – making quick, detailed impressions of a person’s face, hands, feet, or other body parts. Alginate is skin-safe and fast-setting, making it perfect for capturing body contours.
Made to handle: Life casting (one-time use)
Use alginate molds when you need a mold of an actor’s face to sculpt a custom prosthetic.
E. Gelatin Molds
While gelatin is more commonly used for casting prosthetics than creating molds, gelatin molds can be used for practice or short-term effects. Gelatin molds are ideal for quick-turnaround projects or when working on a tight budget.
Ideal for: Practice pieces and single-use FX
A gelatin mold might be used to create a temporary scar or wound piece for a live performance or classroom demo.
F. Polyurethane Molds
Polyurethane molds are rigid and durable, often used for prop and costume fabrication rather than direct skin contact. They hold up well for industrial use or when casting hard materials like resin or foam.
Ideal for: Props, costume parts, rigid prosthetics
⚠️ Caution: Most polyurethane molds are not skin-safe, so they’re not ideal for prosthetics applied directly to the face or body.
Polyurethane molds are used to cast helmets, horns, or chest armor pieces for cosplay and film props.
Get insights on: Foam Latex vs Silicone: Choosing the Right Material for SFX Prosthetics
Quick Overview:
| Mold Type | Flexible | Skin-Safe | Reusable | Best Use Case |
| Silicone Molds | Yes | Yes | Yes | High-end prosthetics, FX applications |
| Plaster Molds | No | Yes | Limited | Support shells, lifecasting |
| Latex Molds | Semi | Varies | Limited | Masks, props |
| Alginate Molds | Yes | Yes | No | One-time body casting |
| Gelatin Molds | Yes | Yes | Re-melt | Practice FX, classroom work |
| Polyurethane Molds | No | No | Yes | Props, rigid costume pieces |
Where Mold-Making Talent Is in High Demand?
From entertainment to education and even healthcare, the demand for artists who can sculpt, mold and fabricate prosthetics is growing steadily. By adding mold-making to your skill set, you’re becoming an asset to multiple high-demand industries. Here are the top industries that hire mold-making specialists:
- Film & TV (Netflix, Marvel, indie films)
- Theater (Broadway, immersive shows)
- Theme parks (Universal Studios, Disney)
- Haunted attractions and escape rooms
- Cosplay prop and costume fabrication
- Medical and forensic simulation companies
Related Article: Career Options for Special Effects Makeup Artists
How to Make Molds (Beginner-Friendly)
Step 1: Sculpt Your Original Piece
Start by sculpting your design using oil-based clay. This could be a wound, a creature detail, or a facial appliance. Oil-based clays like Monster Clay work best because they hold fine details and don’t dry out over time.
Step 2: Build a Mold Box or Barrier
Create a containment wall around your sculpt using foam board, acrylic sheets, or modeling clay. This will keep your mold-making material in place when you pour it over your sculpture.
Step 3: Apply Mold Release
Use a mold release spray or brush-on agent on your sculpt. This ensures the mold material doesn’t stick permanently to your sculpture and makes demolding easier and cleaner.
Step 4: Mix and Pour Your Mold Material
Choose your molding material based on your project and mix according to product instructions, then pour slowly and evenly over your sculpt to capture all detail.
Step 5: Cure and Demold
Let the mold material cure completely (this can take anywhere from 30 minutes to several hours, depending on the type). Once cured, gently remove the mold from the sculpt, you now have a custom mold ready for casting!
Sound too complicated to do it yourself? Book a tour with Cinema Makeup School to learn from professionals!
When you’re passionate about makeup, choosing the right educational path can be both exciting and overwhelming. Should you enroll in a cosmetology school and learn the art of beauty transformations, or dive into creating monsters, gore and fantasy characters at an SFX makeup school?
Both paths offer rewarding careers, but the skills, industries and opportunities they lead to are very different.
In this guide, we’ll break down everything you need to know about cosmetology makeup and special effects makeup so you can make the best choice for your goals.
What Kind of School is a Cosmetology School?
A cosmetology school is an educational institution that trains students in the professional application of beauty services. This includes makeup artistry, hair styling, skincare, manicures and more. Some programs may offer advanced courses in salon management or spa services.
Most cosmetology schools require a certain number of training hours to be eligible for state licensing exams, meaning your career often starts in regulated industries like salons, spas, or beauty counters.
Common Areas to Work as a Cosmetology Makeup Artist:
- Day & evening beauty makeup
- Hair cutting and coloring
- Skincare (facials, acne treatment, etc.)
- Nail technology
- Sanitation & safety practices
- State board preparation
What Is an SFX Makeup School?
A special effects makeup school specializes in teaching the art of makeup transformations for film, television, theater, theme parks and more. This is where students learn how to build monsters, creatures, zombies, prosthetics, wounds, fantasy characters and even animatronic effects.
SFX makeup training dives deep into sculpting, mold-making, prosthetic application, lifecasting and airbrush techniques. The focus is on storytelling through makeup, often using materials like latex, silicone, gelatin and foam.

Helpful insights on: How to Create Creature Design Using Latex, Silicone & Prosthetics?
Core Subjects in SFX Makeup School:
- Character and creature design
- Prosthetic sculpting & application
- Gore effects: wounds, burns, bruises
- Face casting and mold-making
- Hair punching & wig laying
- Airbrushing & painting techniques
- On-set and camera-ready practices
Differences Between Cosmetology and SFX Makeup Training
Let’s break down the most important differences so you can better understand which path suits your ambitions.
| Feature | Cosmetology School | SFX Makeup School |
|---|---|---|
| Main Focus | Beauty & personal grooming | Film, TV, theatrical & character makeup |
| Subjects | Hair, skin, nails, basic makeup | Prosthetics, FX wounds, fantasy design |
| Career Outcomes | Salon stylist, bridal MUA, skincare expert | SFX makeup artist, creature designer, film MUA |
| Tools Used | Brushes, foundations, skincare products | Latex, silicone, airbrushes, molds |
| Client Type | General public, brides, beauty clients | Production companies, filmmakers, haunted attractions |
Check Out: How Cinema Makeup School’s Bootcamps and Workshops Empower You to Master SFX Makeup?
How to Choose the Right School Based on Your Career Goals?
Before you commit to either a cosmetology school or an SFX makeup school, take a moment to map out your long-term vision. Where do you see yourself working in the next few years and what kind of artistry excites you most?
If your goal is to work directly with clients, helping them feel confident and beautiful through hair styling, skincare, or natural makeup, cosmetology school may be the right fit. It offers client interaction and practical techniques you’ll need to thrive in salons, spas, or bridal studios.
On the other hand, if you dream of working behind the scenes in film, television, or live entertainment – crafting blood effects, prosthetics, or fantasy characters, then SFX makeup school is the creative path that aligns with your ambitions. You’ll build a portfolio and focus on techniques like lifecasting, airbrushing and creature design.
Get to Know: What Do SFX Makeup Artists Use for Fake Blood?
Choosing the Right Path Based On:
Creative goals: Are you fulfilled by enhancing natural beauty, or do you want to create advanced looks required in film, TV and stage productions?
Income style: Do you prefer building a steady income as a licensed cosmetologist, or are you excited by project-based income as an SFX makeup artist?
Work environment: Would you enjoy forming long-term client relationships, or does collaborating with behind-the-scenes artists and production teams excite you more?
Interest in storytelling: Do you want to help someone look their best for real-life moments, or transform actors into otherworldly characters that drive a narrative?
Bonus Tip: Want to Truly Excel in SFX Makeup?
Cinema Makeup School, part of the Cinema Art College Corporation, is where serious artists come to push boundaries. In our special effects makeup course, students don’t just learn from books – they train with the best working MUAs in the industry. You’ll have the chance to showcase your work publicly, collaborate with artists from around the world and build a standout portfolio.
And if finances are holding you back? Don’t stress. We offer flexible financing options so money doesn’t stand in the way of your makeup dreams.
Enroll now and turn your dream of becoming an SFX makeup artist into reality!
Can You Learn Both?
Yes! Some artists choose to start with cosmetology makeup for a stable income base and later enroll in an SFX makeup school to expand their creative skills.
This combo opens doors to a wide range of freelance work – from bridal makeup on weekends to movie shoots during festival seasons.
Want a behind-the-scenes look at what you could be learning? Watch our student projects on YouTube!
Frequently Asked Questions:
Q 1. Which career path has better income potential: cosmetology or SFX makeup?
Both paths can be lucrative, but the income style is different. Cosmetologists often earn steady, client-based income through regular appointments, tips and retail commissions. SFX makeup artists usually work project-by-project, with the potential for higher pay per job, especially on film or commercial sets.
Q 2. Can I join a special effects makeup course without giving up my beauty clients?
Definitely. Many working beauty artists expand into SFX makeup to diversify their services. You can continue your bridal or salon work while learning SFX part-time or through:
Q 3. Do I need a portfolio for cosmetology or SFX makeup jobs?
A portfolio is valuable in both fields, but it’s primarily essential in special effects makeup. In cosmetology, employers often prioritize your license and client-handling skills. But in SFX makeup, your portfolio speaks for your talent, showcasing your ability to create prosthetics, wounds, creatures and transformations.
In special effects makeup, the key to creating lifelike prosthetics is starting with accuracy. When it comes to designing custom prosthetic pieces for the face, such as character transformations, wounds, or creature features, the process begins with a face cast.
From horror films to sci-fi series, character transformations often depend on perfectly fitting facial appliances. Without them, even the most talented MUA risks poor fits, warped designs, or awkward applications.
In this blog, we’ll walk you through why facial casting is important in SFX makeup and how to make one like a pro.
Let’s dive in.

What Is a Face Cast in SFX Makeup?
A face cast is a three-dimensional mold taken of a person’s face using materials like alginate and plaster bandages. The mold records even the finest features, such as skin texture, wrinkles and bone contours, resulting in an accurate replica of the actor’s face.
SFX makeup artists use this life-sized model to sculpt prosthetic pieces that fit precisely. That accuracy is crucial when building effects like:
- Prosthetic wounds and scars
- Creature masks or full-face appliances
- Aging transformations
- Hybrid or sci-fi characters
- Anatomical simulations
Unlike a one-size-fits-all approach, face model casting allows you to work with the unique geometry of a specific face, leading to more believable and comfortable results on set.
Why Is Face Casting Essential for Prosthetic Makeup?
Precision matters in prosthetic makeup. When a piece doesn’t align perfectly with the face, it can appear stiff, shift during movement, or even peel off mid-scene.
Here’s why a facial cast is so critical:
1. Custom Fit for Sculpting
Once you have a plaster copy of the actor’s face, you can sculpt directly onto it. That means the prosthetic will match facial contours perfectly – no guesswork.
2. Reduces On-Set Application Time
Custom-fit prosthetics are quicker to apply and require less adjustment. This is crucial on film sets, where every minute counts.
3. Comfort for the Performer
Poorly fitted prosthetics can be uncomfortable or even painful. A proper face cast helps avoid pressure points and skin irritation.
4. More Realistic Movement
A prosthetic built on a personalized face cast will move more naturally with the actor’s expressions, resulting in more immersive performances.
What You’ll Need: Tools and Materials
Creating a face cast isn’t expensive, but it does require specific materials to ensure safety and quality. Here’s a list of essentials used by industry professionals and students at top SFX schools.
Materials:
- Alginate – A fast-setting, skin-safe molding compound
- Plaster bandages – Used to form the sturdy outer layer, also known as the mother mold
- Bald cap or cling wrap – To cover hair
- Petroleum jelly or release cream – For eyebrows, lashes and beard hair
- Mixing bowl and spatula – For alginate prep
- Measuring cups & water spray bottle
- Straws (optional) – For nostril breathing
- Gloves, towels, cape and drop cloth – To keep things clean
- Hydrocal plaster or Ultracal – Used to create the final positive cast
- Silicone casting materials – For reusable molds
- Clay – To smooth surfaces before sculpting
Having everything ready before starting is crucial. Alginate sets fast and there’s no time to fumble once it’s on the face.
Step-by-Step: How to Create a Perfect Face Cast
Face casting is a detailed process that requires teamwork, patience and precision. It’s always a two-person job – one person to act as the model and another to apply the materials. Never attempt this alone, especially with someone inexperienced.
Step 1: Prepare the Subject
To begin, have your subject seated comfortably in a reclining chair. Their hair should be tied back and fully covered with a bald cap or plastic wrap to avoid interference with the molding materials. A thin layer of petroleum jelly or release agent should be applied to the eyebrows, eyelashes and any facial hair to prevent the alginate from sticking.
Drape a cape or towel over their shoulders to keep their clothing protected and to catch any drips. Most importantly, explain the entire process beforehand, especially the part about breathing through the nose. Ask the model to keep their eyes closed and face relaxed so the cast doesn’t pick up any unwanted lines, wrinkles, or muscle tension.

Step 2: Mix and Apply Alginate
Next, prepare the alginate by mixing it with cold water, following the instructions on the packaging. It sets quickly, so efficiency is key. Starting at the top of the forehead, begin applying the alginate downward across the face, using your hands or a spatula to smooth it over the contours of the cheeks, chin and around the mouth.
Always leave the nostrils open to ensure your subject can breathe easily. A consistent layer, about a quarter inch thick, ensures durability and captures skin detail effectively. Alginate is excellent at reproducing fine features, such as pores, wrinkles and bone structure, making it ideal for prosthetic makeup.
Step 3: Build the Support Shell (Mother Mold)
While the alginate is still flexible, a rigid outer shell, often called the mother mold, needs to be applied to hold its shape. This is done using plaster bandages that are dipped in water and layered across the face.
Overlapping the strips adds strength and at least two layers are recommended. It’s important to cover the entire alginate surface while keeping pressure minimal to avoid deforming the shape. The plaster sets in about 10 to 15 minutes, creating a sturdy casing that locks the negative mold in place.
Step 4: Demolding
After the shell has set, gently lift the edges of the plaster bandages to begin removal. Instruct the model to carefully move their face to loosen and detach the cast. The mold should then be lifted off the face slowly and in one clean motion.
Place the complete mold in a clean, secure area and inspect it for any thin areas, air bubbles, or missing details. These flaws can interfere with the accuracy of the final prosthetic piece.
Step 5: Create the 3D Face Copy for Sculpting
Once you’ve removed the mold from the model’s face, you’ll be left with a hollow shape that holds all the details of their features. This is what you’ll use to create a solid copy of the face. First, place the flexible alginate mold back into the hard plaster shell so it keeps its shape. Then, pour a thick plaster mixture, like Ultracal or Hydrocal, into the mold. Gently tilt and rotate it to make sure the material spreads evenly and fills every detail.
After it fully sets, usually within 30 to 60 minutes, peel off the outer layers. What you now have is a solid, life-sized copy of the person’s face. This 3D model will be your base for sculpting custom-fit prosthetics.
Watch this hands-on tutorial to see how professional prosthetics are made:
Common Face Casting Mistakes (and How to Avoid Them)
Even experienced artists can mess up a cast. Here’s what to watch out for:
| Mistake | Why It’s Bad | How to Fix It |
| Using expired alginate | Poor texture capture | Always check dates before use |
| Not applying release agents | Hair pulling or skin damage | Never skip jelly on lashes/brows |
| Leaving nostrils covered | Dangerous breathing risk | Always leave nose holes clear |
| Waiting too long to add plaster | Alginate shrinks or deforms | Apply plaster bandages immediately |
| Inconsistent alginate layer | Misshapen prosthetics | Apply quickly and evenly |
Take your time, the goal isn’t speed, it’s accuracy.
Related Blogs You Might Like:
- How to Apply Latex & Vinyl Bald Caps in Character Makeup
- SFX Burn Makeup Techniques Every Artist Should Know
- What Are Prosthetic Masks in Special Effects Makeup?
Face Cast vs. Life Cast: What’s the Difference?
Both terms come up often in SFX circles and they serve similar but distinct purposes.
A face cast focuses solely on the face and is typically used for creating facial prosthetics. This method is quicker to perform and requires fewer materials, making it ideal for projects that only involve the front of the head or facial features.
In contrast, a life cast involves molding the full head or other body parts. It is often used for more complex creations like creature suits, body armor, or other full-body effects. Because of its broader scope, it takes more time and demands more materials than a face cast.

Learn Face Casting Like a Pro at Cinema Makeup School
If you’re serious about mastering special effects makeup, Cinema Makeup School is where your journey begins. As part of the renowned Cinema Art College Corporation, we don’t just teach face casting; we train future professionals to excel in it.
Our Special Effects Makeup Course includes:
- Professional training in face casting and life casting
- Full workflow from casting to sculpting to final application
- Real-world, camera-ready projects
- Access to industry tools, instructors and materials
- Portfolio-building assignments that mimic real-world conditions
By the end of the course, our students don’t just understand prosthetic design, they can do it on deadline, on budget and on-camera.
Making a face cast may look intimidating, but once you understand the process, it becomes one of the most satisfying parts of SFX makeup artistry. It’s technical, tactile and totally transformative. Whether you’re sculpting a demon or designing a realistic wound, a great prosthetic begins with the perfect cast of face.
The beauty and film industries are evolving at lightning speed and behind every iconic character transformation is a skilled special effects (SFX) makeup artist. As the demand for highly trained professionals grows, so does the interest in educational routes that prepare aspiring artists for careers in this exhilarating field.
Whether you dream of crafting monsters for the silver screen or elevating runway looks with avant-garde designs, your journey begins with the right training.
Cinema Makeup School stands out as one of the best special effects makeup course providers, offering both diploma and certificate programs.
Yet many aspiring artists often face a common dilemma: “Which path should I choose – Diploma or Certificate?”
This guide will take you to a comparison of both options, highlighting key differences in curriculum, time commitment and cost to help you make a well-informed decision aligned with your goals.
Differences Between Diploma and Certificate Courses
| Feature | Diploma | Certificate |
| Depth of Learning | Full-spectrum training | Specialized focus |
| Duration | 18–28 weeks | 3–4 weeks |
| Career Preparation | Industry-ready, portfolio-driven | Skill enhancement or entry-level |
| Cost | Higher investment, full curriculum | Lower cost, focused learning |
| Includes Multiple Skills | Yes (beauty + SFX + digital) | No, only focused techniques |
| Certifies a Professional Diploma | Yes | Certificate of Completion |
Now let’s go through the offerings in our makeup artist certification and diploma tracks programs.
Core Tracks in Our Special Effects Makeup Diploma Course:
Our Diploma programs are built to deliver immersive, holistic training. These tracks are designed for individuals aiming to master the art and science of special effects makeup from every angle.
Each track includes a rich blend of disciplines, ranging from foundational beauty makeup and hairstyling to advanced special effects practices. Students explore:
Beauty Makeup, Photographic Hairstyling, Airbrush Makeup, Character Makeup, Prosthetic Makeup, Creature Maquette Sculpting, Digital FX, Special Effects Makeup, ZBrush, Advanced Beauty Theory and Advanced Lab Techniques.
This comprehensive curriculum ensures graduates are confident across both traditional and modern techniques.
Below are the core diploma tracks:
1. Complete Track Diploma
Duration: 28 Weeks | 1,030 Clock Hours
Tuition + Fees: $31,020
2. FX Track
Duration: 25 Weeks | 910 Clock Hours
Tuition + Fees: $27,640
3. Master Makeup Track
Duration: 18 Weeks | 630 Clock Hours
Tuition + Fees: $17,340
4. High Fashion Track
Duration: 6 Weeks | 210 Clock Hours
Tuition + Fees: $6,420
5. Creature Concept Design Track
Duration: 3 Weeks | 120 Clock Hours
Tuition + Fees: $3,085
Our SFX Makeup Artist Certification Program Includes:
Certificate programs are perfect for learners who want a deep dive into specific aspects of special effects makeup without the extended timeline of a diploma.
1. Character Makeup
Duration: 4 Weeks | 140 Clock Hours
Tuition + Fees: $5,090
Learn to sculpt and paint prosthetics while building a range of character looks. Training covers bald cap use, aging techniques, facial hair and injury effects for believable on-screen transformations.
2. Prosthetic Makeup
Duration: 4 Weeks | 140 Clock Hours
Tuition + Fees: $5,510
Sculpt facial appliances, create molds and work with silicone, gelatin and transfer methods. Finish with hands-on training in applying and painting realistic prosthetic pieces.
3. Special Effects Makeup
Duration: 4 Weeks | 140 Clock Hours
Tuition + Fees: $5,410
Learn to sculpt creatures, correct lifecasts and create foam latex appliances. Students also fabricate custom teeth, cast molds and apply painted prosthetics for lifelike FX results.
4. Advanced Lab Techniques
Duration: 4 Weeks | 120 Clock Hours
Tuition + Fees: $7,300
Refine advanced skills in mold-making, silicone casting and painting. Learn hair punching, patching and crafting realistic eyes for high-detail SFX work.
5. Advanced Beauty Theory
Duration: 3 Weeks | 120 Clock Hours
Tuition + Fees: $3,310
Master styles in drag, fashion and editorial makeup. Enhance airbrush control for tattoo and stencil effects, while refining prosthetic and corrective techniques for high-impact looks.
While certificate courses are shorter, the training is intense, hands-on and industry-aligned.
Don’t Miss: How Cinema Makeup School’s Bootcamps and Workshops Empower You to Master SFX Makeup?
Time, Budget and Flexibility: Practical Factors
Diploma programs demand more time and financial investment, but the payoff is a broad, versatile education. These programs typically span 3 to 7 months and include extensive practice hours.
Certificate programs, with their 3 – 4 week formats, offer flexibility and lower upfront costs. This makes them an excellent entry point or an add-on for working professionals.
| Program Type | Duration | Avg Cost (Total) | Best For |
| Diploma | 3 to 7 months | $17,000–$31,000 | Career changers, full-time students |
| Certificate | 3 to 4 weeks | $3,000–$7,000 | Upskilling, niche specialization |
Which Path Should You Choose?
Ultimately, the best choice depends on your professional goals and how deeply you wish to immerse yourself in special effects makeup.
Choose a Diploma Program if you:
- Want a complete education with broad applications
- Are starting fresh or changing careers
- Have time and resources to invest
- Want to create a diverse, high-end portfolio
Choose a Certificate Program if you:
- Want to sharpen specific skills quickly
- Are already working and need a flexible option
- Prefer a lower upfront investment
Also read, 8 Killer SFX Makeup Looks You Should Try To Become a Pro MUA
Why Cinema Makeup School Is the Ideal Place For Special Effects Makeup Course?
Backed by the legacy of Cinema Art College Corporation, Cinema Makeup School is where foundational training transforms into high-level artistry through immersive, professional instruction.

While different makeup schools offer varying diploma and certificate curricula to meet distinct educational goals, we provide both depth and flexibility. Our programs are not only structured to train, but also to launch your career in the makeup industry.
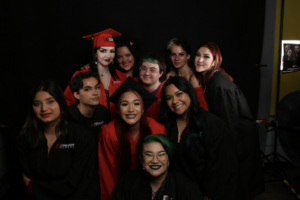
With a 92% graduation rate and over 10,000 alumni worldwide, we’ve established a proven path to success for makeup professionals.
Whether it’s mastering the fine details of prosthetic sculpting or bringing digital creatures to life, our hands-on approach and expert instructors set our graduates apart.
Enroll now if you want to gain real-world experience with camera-ready looks and access to one of the strongest networks in the industry.
Check out: How Cinema Makeup School’s SFX Makeup Course Brings Seasonal Characters to Life?
Both diploma and certificate courses offer valuable experiences; the right choice depends on your goals. A diploma gives you a launchpad into the industry. A certificate gives you sharp skills with less time and cost.
Few things scream horror, trauma, or Halloween drama quite like a gruesome set of fake stitches. For creating stitched lips, a Frankenstein-inspired scar, or cosplay staples that look disturbingly real, the art of fake stitches with makeup is one of the most effective SFX tricks in your arsenal.
In this blog, we’ll walk you through how to make fake stitches with makeup step by step. We’ll explore various methods, materials and pro techniques used by top special effects makeup artists.
Why Fake Stitch Makeup Is a Must-Have Skill?
Fake stitches makeup isn’t just a Halloween trend; it’s a staple in horror films, crime dramas, cosplay conventions and even music videos. The versatility of stitches, clean surgical lines, crude thread pulls, or rusty wire staples lets you tell an entire story on the skin.
Popular types include:
- Stitched Lips Makeup
Turn silence into a statement. This eerie effect creates the illusion of sewn-shut lips, perfect for haunted characters, cursed beings, or freak show aesthetics. It’s shocking, dramatic and instantly memorable. - Stitched Face Makeup
From forehead scars to jawline closures, stitched face makeup helps craft Frankenstein monsters, undead creatures, or post-surgery sci-fi hybrids. It’s ideal for both horror and body modification looks. - Fake Staples for Cosplay
Metallic, gritty and painful-looking, fake staples simulate high-tech injuries or military repairs. Think androids, war survivors, or cyberpunk rebels patched together after battle. - Stitches Halloween Makeup
Want a versatile horror look? Combine stitches with clown designs, doll faces, or melting skin effects. This style gives you endless freedom to be creative, creepy, or even cute-grotesque.
Materials You’ll Need to Create Fake Stitches
Before we dive into the step-by-step, gather your tools. Here’s what the pros typically use for creating realistic stitched skin:
Essential SFX Kit:
| Product | Purpose |
| Liquid latex or scar wax | To build and shape the raised wound areas |
| Foundation and face paint | To blend fake skin into your real skin tone |
| Fake blood | Adds a fresh or clotted wound effect |
| Cotton or tissue | For texture and depth |
| Spirit gum or pros-aide | For adhering thread or staples |
| Thread, yarn, or dental floss | For creating the actual stitches or staples |
| Alcohol-activated palette | To color bruises, shadows and healing tones |
| Tweezers or a sculpting tool | To create stitch holes |
Caution: Always test materials on a small skin patch to avoid allergic reactions.
Step-by-Step: How to Make Fake Stitches With Makeup
Creating realistic stitched effects isn’t just about gluing thread to skin; it’s about storytelling through texture, shape and color. Here’s a complete guide to excel in this powerful SFX technique:
Step 1: Prep the Skin
Start with clean, dry skin. Oils, dirt, or leftover makeup can weaken your materials and cause peeling or discomfort.
- For face or lip applications, gently exfoliate using a soft scrub.
- Apply a light moisturizer or barrier spray to protect sensitive skin, especially around the lips or eyes.
- Optional: Apply a thin layer of castor seal over your skin if using wax. It helps products stick better and gives you an even surface to work on.
Pro Tip: Mark your stitch zone lightly with tape or eye pencil to avoid placement mistakes.
Step 2: Sketch the Wound Shape and Stitch Pattern
Use a white eyeliner pencil to map out the shape and placement of the wound and stitches.
- Draw a central cut or gash where the “wound” will be.
- Lightly mark where each stitch entry and exit point will go, spacing them about 0.5–1 cm apart, depending on the desired style.
- Keep your lines asymmetrical for horror or trauma themes and straight & clean for surgical or sci-fi looks.
Think of this as the blueprint; spacing and direction matter, especially in stitched lips or surgical themes.
Step 3: Build Up Skin Texture With Latex or Wax
Use liquid latex, scar wax, or gelatin to create realistic raised skin around the wound. Each gives a slightly different finish:
- Latex: Ideal for flexible areas (face, hands). Apply in thin layers with a sponge and dry between coats.
- Scar wax: Best for controlling shape & sculpting deep ridges. Use a spatula or fingers.
- Gelatin: Perfect for organic, uneven wound textures. Heat slightly and shape with a brush or stick.
Technique:
- Apply your base product along the wound outline.
- Use a spatula or wet fingers to feather edges into the skin.
- Press small pieces of cotton or tissue into the latex to add volume or simulate ripped flesh.
- Sculpt raised edges or ridges with your tool; these simulate trauma and tension in the skin.
Step 4: Paint for Realism
Once your texture is dry, it’s time to color the wound and surrounding skin for realism and depth.
Start by applying your foundation or base paint over the prosthetic to blend with your natural skin tone.
Then, layer in the drama:
| Color Palette | Usage |
| Deep red + burgundy | Fresh blood, inner wound tissue |
| Blue + purple | Bruising, oxygen loss, trauma |
| Green + yellow | Aged or infected wounds |
| Brown + black | Scabbing, dirt, or dried blood |
Use stippling techniques for a natural mottled look. Alcohol-activated paints offer translucent layering and water resistance, ideal for detailed bruising and blending.
Recommendation: Use small brushes for detail and sponges for mottling or fading edges. Add depth using shadows around the wound edges.
Step 5: Add the Stitches or Staples
Now, turn that painted gash into a stitched masterpiece.
For Traditional Thread Stitches:
- Cut black thread, dental floss, or yarn into short lengths (1–2 inches).
- Carefully position the threads across the wound using tweezers for precision.
- Glue each end into the wound edge using spirit gum or Pros-Aide.
- Push them slightly into the latex to mimic skin being pulled tight by the thread.
For Cross-Stitches or Decorative Looks:
- Crisscross threads over the gash for a stylized, stitched-up aesthetic.
- You can create Xs, zig-zags, or even patterned stitches depending on your character.
For Fake Staples:
- Trim small segments of wire or toothpicks, each about 1 to 1.5 cm long.
- Paint them metallic gray or silver.
- Glue into place parallel across the wound using spirit gum.
Useful Tip: Vary thread tension and angle slightly for a distressed, painful look. Use a thinner thread for surgical realism and a thicker thread for horror or fantasy.
Step 6: Add Blood, Bruising & Final Details
Drip or dab fresh fake blood into and around the wound to create a lifelike appearance. For oozing effects, allow the blood to run naturally from the stitches, giving a freshly torn look.
To simulate clotted or dried blood, apply a thicker blood paste or a DIY mix of corn syrup and cocoa powder. Enhance the trauma by stippled bruising, blend deep red and purple shades outward from the wound using a sponge for a realistic gradient.
For added depth, apply rigid collodion beside the stitches to create puckered, indented scar tissue that mimics the skin being pulled tight by tension.
Balance is key: enough blood to look fresh or nasty, but not so much that it hides your stitching work.
Related Article: What Do SFX Makeup Artists Use for Fake Blood?
Optional: Seal and Set
- Once your look is complete, use a setting spray to keep everything in place, especially for long shoots or Halloween parties.
- Use fixative sprays over thread or staples to ensure durability.
- For HD photography, lightly powder over shiny areas to reduce glare.
Suggested Readings:
SFX Burn Makeup Techniques Every Artist Should Know
How to Apply Latex & Vinyl Bald Caps in Character Makeup
What Are Prosthetic Masks in Special Effects Makeup?
Common Mistakes to Avoid While Applying Stitch Makeup
Applying fake stitch makeup takes precision. From blood placement and blending to stitch spacing and adhesive choice, even small missteps can ruin the realism. Here’s a quick breakdown of the most common mistakes to avoid for a clean, believable result:
- A) Overusing blood: Too much fake blood can hide your stitch details.
- B) Poor blending: Make sure latex edges fade naturally into the skin.
- C) Unrealistic spacing: Stitches too close or far apart can ruin believability.
- D) Using the wrong adhesive: Spirit gum is best for prosthetics and threads; don’t rely on regular glue.
Watch our students bring cinematic makeup to life.
Want to Take Your Special Effects Makeup Skills from Good to Gory Great?
If you’ve made it this far, chances are you don’t just want to copy a Halloween tutorial; you want to master the real craft. That’s where Cinema Makeup School comes in.
As a part of Cinema Art College Corporation, we don’t just teach stitches, we teach transformation.
From stitched lips to full creature builds, our industry-led courses cover SFX makeup, prosthetics, character creation, beauty and beyond. You’ll learn in a real studio environment, using Pro Tools and working alongside artists who’ve designed monsters for the big screen.
If you’re serious about bringing your makeup dreams to life, enroll now.
Practice, experiment and don’t be afraid to get a little messy, because the best SFX looks are the ones that make people do a double-take.
Special effects makeup is where imagination meets realism. From transforming actors into terrifying creatures to creating lifelike wounds, burns, or aliens, SFX makeup is a vital force in entertainment and beyond. But what happens after you master the craft? What career paths open up for a skilled special effects makeup artist?
In this blog, we’ll dive deep into the best special effects makeup artist jobs, covering industry roles, job types, educational paths and how to position yourself in this competitive but thrilling field.
Why Is Special Effects Makeup More Than Just Makeup?
Before we dive into careers, it’s important to understand that special effects makeup artistry goes far beyond basic beauty applications.
It includes prosthetics, creature design, animatronics, gore effects, fantasy makeup and more. SFX makeup artists often use skills like sculpture, painting, mold-making, digital design and even medical science.
This field is for those who don’t just want to beautify a face, they want to transform reality.
Where Do Special Effects Makeup Artists Work?
You’ll find special FX makeup artists behind the scenes of:
- Hollywood Films and Independent Cinema
- Television Shows (especially horror, sci-fi and fantasy genres)
- Theatre Productions
- Haunted Attractions & Theme Parks
- Commercials
- Fashion Shows & Editorials
- Music Videos
- Cosplay & Live Events
- Medical Training Simulations
Top Special Effects Makeup Artist Jobs
Looking to turn your creativity into a full-time career? There are a variety of job roles in the field of special effects makeup across film, TV, live events, theme parks, medical fields and even cosplay culture. Here are the top job opportunities every aspiring SFX makeup artist should know about:
1. Film and TV
Professionals work on movie and television sets to create everything from realistic injuries to full creature transformations. The role involves long hours, tight deadlines and collaboration with directors, costume designers and special effects teams.
Job Highlights:
- On-set makeup for actors and stunt doubles
- Prosthetic application and blending
- Blood, wounds, burns and aging effects
- Continuity maintenance during multi-day shoots
Most SFX makeup artists in film start as assistants or interns before getting lead roles.
2. Prosthetic Designer and Fabricator
This behind-the-scenes job focuses on designing and building prosthetics used by actors or models. These professionals typically work in special effects studios or run freelance fabrication workshops.
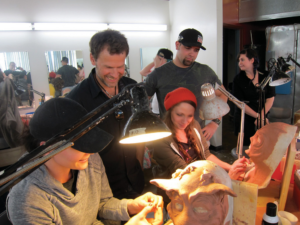
Job Responsibilities:
- Sculpting prosthetics in clay or digitally
- Mold-making and casting techniques
- Crafting detailed prosthetics tailored to the needs of specific characters or production requirements
- Collaborating with makeup departments and effects supervisors to ensure proper fit and realism
This is a vital role in productions that require fantasy characters, aliens, monsters, or injury simulation.
3. Character and Creature Designer
This role combines concept art, anatomy knowledge and creativity to design unique characters for films, theme parks and video games. It’s a visual development position that may overlap with digital art and sculpting.
Key Aspects of the Job:
- Developing visual concepts for characters
- Sculpting maquettes or digital 3D models
- Coordinating with production designers and SFX teams to ensure character designs translate seamlessly from concept to screen
Great for artists who love storytelling through creature design.
4. Theme Park SFX Makeup Technician
Theme parks like Universal Studios, Disneyland and Halloween horror attractions hire SFX artists for seasonal and full-time roles. This job involves applying reusable character makeup and prosthetics to dozens of performers each day.
Common Tasks:
- Quick-turnaround prosthetic application
- Touch-ups and makeup maintenance
- Reusing and sanitizing foam/silicone prosthetics
- Occasionally assisting with props or set decor
5. Medical Simulation and Forensic Makeup Specialist
These MUAs apply their special effects makeup techniques to create lifelike injuries and medical conditions for training simulations used by healthcare, emergency and military teams. They help create lifelike injuries and conditions for high-stakes training.
Typical Job Duties:
- Simulating trauma (wounds, burns, amputations)
- Applying effects on mannequins or live actors
- Designing reusable prosthetics for training dummies
- Working with hospitals, EMS, or academic institutions
This growing field blends makeup artistry with education and healthcare impact.
6. Cosplay and Convention SFX Specialist
As cosplay becomes more professionalized, many SFX makeup artists are hired to help build character looks for conventions, social media and brand collaborations. Some also take commissions or teach cosplay-specific makeup techniques.
Job Opportunities:
- Commission-based prosthetic application and costume support
- Brand sponsorships or event appearances
- Content creation for YouTube, Instagram, or TikTok
- Teaching workshops at pop-culture expos or online
Many successful cosplay artists also launch their own product lines or training courses.
7. Freelance Special Effects Makeup Artist
Freelance artists work across a wide range of projects, including indie films, commercials, music videos, photoshoots, live performances and corporate events. This path offers flexibility but requires hustle, networking and a strong portfolio.
What to Expect:
- Wide variety of projects and clients
- Managing your own rates and availability
- Building long-term client relationships
- Opportunity to scale into your studio
8. SFX Makeup Instructor or Workshop Trainer
After years of experience, many professionals move into education. You can teach at special effects makeup schools, offer your own bootcamps, or build an online course platform for learners worldwide.
Key Benefits:
- Stable income and flexible teaching hours
- Opportunities to influence and mentor new artists
- Great for building your brand and reputation
- Potential to launch your own school or YouTube education channel
Ideal for artists who love sharing knowledge and shaping the next generation of talent.
More Helpful Blogs:
Top 5 Tips for Beginner Makeup Artists
Top 6 Trends in the Makeup Industry 2025
How to Become a Freelance Makeup Artist – Complete Guide
Education & Training: Where to Begin?
Now that you’ve explored the top SFX makeup jobs, it’s time to talk about how to get there. Each of these roles requires specialized training, technical skill and hands-on experience. But with so many special effects makeup schools out there, where should you start?
Cinema Makeup School, part of the prestigious Cinema Art College Corporation, stands out from the rest with comprehensive & industry-driven programs.

- Training with industry-standard tools and techniques
- Mentorship from award-winning professionals
- Networking with leading artists and studios
- Hands-on projects and portfolio development
- Strong industry reputation and alumni success stories
Whether you want to work in film, fashion, or cosplay culture, we give you the foundation to launch your SFX career.
Types of Makeup Artistry (and Where SFX Fits In)
While “makeup artist” is a broad term, special effects makeup falls under a unique category of character-driven transformation. Here’s how it differs from other types:
| Type of Makeup Artistry | Focus Area |
|---|---|
| Beauty Makeup | Glamour, weddings, editorial |
| Fashion Makeup | Runways, magazines |
| Theatrical Makeup | Stage visibility, character depth |
| Special Effects Makeup | Prosthetics, wounds, fantasy, monsters |
| Creature Design | Conceptual sculpting and builds |
| Airbrush Makeup | Film, TV, body art |
SFX artists often cross into multiple categories, making their skills incredibly versatile.
What to Expect in SFX Makeup Jobs:
SFX makeup careers start modestly but grow with experience and networking. No matter if you choose freelance freedom or studio stability, success depends on strong relationships, a solid portfolio and the ability to handle travel, long hours and tight deadlines.
- Entry-level pay may be modest, but with skill and persistence, your value (and rates) increase over time.
- Freelance flexibility vs. studio consistency is a personal choice.
- Jobs often arise from networking, social media and strong portfolios.
- Build relationships with directors, costume departments and other artists.
- Be ready to travel – jobs might take you to different cities, sets, or even countries, depending on the project.
- Deadlines can be intense – many shoots involve early call times, long hours and quick turnarounds.
The career options for special effects makeup artists are far more diverse than most imagine. Whether you dream of Hollywood sets, haunted mazes, or educational simulations, the skills you learn can take you there.
So, if you’re ready to turn brushes and prosthetics into a powerful career, now’s the time. With a blend of artistry, discipline and professional training, your path could be both creatively fulfilling and financially rewarding.