Cosplay is all about bringing characters to life and one of the most powerful ways to do that is with horns. Whether you’re creating a fawn, monster, dragon, or any other fantasy character, horns instantly make your character look more dramatic and believable.
Cosplayers think making horns is complicated, but the process can be simple and fun with the right approach. In this guide, we’ll walk through everything you need to know about making horns for cosplay – from materials and sculpting methods to painting, finishing and attaching them securely for long wear.

What Makes Horns Essential for Cosplay Events?
Horns play a critical role in cosplay by serving as defining visual elements that establish a character’s identity and presence. In many fantasy and mythical designs, the horns are the primary feature that communicates the character’s essence at a glance.
From a practical standpoint, horns contribute to visual storytelling. Their shape, size and orientation can suggest personality traits, power dynamics, or magical abilities, allowing cosplayers to convey character intent without words. When combined with special effects makeup, horns integrate seamlessly with facial prosthetics, contouring and texture work, creating a cohesive and believable transformation.
Furthermore, horns make your character’s shape and outline more noticeable, which is especially important at conventions or on stage. Well-designed horns draw attention and create dynamic lines that make the character more memorable in photographs and during live interactions.
Materials You’ll Need to Make Creature & Monster Horns for Cosplay
Before you start crafting horns, it’s important to gather the right materials. The tools and supplies you choose will affect the weight, durability and final look of your horns. From basic sculpting materials to paints and adhesives, having the right items on hand ensures your horns are not only realistic but also comfortable and long-lasting.
Sculpting Materials
- Aluminum foil – Creates a lightweight base for building horn shapes.
- Air-dry clay – Easy to sculpt and hardens without baking.
- Polymer clay (e.g., Sculpey) – Durable clay that bakes solid for detailed horns.
- Foam (EVA or craft foam) – Lightweight and flexible, great for larger horns.
- Worbla or thermoplastics – Heat-moldable plastics for advanced, durable designs.
Materials for Detailing & Painting
- Acrylic paints – Reliable paints for base coats and shading.
- Dry brushing tools – Add texture and highlights to bring the horns to life.
- Metallic/iridescent pigments – Create magical or fantasy-style finishes.
Horns Attachment Tools
- Spirit gum or Pros-Aide – Skin-safe adhesives for small horns.
- Elastic headbands or hair clips – Easy ways to secure horns under wigs.
- Latex or silicone blends – Blend horn bases seamlessly into skin.
Foam Latex vs Silicone: Choosing the Right Material for SFX Prosthetics
Step-by-Step Guide: How to Make Cosplay Horns?
Creating cosplay horns can range from simple, beginner-friendly designs to advanced, professional-level pieces. The method you choose depends on your experience, the desired realism and how long you plan to wear the horns. In the sections below, we break down three popular approaches – from lightweight foil and clay, to flexible foam, to high-detail latex or silicone horns – so you can pick the technique that fits your cosplay goals and skill level.
Method 1: Lightweight Foil & Clay Horns (Beginner-Friendly)
Perfect for beginners who want realistic results without heavy tools.
Step 1: Shape the Base: Start by taking a ball of aluminum foil and rolling it into a cone or spiral shape. This will act as the core of your horn, keeping it strong yet lightweight. Using foil ensures your horns won’t be too heavy to wear comfortably during a full day of cosplay.
Step 2: Cover with Clay: Once you have your foil base, wrap it in air-dry clay or polymer clay. Smooth the surface and add texture by sculpting ridges, spirals, or cracks. This is where you can get creative, giving your horns the look of twisted wood, jagged bone, or rough stone, depending on your character.
Step 3: Harden the Clay: If you’re using polymer clay, follow the baking instructions on the package to harden your horns. Air-dry clay doesn’t need baking, but you’ll need to let it sit for about 24–48 hours until it’s completely solid. Patience here ensures your horns won’t crack later.
Step 4: Paint the Horns: Once hardened, it’s time to paint. Start with a dark base coat – black, deep brown, or dark gray works best for depth. After the base is dry, use lighter shades and dry brushing techniques to highlight the ridges and textures. This layering will give your horns a realistic, three-dimensional finish.
Check out the guide: What Kind of Clay Is Best for SFX Sculpting?
Method 2: Foam Horns (Lightweight & Comfortable)
Foam horns are a favorite among cosplayers because they’re extremely light, flexible and easy to wear for hours without strain.
Step 1: Cut & Shape Foam: Start by using EVA or craft foam sheets. Roll them into cone-like shapes or carve them with a craft knife to create curves and points. Foam is flexible, so you can easily experiment with different horn styles.
Step 2: Heat for a perfect Shape (Optional): If you want more natural curves, gently heat the foam with a heat gun or hairdryer. This makes it soft enough to bend and mold. Hold it in the desired shape until it cools and sets.
Step 3: Seal & Paint: Apply a thin layer of sealant, such as white glue or a flexible coating, to smooth out the foam’s texture and prepare it for painting. Once dry, use water-based paints or craft paints to build up a base tone, then layer shadows and highlights for a realistic or fantasy finish.
Step 4: Attach: Before sealing completely, fix a headband, clips, or elastic into the base of the horns. This ensures they stay secure when worn and remain comfortable throughout your cosplay event.
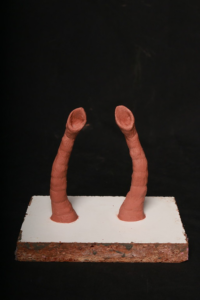
Method 3: Latex or Silicone Horns (Advanced Special Effects Makeup Approach)
If you’re aiming for a truly professional finish that looks like it came straight from a movie set, latex or silicone horns are the way to go. This technique requires more tools and patience but delivers the most realistic results.
Step 1: Sculpt the Horns: Start by sculpting your desired horn shape with oil-based clay. This gives you freedom to experiment with ridges, curves, or spirals until the design feels right for your creature.
Step 2: Create a Mold: Once the sculpt is ready, build a two-part mold around it using plaster or silicone molding material. This captures every detail of your sculpt and allows you to produce identical horns for both sides.
Step 3: Cast the Horns: Pour liquid latex or silicone into the mold and let it cure completely. The material will form a flexible yet durable horn that’s lightweight and comfortable to wear.
Step 4: Blend with Makeup: Attach the horns to your skin using a safe adhesive. Then blend the edges with liquid latex or a similar product so they transition smoothly into your own skin. Finally, apply foundation, powders, or contouring techniques to match your natural complexion or your character’s design.
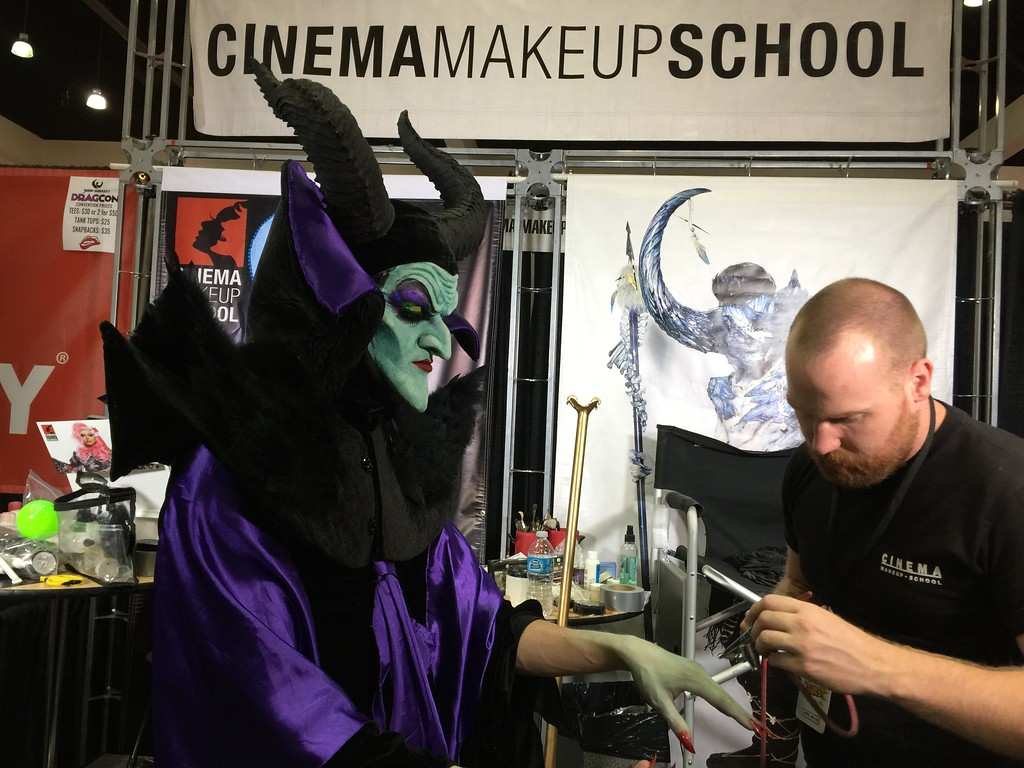
This advanced method is widely used in film, theater and professional cosplay, where realism and durability are crucial.
Learn Why Every Serious Makeup Artist Should Learn Mold-Making Techniques
How Cinema Makeup School Helps You Create Perfect Horns for Cosplays?
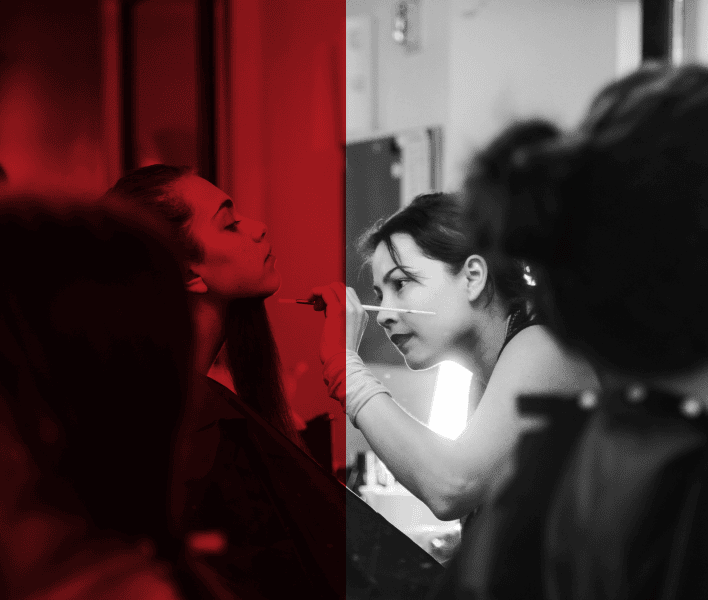
Want to skip that embarrassing moment when you tried making creature or monster horns on your own and ended up with a crooked or distorted result? Join Cinema Makeup School. Here, every student learns directly from experienced SFX instructors who guide you step by step, so you understand not just the “how,” but the “why” behind each technique.
Beyond horns, our special effects makeup course covers the full range of creature and character design skills. You’ll get hands-on experience with sculpting, prosthetics, latex and silicone applications, painting, texturing and blending techniques that bring characters to life. Each project is designed to reflect real-world work, giving you the confidence to create believable and professional SFX creations.
At our special effects makeup school, you’ll learn to avoid common beginner mistakes while gaining insider tips and practical skills that professionals use in film, theater and cosplay. From wounds and burns to creatures, monsters and fantasy designs, our courses ensure you can execute every idea with precision and creativity.
Cinema Makeup School graduate Jose Davalos shares his cosplay journey in this video!
Different Mythical Creatures With Horns to Spark Your Cosplay Ideas
1) Fauns/Satyrs: Short, spiraled horns inspired by Greek mythology.
2) Monsters: Large, intimidating horns, often curved or ridged.

3) Dragons: Jagged, sharp horns with scales or spikes.
4) Unicorns: Elegant, spiraled single horn, usually with glitter or shimmer.
5) Minotaurs: Thick, bull-like horns that emphasize strength.
Adding unique textures like cracks, moss, or metallic finishes can make your creature feel even more alive.
Book a tour of our SFX Makeup School in Los Angeles, California and start your journey into professional makeup artistry today!