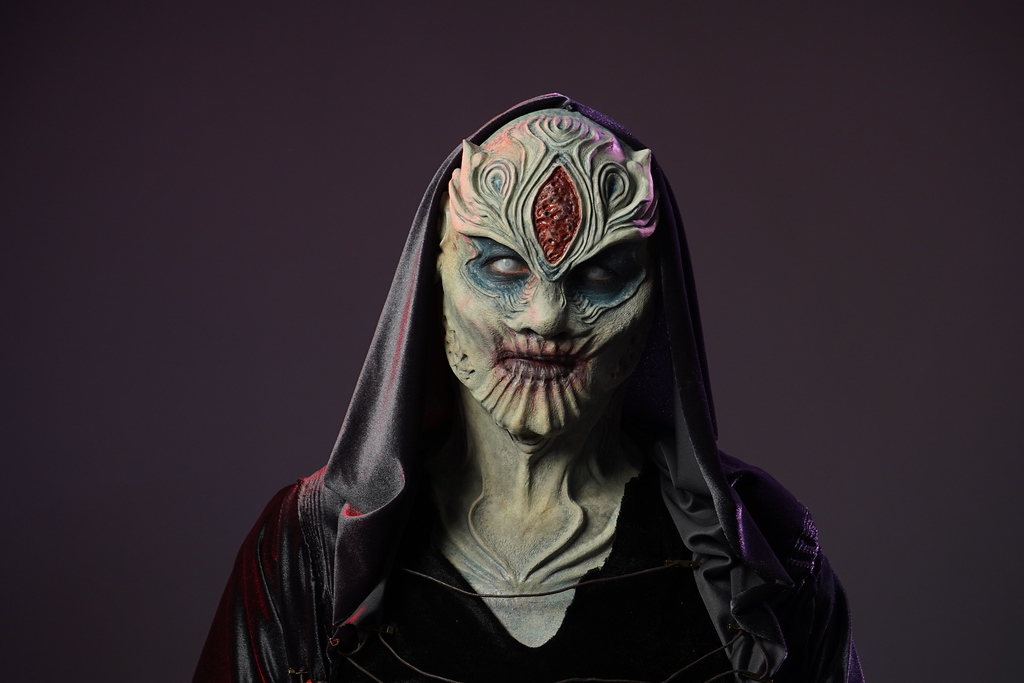
Third eye designs have become one of the most recognizable concepts in creature design, fantasy makeup, cosplay and surreal character creation. From mystical beings and sci-fi creatures to horror mutations, a well-sculpted third eye prosthetic instantly changes the visual identity of a character.
But creating this look is more than simply placing an eyeball on the forehead. The sculpt must follow facial anatomy, natural skin movement, symmetry, and realistic blending techniques so the appliance looks integrated into the skin instead of glued on top.
In professional SFX makeup, artists use sculpting, mold-making, texturing, and painting techniques used in film and television. In this guide, we will break down the entire process step-by-step to help aspiring SFX artists create realistic and professionally finished third eye prosthetics.
What Is a Third Eye Prosthetic?

A third eye prosthetic is a custom-made special effects appliance designed to create the illusion of an additional eye on the forehead or another area of the face. It can be realistic, alien-inspired, mystical, mutated, or horror-themed, depending on the character design.
The prosthetic is usually sculpted in clay, molded, and cast in materials such as:
- Silicone
- Foam latex
- Gelatin
- Latex
Professional artists often combine prosthetics with paint, veins, textures, and fake skin transitions to create a believable effect on camera.
Key Anatomical Areas to Study for Sculpting a Third Eye Prosthetic
- Brow Ridge Structure: The brow bone creates natural depth on the upper face. A third eye sculpt should work with this structure instead of fighting against it.
- Forehead Curvature: The forehead curves outward slightly, so the prosthetic base must match this shape for proper blending and comfort.
- Skin Movement: The forehead stretches and folds during facial expressions. If the sculpt is too rigid or bulky, the appliance may wrinkle unnaturally or lift during application.
- Eye Proportions: The third eye should still follow realistic eye proportions, including eyelid thickness, tear duct placement and surrounding skin forms.
Tip: From anatomy studies to realistic prosthetic blending, these skills are taught through hands-on training at Cinema Makeup School. Prospective students can also book a campus tour to experience the classrooms, labs, and creative environment firsthand.
Tools and Materials Needed to Sculpt a Third Eye Prosthetic
| Sculpting Materials |
Oil-based clay Water-based clay Monster clay |
| Sculpting Tools |
Loop tools Rake tools Silicone shapers Dental tools Texture sponges Fine detail tools |
| Life Casting Supplies |
Alginate Plaster bandages Ultracal or plaster |
| Mold-Making Supplies |
Silicone rubber Fiberglass mother mold Ultracal mold material |
| Casting Materials |
Silicone Foam latex Gelatin Latex |
| Painting Supplies |
Alcohol paints Rubber mask, grease paint Airbrush colors Skin Illustrator palettes |
Step-by-Step Guide to Sculpt a Third Eye Prosthetic
Creating a realistic third eye prosthetic involves multiple stages, from anatomy study and life casting to sculpting, mold-making, texturing, and final application. Each step plays an important role in making the prosthetic look naturally integrated into the skin instead of appearing like a separate appliance. Below is a step-by-step breakdown of the professional sculpting process used in film and television SFX makeup.
Step 1: Prepare a Life Cast
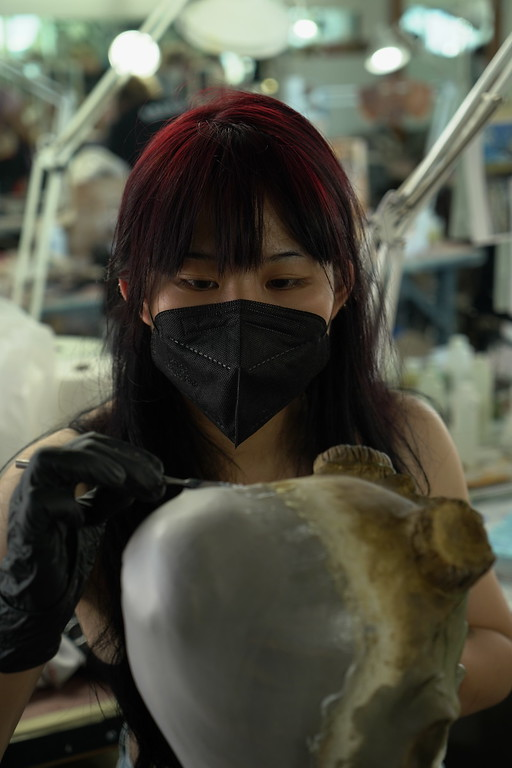
Start by preparing a life cast of the actor or model. A life cast gives you an accurate surface to sculpt on and helps the appliance fit naturally against the face. Since the forehead contains curves and subtle asymmetry, sculpting directly on a flat surface can lead to poor-fitting results.
Most SFX artists create a positive cast using alginate, plaster bandages and Ultracal so they can build the prosthetic with proper facial proportions.
Learn How to Make a Face Cast That Fits Perfectly for Prosthetic Makeup.
Step 2: Design and Mark the Placement
Before adding clay, decide exactly where the third eye will sit on the forehead. Placement affects the overall realism and balance of the design.
A centered eye usually creates a mystical or symmetrical appearance, while an off-center placement can create a mutated or creature-inspired look. At this stage, artists often sketch the outline directly onto the life cast to visualize the final shape and size of the prosthetic.
Step 3: Block Out the Main Shapes
Start sculpting by building large forms first. Do not focus on details immediately.
Begin With:
- Eye socket shape
- Eyelid thickness
- Forehead transition
- Raised skin around the eye
At this stage, think about structure instead of texture. Professional sculptors constantly check the side profile, symmetry, depth and edge thickness to ensure the prosthetic looks balanced and blends naturally with the face.
The eye should appear embedded beneath the skin rather than attached on top.
Step 4: Sculpt the Eyelids and Surrounding Forms
After the primary structure is complete, sculpt the eyelids and surrounding skin folds. The eyelids are one of the most important parts of realistic third eye SFX makeup because they determine how natural the prosthetic appears on camera.
The upper lid should slightly overlap the lower lid and the surrounding skin should show subtle folds and transitions. Artists often study real human eyes during this stage to understand how skin naturally wraps around the eyeball.
Step 5: Blend the Prosthetic Into the Forehead
A successful prosthetic should look like part of the skin instead of a separate piece attached to the face. During this stage, the clay is gradually blended outward into the forehead to create smooth transitions.
The edges are thinned carefully so they disappear more easily during application. This blending process is essential for achieving professional-quality results, especially under high-definition cameras and studio lighting.
Step 6: Add Skin Texture and Organic Details
Once the sculpted forms are finalized, surface detailing begins. Skin texture helps the prosthetic look organic and realistic. Artists add pores, wrinkles, fine lines and subtle imperfections directly into the clay using texture tools and sponges.
Depending on the character design, additional effects such as veins, stretched skin, scars, cracks, or irritated flesh can also be sculpted into the appliance to make the third eye appear biologically connected to the face.
Step 7: Refine the Sculpt and Check Symmetry
Before molding the prosthetic, carefully inspect the entire sculpture from multiple angles. At this stage, artists refine uneven areas, clean up transitions and check facial symmetry. Even horror or creature prosthetics need controlled proportions to remain believable. Small adjustments made during refinement can dramatically improve the final appearance once the prosthetic is cast and painted.
Step 8: Mold and Cast the Prosthetic
After the sculpt is completed, the next step is creating a mold. The mold captures every detail from the sculpture, including pores and fine textures.
Once the mold cures, the prosthetic can be cast using silicone, foam latex, gelatin, or another material, depending on the desired effect. Silicone is commonly used in film and television because it moves naturally and closely resembles real skin.
Also read Why Your Sculpt Looks Great in Clay but Fails in Mold.
Step 9: Paint and Apply the Prosthetic
The final stage is painting and applying the prosthetic onto the actor. Skin tones, veins, shadows, highlights and texture coloration are added to make the appliance appear realistic on camera. During application, professional adhesives are used to secure the prosthetic while carefully blending the edges into the skin.
Once completed, the third eye becomes fully integrated into the makeup design, creating a finished cinematic transformation.
Related Articles –
How to Create a Facial Distortion Effect with SFX Makeup?
How SFX Artists Build & Apply Ear Prosthetics?
What are Stippling Techniques in SFX Makeup?
Learn Professional Sculpting Techniques for Prosthetic Makeup
Learning these techniques requires more than watching tutorials. Professional-level third eye SFX makeup involves understanding sculpting, mold-making, casting materials, painting and on-set application methods used throughout the film and television industry.
At Cinema Makeup School, students receive hands-on training in prosthetic sculpting, creature design, special effects makeup and advanced character creation techniques
We help aspiring artists develop the technical and creative skills needed for professional SFX work in film & television.
Ready to take your prosthetic makeup skills further? Explore diploma programs, certificate courses, workshops and bootcamps at Cinema Makeup School. You can also apply for programs or schedule a campus tour to experience our campus and learn more about professional SFX makeup training.