Airbrushing has become one of the most valuable skills in modern beauty and special effects makeup. From flawless beauty finishes to detailed fantasy creatures, artists use airbrush to create smooth color application, texture effects and precise character details that are difficult to achieve with regular brushes alone. One technique that helps artists gain even more control is airbrushing with Stencils.
Stencils allow makeup artists to add patterns, textures, highlights, scales, tattoos, camouflage effects, freckles and realistic skin details with speed and consistency.
In this guide, you will learn how airbrushing works through stencils and what tools you need, helping aspiring artists create cleaner textures, sharper details and more professional-looking makeup effects.
Why SFX Makeup Artists Use Airbrush Makeup Stencils
Special effects makeup often requires detailed textures, smooth blending and realistic skin effects that need to appear believable on camera. This is why many professional artists use airbrush makeup stencils during character creation and prosthetic makeup applications.
- Creates Realistic Skin Texture: Stencils help artists create natural-looking textures such as pores, veins, scales, freckles, cracked skin and bruising. When combined with airbrushing, these details appear softer and more realistic than heavy brush application.
- Speeds Up the Makeup Process: Artists may need to repeat the same makeup design multiple times. Stencils allow faster application while keeping the texture and pattern consistent on every actor or prosthetic piece.
- Helps Achieve Cleaner Details: Airbrush spraying through stencils gives artists more control over placement and design shape.
- Produces Smooth Color Blending: Airbrush makeup applies in very fine layers, making transitions look softer and more natural. This is especially useful when blending bruises, dirt effects, burns, or creature makeup into the skin.
- Reduces Heavy Makeup Build-Up: Because airbrush makeup is sprayed lightly, the final effect usually feels thinner and lighter on the skin. This improves comfort for performers during long shooting hours.
- Improves Camera-Ready Results: Modern film and photography cameras capture very fine details. Airbrush stencil techniques help create smoother, more believable makeup that performs better under HD and studio lighting conditions.
Essential Tools Needed for Airbrushing with Stencils
1) Airbrush Gun for spraying smooth and controlled makeup application through stencils.
2) Airbrush Makeup Colors for spraying beauty, fantasy, or SFX designs.
3) Stencil Adhesive or Tape for keeping stencils secure during application.
4) Mixing Cups for thinning and preparing airbrush colors.
5) Tweezers for placing and lifting detailed stencil pieces without disturbing the makeup.
6) Cotton Swabs and Paper Towels for quick cleanup and correcting overspray.
7) Makeup Sponge for soft blending around stencil edges.
Note: Interested in mastering techniques for using these tools? Apply here for hands-on training at Cinema Makeup School.
Want to explore the learning environment before enrolling? Take a tour of our campus either in person or virtually, based on your preference.
Best Practice: Preparing the Skin Before Airbrushing
Good preparation creates a smoother makeup application and improves durability.
Start by cleansing the skin thoroughly to remove oils, dirt and skincare residue. After cleansing, apply a lightweight moisturizer if needed. Heavy creams can interfere with airbrush adhesion.
If the makeup will be worn for long hours or under studio lights, apply a suitable primer that helps the airbrush makeup grip evenly and reduce patchiness.
Once the skin is prepared, wait for the products to fully absorb and dry before airbrushing begins.
How to Do Airbrush Makeup with Stencils
Creating clean and realistic stencil effects requires more than simply spraying makeup through a pattern. Professional-looking results depend on stencil placement, airflow control, layering techniques and proper blending. The following step-by-step process helps artists achieve smoother textures, sharper details and better overall airbrush makeup results.
Step 1: Select the Right Stencil Design
The first step is choosing a stencil that matches the makeup concept. A beauty editorial look may require lace or geometric designs, while creature makeup may need reptile or cracked textures.
Think carefully about scale and placement. Large patterns may overwhelm small facial areas, while tiny details may disappear on camera if placed incorrectly. Professional makeup artists often test stencil placement before spraying any makeup.
Step 2: Position the Stencil Properly
Place the stencil gently against the skin. The stencil should sit flat without large gaps, because lifted areas can cause blurry edges or overspray.
Some artists hold the stencil manually, while others use temporary adhesive for stability during complex applications. Keeping the stencil close to the skin helps create cleaner and more defined patterns.
Step 3: Adjust Air Pressure
Pressure control is extremely important.
High pressure can force makeup underneath the stencil and ruin clean edges. Lower pressure provides better precision and softer layering. Most artists use light airflow when working close to the skin for detailed textures. Testing airflow on paper before spraying the face helps avoid mistakes.
Also Read Single-Action vs. Double-Action Airbrush: Which Should SFX Artists Use and Why
Step 4: Spray Thin Layers Gradually
Instead of spraying heavy amounts of product immediately, apply multiple light passes.
Move the airbrush gun in controlled motions while maintaining a consistent distance from the stencil. Sudden movements may create uneven buildup. Layering gradually gives you better control over opacity and realism. This technique is especially important when creating skin textures like freckles, veins, or bruising.
Step 5: Remove the Stencil Carefully
Once the makeup dries slightly, lift the stencil gently away from the skin. Avoid dragging the stencil across fresh makeup because it may ruin the design.
At this stage, you can evaluate whether the effect needs additional shading, highlighting, or blending. Professional artists often combine stencil textures with hand-painted detailing for more realistic results.
Step 6: Blend and Finish the Makeup
After removing the stencil, soften harsh edges as needed with additional airbrush layers or makeup sponges.
Setting products may be added depending on the makeup formula and shooting conditions.
For film and television work, artists frequently examine the makeup under different lighting conditions to ensure the textures appear natural on camera.
Common Effects Created Using Airbrush Makeup Stencils
Airbrush makeup stencils are widely used in beauty, editorial, body painting and special effects makeup because they help artists create detailed textures and controlled designs more efficiently. Different stencil patterns can completely change the appearance of a character, skin texture, or fantasy makeup look.
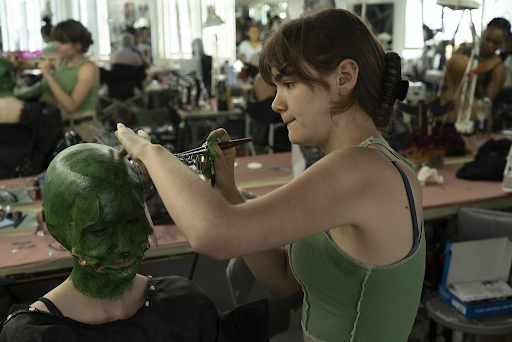
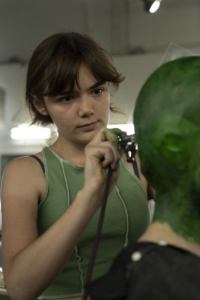
1. Fantasy and Creature Textures
Artists use stencil patterns to produce reptile skin, scales, alien textures and animal-inspired detailing for film, cosplay and theatrical makeup.
2. Freckles and Skin Detailing
Fine stencils help create natural-looking freckles, pores and subtle skin textures that appear more realistic on camera. These effects are often used in beauty makeup, aging makeup and high-definition film work.
3. Animal and Character Patterning
Airbrush makeup stencils are commonly used for tiger stripes, leopard spots, reptile patterns and fantasy character detailing. These effects help artists create bold transformations with cleaner and more consistent designs.
4. Camouflage and Dirt Effects
SFX artists frequently use stencil airbrushing to create dirt buildup, camouflage patterns and textured skin effects. Layering different shades through stencils helps make the makeup appear more dimensional and natural.
5. Bruises and Injury Makeup
Airbrush stencil techniques can also be used for bruise textures, veins, burns and distressed skin effects. Soft airbrush layering helps blend colors smoothly into the skin for more believable injury makeup.
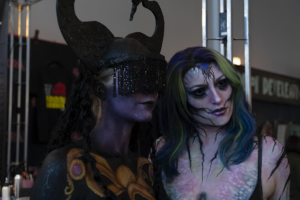
6. Editorial and Fashion Designs
In editorial makeup, artists use airbrush stencils to apply decorative shapes, abstract patterns and dramatic beauty details. These designs are popular in runway, photoshoots and creative beauty campaigns.
Related Articles:
Airbrush Makeup Artist Career Roadmap
Water-Based vs. Alcohol-Based Airbrush Makeup
Best Sealing Techniques for Long-Lasting Prosthetics
Learn Professional Airbrush Techniques at Cinema Makeup School
Aspiring makeup artists interested in beauty, fantasy and special effects makeup can enroll in professional airbrush training at Cinema Makeup School. This 1 week course introduces students to essential airbrush techniques used in both beauty and character makeup applications.
During the training, students practice creating smooth complexions, contouring effects, stencil designs, fantasy patterns and more. The program also covers important technical skills such as airbrush assembly, maintenance, color blending, masking and detailed pattern work.
With hands-on studio practice and creative exercises, students gain practical experience for real projects.