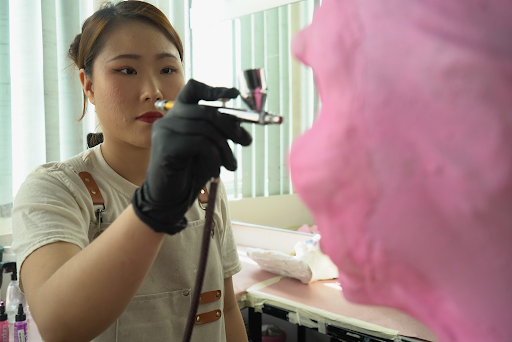
Airbrushing is one of the final and most important steps in bringing a prosthetic to life. It adds realistic color, depth and skin tones that help a sculpted prosthetic look like real skin, wounds, or other SFX effects. But the process isn’t identical across every material. Silicone and foam latex behave very differently under paint and understanding how each material reacts is essential for anyone pursuing a career in special effects makeup.
In this guide, we’ll compare the airbrushing process for silicone and foam latex prosthetics to help you understand how to approach each material.
What Is Airbrushing in Prosthetic Makeup
Airbrushing is a coloring technique that uses a small, air-powered tool to apply thin, controlled layers of paint onto a surface. In prosthetic makeup, it is used to build translucency, blend edges, add depth and create effects like bruising, veining or environmental damage that are difficult to achieve with a brush or sponge alone.
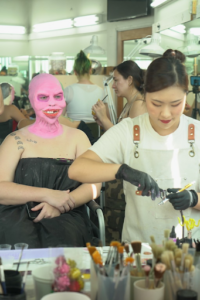
Airbrushing on Silicone Prosthetics
Silicone is a non-porous material, so paint sits on top of the surface rather than absorbing into it. This means makeup artists need paint specifically formulated to bond with silicone and their technique has to account for the material’s flexibility and natural translucency.
Key Considerations for Airbrushing Silicone Prosthetics
- Use paints specifically formulated for silicone. The wrong paint can crack, peel, or fail to bond to the surface.
- Clean the prosthetic properly before painting. Any residue, oil, or dust can affect adhesion and create an uneven finish.
- Make sure the paint is mixed to the consistency recommended for your airbrush and paint system. Paint that is too thick can clog the airbrush, while overly thin paint can run or create uneven coverage.
- Adjust the air pressure according to the paint and detail you are applying. Lower pressure can provide greater control for fine details, while broader applications may require different settings.
- Build color gradually with thin layers. This gives you more control and helps create the translucent variations found in natural skin.
- Keep the airbrush at an appropriate distance for the effect you want. Spraying too close can cause concentrated or wet patches, while spraying too far can produce a rough or dusty finish.
- Remember that silicone prosthetics move and stretch. The paint system needs to remain compatible with that flexibility so the finish does not crack when the appliance is manipulated.
- Use the airbrush for broad color transitions and subtle variations, then add finer details by hand when needed.
Airbrushing on Foam Latex Prosthetics
Foam latex is porous and sponge-like, which changes the process. Unlike silicone, it absorbs paint into its surface, affecting how color builds and how much product is needed for depth. Choosing the right paint here matters even more.

Key Considerations for Airbrushing Foam Latex Prosthetics
- Make sure the foam latex prosthetic is properly sealed and free from dust, oils, or other contaminants before painting.
- Use paints that are suitable for foam latex and compatible with the desired finish. The paint choice can affect adhesion, color development and the overall appearance of the prosthetic.
- Use multiple thin layers instead of a single heavy coat. Light, controlled passes give artists better control over coverage and help prevent the color from looking flat or overly saturated.
- Build color gradually with different shades. Layering base tones, shadows, highlights, bruising, veins and other details can create more realistic depth.
- Pay attention to the texture of the foam latex. Its porous, matte surface can absorb and soften the appearance of paint differently from the smoother surface of silicone.
- Allow each layer to dry properly before adding more color or detail. This helps prevent unwanted blending and makes it easier to control the final appearance.
- Seal the finished paintwork with a product appropriate for the prosthetic and paint system. This can help protect the color and reduce transfer during application and wear.
Want to master airbrush makeup?
Join our airbrush makeup program today!
Airbrushing on Silicone vs. Foam Latex: Key Differences
| Feature | Silicone Prosthetics | Foam Latex Prosthetics |
| Surface Type | Non-porous | Porous |
| Paint Type | Silicone-based, encapsulated pigments | Alcohol-based or water-based paints |
| Absorption | Sits on top of the surface | Absorbs into the material |
| Translucency | Naturally translucent | Requires more built-up color for depth |
| Layering Needs | Thin, minimal layers | Multiple thin layers for coverage |
| Flexibility Requirement | High, must move with the skin | Moderate, foam already has give |
How Both Processes Work Together in Production
Step 1: Identify the Material
Before picking up an airbrush, the artist confirms whether the piece is silicone or foam latex, since that decision drives every paint and technique choice that follows.
Step 2: Preparing the Surface
Silicone needs little beyond cleaning; foam latex is sometimes pre-sealed to control absorption.
Step 3: Apply Base Layers
Silicone starts with minimal base color since intrinsic tinting already provides a foundation. Foam latex typically needs fuller base coverage.
Step 4: Build Depth and Detail
Artists layer translucent tones, shadow, highlight and detail work such as veining, adjusting passes for how each material absorbs or resists paint.
Step 5: Seal and Finish
Silicone is usually finished with a matting product; foam latex needs a sealant to lock in color and prevent transfer. Our guide to sealing techniques for long-lasting prosthetics covers this step in more depth.
Build Your Airbrushing Skills at Cinema Makeup School
Students who want hands-on experience with both materials can enroll in specialized training at Cinema Makeup School. Students work directly with silicone and foam latex prosthetics, gaining practical experience in application and finishing techniques.
Cinema Makeup School graduates take these skills beyond the classroom and onto real productions, applying their SFX makeup skills to professional projects. Our alumni have worked on productions such as Predators, The Pope’s Exorcist, Planet of the Apes and Prey.
Related Articles:
Single-Action vs. Double-Action Airbrush: Which Should SFX Artists Use and Why
Airbrush Makeup Artist Career Roadmap
SFX vs Prosthetic Makeup: What is the Difference?
Frequently Asked Questions
Q1: Can the same airbrush paint be used on both silicone and foam latex?
No. Silicone requires silicone-based paints that chemically bond to the surface, while foam latex works best with alcohol-based or water-based paints made for porous materials.
Q2: Which material is easier to airbrush for beginners?
Foam latex is generally more forgiving since it absorbs paint readily, while silicone demands more precision due to its non-porous, flexible surface.
Q3: Does airbrushing technique affect how long a prosthetic lasts on camera?
Yes. Proper thin layering and correct sealing help color hold up under studio lighting without cracking, flaking or rubbing off during a shoot.
Q4: Is intrinsic coloring still necessary if airbrushing is used?
For silicone, intrinsic coloring mixed in before curing provides a realistic base that airbrushing then enhances. Foam latex relies more heavily on airbrushed color since it isn’t tinted the same way before curing.
Want to see the training environment before enrolling at Cinema Makeup School? Schedule a campus tour, in person or virtually.