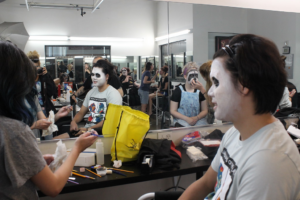
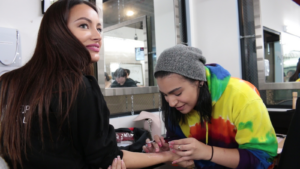
If you’re already exploring airbrush makeup, you know how powerful this technique can be in creating flawless, high-definition looks. Whether you’re experimenting with fantasy designs, perfecting a bridal finish, or working on sets for film and TV, the possibilities are endless.
But how do you turn this skill into a full-fledged career? This guide will walk you through the essential steps, from advanced training and certification to finding the right opportunities and setting professional rates, helping you establish yourself as a successful airbrush makeup artist.
Why Get Training & Certification to Build a Successful Career as an Airbrush Makeup Artist?
Mastering airbrush makeup requires more than just practice; it demands proper training and professional guidance. Training and certification provide the foundation you need to create flawless, high-definition looks while preparing you for real-world industry standards. Here’s why joining a special effects makeup school can accelerate your career:
1. Learn the Techniques That Make You Stand Out
Airbrush makeup involves precise control over the airbrush gun, understanding different formulas and mastering blending, shading and layering. Professional airbrush makeup classes teach these skills systematically, helping you avoid common mistakes and deliver results that clients and employers notice.

2. Gain Credibility and Trust with Certification
A recognized airbrush makeup certification signals to clients, studios and event organizers that you have the technical knowledge and experience to perform at a professional level. Certification increases your credibility, which can make a significant difference when applying for high-profile airbrush makeup jobs in film, TV, or fashion.
3. Access to Industry-Standard Tools and Products
Airbrush makeup training programs often provide hands-on experience with professional airbrush equipment and top-quality products. Learning with the right tools ensures you can create looks that are camera-ready, long-lasting and suitable for different skin types, lighting conditions and event requirements.
4. Build a Strong Professional Network
Enrolling in airbrush makeup courses connects you with instructors, industry experts and fellow artists. Networking during your training can open doors to collaborations, freelance gigs and referrals, opportunities that are often hard to find independently.
5. Boost Your Earning Potential
Trained and certified airbrush makeup artists can command higher rates than self-taught peers. By demonstrating your expertise through certification, you can justify premium rates and access higher-paying projects in fashion, film, TV and other entertainment industries.
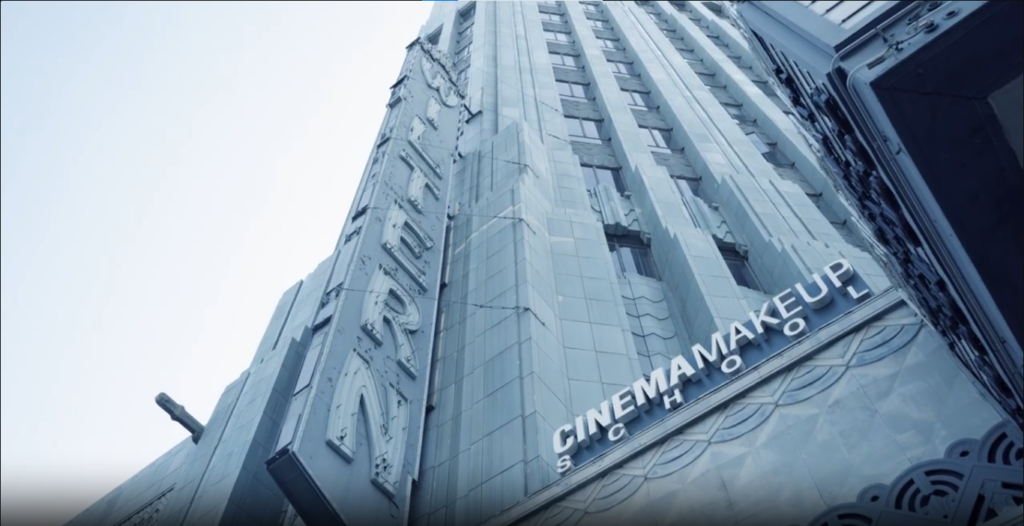
Note: Visit Cinema Makeup School to learn professional airbrush makeup and gain the skills needed to launch a successful career. We offer specialized special effects makeup courses with hands-on training using industry-standard tools, helping you master techniques like flawless blending, high-definition application and custom look creation.
You’ll build a strong portfolio, earn certification and develop the practical skills required to work in film, TV, fashion, cosplay and live performances.
Check out our YouTube channel to watch amazing transformations created by our students.
Career Opportunities for Airbrush Makeup Artists
Airbrush makeup offers a versatile career path, with opportunities across film, TV, live performances, fashion, cosplay and special events. Skilled artists can apply their expertise in high-definition settings, work closely with performers and clients and create flawless, camera-ready looks.
1. Film and Television
In the film and TV industry, airbrush makeup jobs are in high demand. Airbrush techniques are ideal for high-definition cameras that pick up the tiniest imperfections. Artists may work on:
- Movie sets
- TV shows
- Music videos
In this environment, an airbrush makeup artist can find plentiful opportunities due to Hollywood’s concentration of productions.
2. Drag Shows and Stage Performances
Drag shows and theatrical performances demand bold, precise makeup that can withstand bright stage lights and long hours on stage. Airbrush makeup is ideal in these settings because it offers long-lasting coverage, seamless gradients and a flawless finish that looks just as striking under intense lighting as it does up close.
From transforming drag queens and drag kings into larger-than-life characters to enhancing the features of stage actors and live performers, airbrush techniques combine creativity and precision. As an airbrush makeup artist, you’ll often work closely with performers to design custom looks that align perfectly with their costumes, characters and stage presence.
3. Cosplay and Fantasy Events
Fantasy, sci-fi and anime conventions are booming, creating exciting opportunities for airbrush artists. Cosplay often involves fantasy makeup and animal makeup, which benefit from the precise blending and shading possible with an airbrush.
Many airbrush makeup artists find freelance opportunities at conventions and fan expos, collaborating with cosplayers to bring beloved characters to life with stunning, high-definition results.
4. Fashion and Editorial
In fashion photography and editorial shoots, flawless skin and even coverage are non-negotiable. Airbrush makeup is a top choice for these settings because it delivers a camera-ready finish that holds up under high-resolution photography and intense lighting.
From magazine editorials and runway shows to large-scale advertising campaigns, airbrush techniques help achieve the polished, picture-perfect looks that fashion demands. Clients in this industry also value the speed and efficiency of airbrush application, which makes it easier to manage multiple models and quick look changes during busy shoot days or back-to-back runway events.
5. Bridal and Special Occasions
While high-profile industries often offer larger paychecks, many airbrush makeup artists build steady, rewarding careers in the wedding and special-event market. Brides and guests alike are turning to airbrush makeup for its long-lasting wear, natural appearance in photographs and ability to hold up under humidity and long hours.
From bridal looks that stay flawless throughout the day to polished makeup for proms, formal events and personal milestone photoshoots, airbrush techniques deliver professional results that make every occasion feel unforgettable.
How Much Does an Airbrush Makeup Artist Make?
If you’re pursuing a career in airbrush makeup, understanding the income potential is just as important as mastering your craft. According to data from ZipRecruiter, the average hourly pay for an airbrush makeup artist in the United States is around $14.42 as of September 2025. However, this number varies widely depending on experience, skill level and the kind of projects you work on.
Beginners entering the field or working part-time gigs typically earn around $15 to $20 per hour, while experienced artists with strong portfolios and specialized techniques can command $35 to $50 per hour or more. Those working on high-end editorial shoots, fashion campaigns, or entertainment projects can often negotiate significantly higher rates – especially if they’ve built a reputation for delivering flawless, camera-ready results under tight deadlines.
Location is another major factor influencing airbrush makeup artist prices. Major creative hubs such as New York, Atlanta, or Chicago tend to offer higher-paying opportunities because of increased demand in fashion, film and media.
Freelancers working in weddings, special events, or photoshoots often charge package-based fees instead of hourly rates, typically ranging from $100 to $400 per session, depending on the complexity of the look and client requirements.
In short, while entry-level jobs provide a solid foundation, continuous skill development and professional certification can help you move into the premium earning bracket. With experience and the right training, airbrush makeup artistry can become not just a creative career – but a profitable one too.
Related Articles:
Online vs In-Person SFX Makeup Course
Diploma vs Certificate in SFX Makeup Course: Which Path Should You Choose?
How Hard Is It to Learn Airbrushing?
Airbrush Makeup Artist Career Roadmap
- Get Professional Training & Certification – Enroll in airbrush makeup classes and earn certification to validate your skills.
- Build a Strong Portfolio – Highlight your best work with professional-quality images, covering a range of styles from bridal and fashion to cosplay and stage performances.
- Gain Real-World Experience – Take freelance jobs, assist professionals, or volunteer for events and photoshoots.
- Specialize & Diversify Skills – Explore niches like bridal, editorial, fantasy, or performance makeup.
- Set Competitive Rates – Research industry pricing and adjust based on experience and project complexity.
- Network & Market Yourself – Connect with clients, photographers and industry professionals; promote your work online.
- Continuously Learn – Stay updated with new techniques, tools and trends to maintain a competitive edge.
Schedule a tour of our special effects makeup school in Los Angeles, California and start your journey toward a successful career in airbrush makeup.
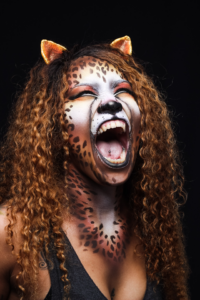
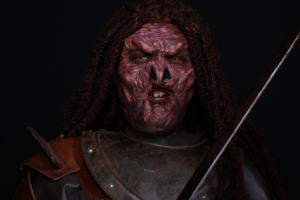
Cosplay is all about bringing characters to life and one of the most powerful ways to do that is with horns. Whether you’re creating a fawn, monster, dragon, or any other fantasy character, horns instantly make your character look more dramatic and believable.
Cosplayers think making horns is complicated, but the process can be simple and fun with the right approach. In this guide, we’ll walk through everything you need to know about making horns for cosplay – from materials and sculpting methods to painting, finishing and attaching them securely for long wear.

What Makes Horns Essential for Cosplay Events?
Horns play a critical role in cosplay by serving as defining visual elements that establish a character’s identity and presence. In many fantasy and mythical designs, the horns are the primary feature that communicates the character’s essence at a glance.
From a practical standpoint, horns contribute to visual storytelling. Their shape, size and orientation can suggest personality traits, power dynamics, or magical abilities, allowing cosplayers to convey character intent without words. When combined with special effects makeup, horns integrate seamlessly with facial prosthetics, contouring and texture work, creating a cohesive and believable transformation.
Furthermore, horns make your character’s shape and outline more noticeable, which is especially important at conventions or on stage. Well-designed horns draw attention and create dynamic lines that make the character more memorable in photographs and during live interactions.
Materials You’ll Need to Make Creature & Monster Horns for Cosplay
Before you start crafting horns, it’s important to gather the right materials. The tools and supplies you choose will affect the weight, durability and final look of your horns. From basic sculpting materials to paints and adhesives, having the right items on hand ensures your horns are not only realistic but also comfortable and long-lasting.
Sculpting Materials
- Aluminum foil – Creates a lightweight base for building horn shapes.
- Air-dry clay – Easy to sculpt and hardens without baking.
- Polymer clay (e.g., Sculpey) – Durable clay that bakes solid for detailed horns.
- Foam (EVA or craft foam) – Lightweight and flexible, great for larger horns.
- Worbla or thermoplastics – Heat-moldable plastics for advanced, durable designs.
Materials for Detailing & Painting
- Acrylic paints – Reliable paints for base coats and shading.
- Dry brushing tools – Add texture and highlights to bring the horns to life.
- Metallic/iridescent pigments – Create magical or fantasy-style finishes.
Horns Attachment Tools
- Spirit gum or Pros-Aide – Skin-safe adhesives for small horns.
- Elastic headbands or hair clips – Easy ways to secure horns under wigs.
- Latex or silicone blends – Blend horn bases seamlessly into skin.
Foam Latex vs Silicone: Choosing the Right Material for SFX Prosthetics
Step-by-Step Guide: How to Make Cosplay Horns?
Creating cosplay horns can range from simple, beginner-friendly designs to advanced, professional-level pieces. The method you choose depends on your experience, the desired realism and how long you plan to wear the horns. In the sections below, we break down three popular approaches – from lightweight foil and clay, to flexible foam, to high-detail latex or silicone horns – so you can pick the technique that fits your cosplay goals and skill level.
Method 1: Lightweight Foil & Clay Horns (Beginner-Friendly)
Perfect for beginners who want realistic results without heavy tools.
Step 1: Shape the Base: Start by taking a ball of aluminum foil and rolling it into a cone or spiral shape. This will act as the core of your horn, keeping it strong yet lightweight. Using foil ensures your horns won’t be too heavy to wear comfortably during a full day of cosplay.
Step 2: Cover with Clay: Once you have your foil base, wrap it in air-dry clay or polymer clay. Smooth the surface and add texture by sculpting ridges, spirals, or cracks. This is where you can get creative, giving your horns the look of twisted wood, jagged bone, or rough stone, depending on your character.
Step 3: Harden the Clay: If you’re using polymer clay, follow the baking instructions on the package to harden your horns. Air-dry clay doesn’t need baking, but you’ll need to let it sit for about 24–48 hours until it’s completely solid. Patience here ensures your horns won’t crack later.
Step 4: Paint the Horns: Once hardened, it’s time to paint. Start with a dark base coat – black, deep brown, or dark gray works best for depth. After the base is dry, use lighter shades and dry brushing techniques to highlight the ridges and textures. This layering will give your horns a realistic, three-dimensional finish.
Check out the guide: What Kind of Clay Is Best for SFX Sculpting?
Method 2: Foam Horns (Lightweight & Comfortable)
Foam horns are a favorite among cosplayers because they’re extremely light, flexible and easy to wear for hours without strain.
Step 1: Cut & Shape Foam: Start by using EVA or craft foam sheets. Roll them into cone-like shapes or carve them with a craft knife to create curves and points. Foam is flexible, so you can easily experiment with different horn styles.
Step 2: Heat for a perfect Shape (Optional): If you want more natural curves, gently heat the foam with a heat gun or hairdryer. This makes it soft enough to bend and mold. Hold it in the desired shape until it cools and sets.
Step 3: Seal & Paint: Apply a thin layer of sealant, such as white glue or a flexible coating, to smooth out the foam’s texture and prepare it for painting. Once dry, use water-based paints or craft paints to build up a base tone, then layer shadows and highlights for a realistic or fantasy finish.
Step 4: Attach: Before sealing completely, fix a headband, clips, or elastic into the base of the horns. This ensures they stay secure when worn and remain comfortable throughout your cosplay event.
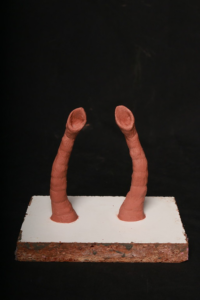
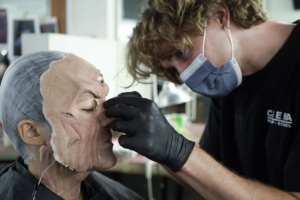
Method 3: Latex or Silicone Horns (Advanced Special Effects Makeup Approach)
If you’re aiming for a truly professional finish that looks like it came straight from a movie set, latex or silicone horns are the way to go. This technique requires more tools and patience but delivers the most realistic results.
Step 1: Sculpt the Horns: Start by sculpting your desired horn shape with oil-based clay. This gives you freedom to experiment with ridges, curves, or spirals until the design feels right for your creature.
Step 2: Create a Mold: Once the sculpt is ready, build a two-part mold around it using plaster or silicone molding material. This captures every detail of your sculpt and allows you to produce identical horns for both sides.
Step 3: Cast the Horns: Pour liquid latex or silicone into the mold and let it cure completely. The material will form a flexible yet durable horn that’s lightweight and comfortable to wear.
Step 4: Blend with Makeup: Attach the horns to your skin using a safe adhesive. Then blend the edges with liquid latex or a similar product so they transition smoothly into your own skin. Finally, apply foundation, powders, or contouring techniques to match your natural complexion or your character’s design.
This advanced method is widely used in film, theater and professional cosplay, where realism and durability are crucial.
Learn Why Every Serious Makeup Artist Should Learn Mold-Making Techniques
How Cinema Makeup School Helps You Create Perfect Horns for Cosplays?
Want to skip that embarrassing moment when you tried making creature or monster horns on your own and ended up with a crooked or distorted result? Join Cinema Makeup School. Here, every student learns directly from experienced SFX instructors who guide you step by step, so you understand not just the “how,” but the “why” behind each technique.
Beyond horns, our special effects makeup course covers the full range of creature and character design skills. You’ll get hands-on experience with sculpting, prosthetics, latex and silicone applications, painting, texturing and blending techniques that bring characters to life. Each project is designed to reflect real-world work, giving you the confidence to create believable and professional SFX creations.
At our special effects makeup school, you’ll learn to avoid common beginner mistakes while gaining insider tips and practical skills that professionals use in film, theater and cosplay. From wounds and burns to creatures, monsters and fantasy designs, our courses ensure you can execute every idea with precision and creativity.
Cinema Makeup School graduate Jose Davalos shares his cosplay journey in this video!
Different Mythical Creatures With Horns to Spark Your Cosplay Ideas
1) Fauns/Satyrs: Short, spiraled horns inspired by Greek mythology.
2) Monsters: Large, intimidating horns, often curved or ridged.

3) Dragons: Jagged, sharp horns with scales or spikes.
4) Unicorns: Elegant, spiraled single horn, usually with glitter or shimmer.
5) Minotaurs: Thick, bull-like horns that emphasize strength.
Adding unique textures like cracks, moss, or metallic finishes can make your creature feel even more alive.
Book a tour of our SFX Makeup School in Los Angeles, California and start your journey into professional makeup artistry today!
Dreaming of creating realistic bruises, gory cuts, or even transforming into a creature for cosplay or Halloween? It all starts with the right tools. Every great special effects makeup artist, no matter how advanced today, once stood where you are – wondering which products actually belong in a starter kit.
The truth is, you don’t need to invest in a massive professional setup to begin. With just a few essentials, you can experiment, practice and start building the special effects makeup skills that bring characters to life.
In this guide, we’ll walk through explaining the recommended makeup products for beginners, how to use them and provide checklists for to-do and not to-do. Whether your goal is fun weekend experiments, eye-catching cosplay, or the first step toward a makeup career, this checklist will help you start strong.
Beginners-Friendly SFX Makeup Kit Checklist
Starting your journey in special effects makeup begins with having the right kit. For beginners, the essentials include skin-safe adhesives, versatile products like liquid latex and gelatin and sculpting materials such as scar wax. You’ll also need fake blood in different consistencies, bruise wheels for realistic discoloration and setting powders to lock everything in place.
Tools like brushes, sponges and stipple applicators help refine details, while optional prosthetic pieces let you practice advanced techniques. Finally, removers and skin prep products keep your skin healthy and your work professional.
1. Skin-Safe Adhesives
One of the first things you’ll need is something that makes prosthetics, latex, or facial hair stick to skin.
- Spirit Gum – Classic adhesive used for prosthetics and fake hair.
- Pros-Aide – A professional-grade adhesive with strong hold and safe removal.
- Medical Tape – Useful for quick fixes or temporary holds.
Tip: Always pair adhesives with removers to prevent skin irritation.
2. Liquid Latex
Liquid latex is a must-have for beginners because of its versatility. It’s affordable, easy to find and can be used to create a wide variety of effects. With just this one product, you can build wounds and scars, achieve aging effects using tissue or cotton, seal prosthetics securely, or even create blistered and burned skin textures.
It’s often considered the centerpiece of a special effects makeup products list because it plays a role in almost every SFX look you’ll try as a beginner.
3. Gelatin
Gelatin is a food-grade material, which means it’s completely safe to use on the skin – making it perfect for beginners who want to practice without worrying about irritation. Despite its safety, it’s incredibly versatile and can be used to create realistic wounds, blisters and skin textures.
You can melt it, shape it and layer it to achieve a range of effects, from subtle cuts to dramatic injuries. Because it sets quickly and can be reused, gelatin is an excellent addition to your kit, helping you experiment and build confidence in your skills.
4. Modeling Wax or Scar Wax
Modeling wax, often called scar wax, is a soft, moldable material that lets you sculpt raised wounds, cuts and scars directly onto the skin. You can easily shape and smooth it using petroleum jelly or lotion, making your creations look seamless and realistic.
Scar wax is highly versatile; it works for both subtle scars and dramatic, gory effects. It’s also affordable, typically coming in small containers that are perfect for practice sessions. For best results, pair scar wax with a skin-safe adhesive like spirit gum to ensure it stays in place during your makeup application.
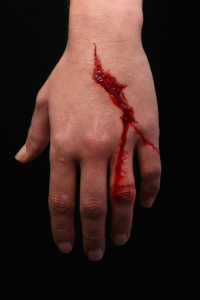
5. Fake Blood
As a beginner, you should include fake blood in your kit, as it brings wounds, cuts and injuries to life. Different types of blood help achieve different effects: thick blood is ideal for coagulated or clotted wounds, runny blood works perfectly for fresh cuts or dripping effects and scab blood mimics dried or healing wounds.
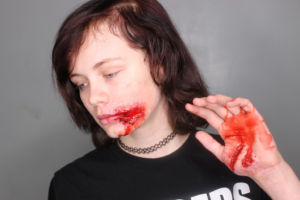
Helpful tip for beginners: always test fake blood on fabric or clothing first, because it can stain easily. Having a variety of fake bloods in your kit allows you to create realistic injuries ranging from subtle details to dramatic, cinematic effects.
Check Out: What Do SFX Makeup Artists Use for Fake Blood?
6. Bruise Wheels & Cream Makeup
To make wounds, bruises, burns, or infected skin look realistic, you’ll need a palette of cream-based colors. Bruise wheels are pre-arranged palettes that include shades of yellow, purple, green and red, making it easier for beginners to blend and create natural-looking discoloration.
Grease paints are another essential option – they’re highly pigmented and can be layered over or under latex, scar wax, or other prosthetics to add depth and realism. Together, these products allow you to achieve a wide range of effects, from subtle injuries to dramatic, cinematic makeup.
7. Setting Powders
Setting powders are an essential part of any SFX makeup kit because they help prevent stickiness, keep wax or prosthetics in place and set cream-based paints for a longer-lasting finish.
A translucent setting powder works well on all skin tones and provides a professional finish, while baby powder can be used as a budget-friendly beginner option, though it doesn’t perform quite as well as professional powders. Using the right powder ensures your makeup stays smooth and realistic throughout your application.
8. Brushes, Sponges and Applicators
The tools you use in SFX makeup are just as important as the products themselves. Makeup sponges help apply color evenly and create texture for wounds or bruises. Fine detail brushes allow you to paint small details like veins, scratches, or intricate designs with precision.
Stipple sponges are useful for producing realistic effects such as broken capillaries, bruising, or stubble. Using the right combination of brushes and sponges ensures your SFX looks are realistic and professional, even when you’re just starting.
9. Prosthetic Pieces (Optional Starter Add-On)
If you want to expand your SFX makeup kit with a thought to improve skills, consider adding a few pre-made prosthetic pieces. Items like latex scars, zombie bites, witch noses and creature horns are perfect for practicing advanced effects.
These pieces can be glued and painted to match your design, allowing you to practice applying and blending prosthetics correctly before attempting to sculpt your own.
10. Removers & Skin Prep Products
Taking care of your skin is just as important as having the right makeup products. Every SFX makeup artist should include removers and skin prep items in their kit to ensure safe application and easy cleanup.
Tip: Spirit gum remover helps safely break down adhesives, while isopropyl alcohol (70–99%) is useful for cleaning tools and removing pigments. Before applying latex, wax, or adhesives, always use moisturizers or barrier creams to protect the skin and prevent irritation. Proper skin care not only keeps you safe but also helps your makeup look smoother and last longer.
Master SFX Makeup with the Right Kit
Beginner? Need expert training? Cinema Makeup School warmly welcomes newcomers and provides everything you need to kickstart your journey in special effects makeup. From carefully curated SFX makeup kits for beginners to hands-on lessons with industry professionals, students gain the confidence and skills to create realistic effects.
Our special effects makeup courses focus on practical techniques, proper use of SFX tools and step-by-step guidance, so you can experiment safely while building a strong foundation. Whether your goal is cosplay, Halloween transformations, or starting a professional career in film, TV, or theater, we ensure every beginner has the support, resources and inspiration to bring their creative vision to life.
Why Every Beginner Needs a Dedicated SFX Makeup Kit?
When you scroll through YouTube tutorials or Instagram reels, it’s easy to see professional SFX artists using advanced prosthetics, airbrushes and silicone molds and immediately think, I need all of that too! But here’s the catch: starting with complex tools before mastering the basics can actually slow your progress.
Beginners often buy too many products at once, get overwhelmed and then struggle to figure out what to use and when. That’s where having a simple, well-structured checklist comes in. A dedicated special effects makeup kit for beginners keeps you focused on the essentials that build your foundation, without the distractions of unnecessary gear.
Here’s why having an SFX makeup kit as a beginner is a game-changer:
- To be clear, you know exactly what belongs in your kit, so there’s no confusion about what to use.
- Practicing with beginner-friendly special effects products helps you learn techniques the right way.
- Instead of feeling lost, you’ll see progress with every look you create, which builds confidence.
Take a tour of Cinema Makeup School or apply now and choose the course track that best fits your interests.
Horror movies have always had a unique power to captivate audiences, sending chills down our spines and leaving lasting impressions long after the credits roll. But have you ever wondered how filmmakers create the terrifyingly realistic monsters, gruesome wounds and bone-chilling creatures that make horror films unforgettable?
The answer lies in special FX horror makeup, which has revolutionized the genre over the decades.
From the early days of cinema to today’s high-tech productions, SFX makeup for scary movies has evolved into a sophisticated art form, combining creativity, technical skill and cutting-edge technology. In this blog, we’ll explore how special effects makeup has transformed horror movies, the techniques behind it and why it remains an essential tool for filmmakers.
Role of Makeup Artists in Horror Films
In horror films, makeup artists play a crucial role in bringing characters to life. They transform actors into creatures, monsters, or injured characters using a combination of prosthetics, makeup and special effects techniques. Their work goes beyond simply applying cosmetics; it helps tell the story and gives the audience a visual understanding of a character’s condition, personality, or role in the film.
By creating realistic wounds, scars, burns and realistic prosthetics, makeup artists make characters believable and help the actors fully embody their roles. They work closely with directors, cinematographers and costume designers to ensure that every effect looks right on camera and under different lighting conditions.
Their expertise in special effects makeup allows them to handle everything from subtle injuries to full creature designs, helping filmmakers bring their creative vision to life. In many ways, the success of a horror film depends on their skill and attention to detail, as their work directly affects how audiences experience the story.
How Has Special Effects Makeup Shaped Horror Movies?
Special effects makeup has been a game-changer for horror films, helping filmmakers create visuals that truly scare and immerse audiences. From realistic gore to unforgettable monsters, subtle psychological effects and even the genre’s overall aesthetic, SFX makeup shapes how horror stories are told on screen. Combined with modern digital tools, it allows filmmakers to push boundaries and bring terrifying visions to life like never before.
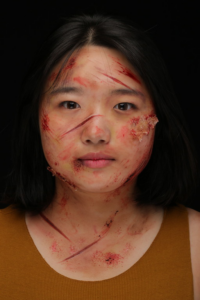
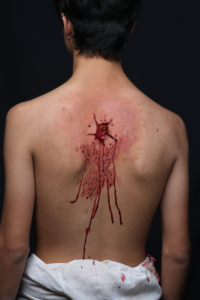
1. By Creating Believable Gore
One of the most significant contributions of special effects makeup is its ability to simulate injuries, mutilations and decayed bodies in ways that feel immediate and unsettling. From bullet wounds to zombie flesh, SFX makeup adds a tactile, visceral quality that connects directly with the audience.
In today’s horror films, this is often combined with digital FX, which can enhance blood flow, movement, or supernatural elements. Together, they create gore that feels both realistic and larger-than-life, giving filmmakers the freedom to shock and immerse viewers like never before.
2. Designing Memorable Monsters
Horror movies often depend on their creatures. With SFX makeup, artists transform actors into terrifying beings with unique skin textures, exaggerated features, or monstrous proportions. Classic examples include the alien in Alien (1979) and the Predator in Predator (1987). These designs prove how makeup can create monsters that remain unforgettable decades later.
3. Enhancing Psychological Fear
Not all horror relies on blood and monsters. Sometimes the scariest effects are subtle – pale skin, sunken eyes, or twisted facial expressions. With the right makeup, an ordinary character can suddenly look sick, possessed, or otherworldly. These small but powerful changes heighten tension and leave audiences unsettled without showing a drop of blood.
4. Shaping Horror’s Visual Language
The look of horror movies as a genre owes much to Special effects makeup. Gory slashers, gothic possession films, or body-horror classics all developed their distinct aesthetics through makeup innovations that later influenced pop culture, fashion and even Halloween traditions.
5. Combining Makeup with Digital Effects
Today, the most powerful horror moments come from blending SFX makeup with digital tools. Makeup provides the physical base, while digital FX adds enhancements like glowing eyes or impossible movements – together redefining how modern horror shocks its viewers.
Techniques Behind Special FX Horror Makeup
Special FX makeup is a highly technical craft that blends artistry and science. Here are some of the key techniques:
- Prosthetics: Prosthetic appliances made from latex, silicone, or gelatin are molded to fit an actor’s face or body. They can transform human features into grotesque monsters or aging characters, adding depth and realism to horror visuals.
- Blood Effects: Realistic blood is essential for scary movies. Artists create blood with various textures and colors to simulate everything from fresh wounds to decayed flesh.
- Sculpting and Casting: Before prosthetics can be applied, artists sculpt wounds through clay modeling, creating molds that will later cast the prosthetic pieces. This ensures each piece fits perfectly and looks natural on camera.
- Makeup Blending: Seamlessly blending prosthetics with an actor’s skin is critical. Artists use colors, textures and adhesives to hide edges and create a realistic appearance.
Top 5 Scary Movie Makeup Looks That Boosted the Demand for SFX Makeup
Certain iconic makeup looks have played a major role in boosting the popularity of SFX makeup in horror films. From grotesque monsters and decayed zombies to possessed characters, realistic wounds and creepy clowns, these designs have pushed the boundaries of creativity and shown how makeup can make horror feel tangible and unforgettable.
1. Terrifying Monsters
Grotesque skin textures, distorted features and oversized proportions have brought unforgettable monsters to life. These designs turn imagination into reality, leaving audiences horrified yet fascinated.
2. Vampires and the Zombies
From sharp fangs and pale skin to decayed, rotting flesh, vampires and zombies remain timeless. Their designs range from eerie elegance to pure gore, making them a staple in horror cinema.
3. Possessed Souls
Sunken eyes, cracked lips and unnatural facial distortions portray characters under supernatural influence. Subtle but chilling, this style heightens psychological horror and lingers with viewers long after the movie ends.
4. Flesh and Bite Effects
Few effects are as disturbing as torn skin, deep wounds, or realistic bite marks. These gory details created with SFX makeup deliver the raw, visceral edge that CGI alone cannot replicate.
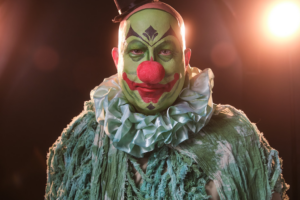
5. Sinister Clowns
Exaggerated smiles, warped features and unsettling color contrasts make creepy clowns both bizarre and terrifying. Their mix of innocence and menace continues to terrify audiences worldwide.
Related Guides:
How to Create Realistic Wounds and Scars with Prosthetics?
What Kind of Clay Is Best for SFX Sculpting?
Why Every Serious Makeup Artist Should Learn Mold-Making Techniques
How Cinema Makeup School Helps You Learn Makeup for Scary Movies?
Creating realistic horror looks requires more than basic makeup skills, it takes practice, guidance and a deep understanding of special effects techniques. At Cinema Makeup School, students get hands-on experience, learning how to craft everything from cuts, bruises and burns to full creature designs and prosthetic transformations.
Through step-by-step training, students explore different materials, textures and application methods that make horror characters believable on screen. Our SFX makeup Instructors with real industry experience provide practical tips and insider techniques, helping students refine their skills and gain confidence in executing complex effects.
By the end of the program, students can create professional-level horror makeup looks, whether it’s subtle injury makeup or a full monster transformation, preparing them for careers in film, television and special FX projects.
Ready to create scary movie makeup and make your mark in your SFX makeup journey? Take a tour of our special effects makeup school in Los Angeles, California.
Vampires have fascinated audiences for centuries, spanning classic tales like Dracula, modern hits like Twilight and comedic spins like What We Do in the Shadows. Their pale skin, bloodthirsty looks and, of course, those iconic fangs make them one of the most popular Halloween and cosplay choices.
But here’s the fun part: you don’t need to spend hundreds on custom dentures to pull off convincing vampire fangs. With a little SFX makeup know-how, you can make your own fake vampire teeth that look natural, comfortable and screen-ready.
In this blog, you’ll learn about the different types of vampire fangs, understand how to make vampire fangs using SFX techniques and discover how to combine them with makeup for a complete character transformation.
Why Vampire Fangs Are So Iconic in SFX Makeup?
In special effects makeup, vampires are among the most popular characters in horror films, television, theater and even Halloween events because audiences instantly recognize and love them. The vampire look stands out thanks to its signature feature: the fangs.
What makes fangs iconic is that they capture everything the vampire represents: danger, immortality and seduction, with just a single detail. The moment those sharp canines appear, the character’s identity is unmistakable. That’s why creating realistic vampire fangs has become one of the most essential skills in SFX makeup.

Different Types of Vampire Fangs SFX Makeup Artists Create
Vampire fangs come in a variety of styles, each creating a different effect and helping define your character’s personality and presence. From subtle, elegant canines to monstrous, exaggerated teeth, choosing the right style is key to achieving a convincing vampire look in film, theater, or SFX projects. Let’s learn about these types in detail.
1. Classic Canine Fangs
This is the most traditional and widely recognized style. Long, sharp upper canines instantly create that Dracula-inspired look audiences associate with gothic vampires. They work well for stage and screen because they’re simple yet highly effective at transforming an actor into a convincing creature of the night.
2. Subtle / Short Fangs
These fangs are slightly elongated canines that give a more understated effect. They’re often used for modern and romantic vampire characters in TV dramas and films, where charm and elegance are just as important as menace. This style allows actors to maintain a natural look while still giving off that supernatural edge.
3. Extreme / Monstrous Fangs
Oversized, jagged and sometimes including bottom teeth, these fangs are designed for shock value. They’re popular in horror films where the goal is to portray vampires as terrifying, feral and monstrous rather than elegant. This style works best when paired with heavy SFX makeup for a complete creature transformation.
4. Custom Denture Sets
Made from dental acrylic, these are full prosthetic mouthpieces crafted to fit the actor’s teeth perfectly. They offer the most realistic and professional finish but require more time, materials and expertise to produce. Custom denture sets are the go-to choice for film productions where comfort, durability and on-camera believability are critical.
Materials You’ll Need to Create Fake Vampire Fangs
Before learning the techniques behind making vampire fangs, gather your materials. Depending on your budget and skill level, you can use simple household items or professional SFX supplies. Let’s take a closer look at the materials you’ll need, ranging from beginner-friendly options to more advanced professional tools.
A. Beginner-Friendly Materials
- White polymer clay or thermoplastic beads (like InstaMorph or Friendly Plastic).
- Nail glue (optional, for temporary hold).
- A small cup of hot water (for molding thermoplastic).
B. Intermediate to Advanced Materials
- Dental acrylic or dental resin (for realistic fake vampire teeth).
- Alginate or silicone (for making molds of your teeth).
- Plaster or dental stone (for casting molds).
- Professional tooth paint or safe enamel paints (to match natural tooth color).
Step-by-Step: How to Make Vampire Fangs?
Making vampire fangs is both an art and a skill. From quick, beginner-friendly options to professional, on-screen-ready sets, there is a technique suited to your level and needs. In this section, we’ll break down each method so you can learn vampire fangs-making techniques like a pro.
Method 1: Thermoplastic Vampire Fangs (Beginner Friendly)
- Heat the Plastic: Start by placing thermoplastic beads into a cup of hot water. As they heat up, the beads will turn clear and soft, making them easy to mold.
- Shape the Fang: Once the beads are ready, roll the softened plastic into a small cone-like shape. Fit this cone over your canine tooth and gently press it so the material molds naturally to your bite.
- Refine the Look: After fitting, use your fingers to sharpen the tip of the fang to your liking. If it looks a little uneven, you can trim it with small scissors for a cleaner finish.
- Cool and Harden: Remove the fang carefully and let it cool down until it hardens into shape. The best part is that you can always reheat and reshape it later if needed.
- Paint if Necessary: If the finished fang looks too bright or unnaturally white, you can lightly coat it with professional tooth paint or safe enamel paint to give it a more realistic color.
Method 2: Polymer Clay Fangs
- Shape the Clay: Begin by rolling small pieces of polymer clay into cone-like shapes. Test-fit these cones over your teeth before baking to ensure they sit comfortably and look natural.
- Bake and Harden: Once you’ve shaped the clay, place it in the oven and bake it according to the instructions on the clay’s packaging. After baking, let the fangs cool completely so they harden properly.
- Attach Safely: To wear them, use dental adhesive or denture-safe glue – never use superglue, as it isn’t safe for teeth. Fit the fangs onto your canines and press them gently into place. This method creates fangs that look more polished and professional, though it takes a bit longer than thermoplastic.
Method 3: Professional SFX Vampire Fangs (Advanced)
- Make a Dental Impression: To start, take an impression of the actor’s teeth using alginate, a safe material often used by dentists. Once the mold is ready, pour dental stone into it to create a solid cast. This cast gives you a replica of the actor’s mouth to work on, ensuring the fangs will fit comfortably and look realistic.
- Sculpt the Fangs: Next, sculpt the vampire fangs directly onto the dental cast using wax or clay. This step allows you to customize the shape, length and style of the fangs so they align naturally with the actor’s bite. Careful sculpting ensures the fangs look both believable and comfortable to wear.
- Create Acrylic Fangs: Once the sculpt is finalized, use dental acrylic to make the permanent set of fangs. Dental acrylic is durable, lightweight and safe, which makes it the preferred material for creating the perfect fangs. After curing, the acrylic fangs are polished to remove any sharp edges and provide a smooth, comfortable finish.
- Paint and Detail: Finally, paint the acrylic fangs to match the natural color of the actor’s teeth. Professional tooth paints help achieve a seamless blend with real enamel. Adding subtle imperfections or slight variations in shade can make the fangs look more lifelike on camera, avoiding a “too perfect” or artificial look.
Applying Vampire Fangs Makeup
The fangs are only half of the transformation; pairing them with makeup completes the vampire look. Start with a base complexion by applying a pale foundation or white face paint to your face. Set it with translucent powder to achieve a matte, undead finish.
Next, add contour and shadows to enhance the supernatural effect. Use gray, purple and black eyeshadows to hollow out your cheekbones and eye sockets, blending carefully to create depth and a sunken appearance.
For the eyes and details, dark eyeliner and smudged eyeshadow can give a haunting stare. Adding colored contact lenses – red, yellow, or white – instantly intensifies the look and brings a chilling focal point to your character.
Finally, include blood effects for realism. Drip fake blood from the corners of your mouth and lightly smudge it around the chin or neck to suggest a “just fed” appearance.
Get to Know: What Do SFX Makeup Artists Use for Fake Blood?
Following these steps completes your vampire fangs makeup, making the fangs blend naturally into the character and ensuring a dramatic, convincing transformation.
More Helpful Blogs:
What Kind of Clay Is Best for SFX Sculpting?
Reasons to Take a Digital FX Course in 2025
Why Every Serious Makeup Artist Should Learn Mold-Making Techniques
Where to Learn Vampire Fangs Techniques?
If you’re eager to master the art of creating realistic vampire fangs and bringing unforgettable characters to life, Cinema Makeup School is the place to start. Our SFX makeup school offers hands-on courses, including prosthetics, sculpting, mold-making and advanced SFX techniques.
Here, you’ll learn from industry professionals in fully equipped labs, gaining the practical skills needed to craft professional vampire fangs, apply makeup for film and theater and transform actors into lifelike supernatural characters. Whether you’re pursuing a career in film, television, theater, or cosplay, our special effects makeup programs provide the guidance, tools and experience to take your skills to the next level.

Check out our YouTube channel for tutorials!
Where Vampire Fangs Are in Demand?
- Film & TV Productions
- Theater & Stage Performances
- Cosplay & Conventions
- Haunted Attractions & Theme Parks
- Photography & Editorial Shoots
Book a tour of our special effects makeup school in Los Angeles, USA or apply now and begin your journey to mastering professional SFX skills with Cinema Makeup School.
When you think of the most unforgettable characters in film, TV, theater, or even cosplay conventions, what comes to mind? Aliens with glowing eyes, vampires dripping with menace, or whimsical fairies sparkling with color? Behind every iconic transformation is the skilled hand of a SFX makeup artist.
Turning imagination into reality requires more than vision – it demands skill, precision and professional training. That’s where Cinema Makeup School comes in. We shape the next wave of artists by teaching them how to turn imagination into reality. Instead of stopping at the fundamentals, the training dives deep into a variety of transformative styles: Sci-Fi, Horror, Fantasy, Creature and Character Makeup that goes far beyond imagination.
Whether you dream of designing futuristic cyborgs, eerie skeletons, mythical fauns, or bold drag queens, our curriculum gives you the skills to sculpt, paint and transform like a true industry professional. Let’s dive into the different looks you can master in the special effects makeup course.
Why Learn to Create Multiple SFX Makeup Looks?
The entertainment industry thrives on versatility. A makeup artist who can jump from cosplay-ready anime eyes to blood-soaked monster prosthetics instantly stands out. At our special effects makeup school, you won’t be limited to one style, you’ll train across a full spectrum of transformative looks.
Here’s why mastering multiple SFX styles gives you a serious edge:
- Career Opportunities: Expanding your skills opens doors to a wider range of productions, from indie films to high-budget franchises.
- Creative Freedom: Every style, such as sci-fi, gothic, clown, or faun, introduces techniques you can mix and match to create original designs.
- Portfolio Diversity: Showcasing varied SFX makeup looks proves you can adapt to different genres, directors and client demands.
- Personal Growth: Diving into bold and unconventional styles challenges your artistry while boosting confidence.
Now that we’ve talked about how important it is to learn multiple SFX skills, the real question is: how do you master them?
Let’s go through:
Top 8 skills you’ll learn in the SFX Makeup Course at Cinema Makeup School:
Our SFX Makeup Course is designed to immerse you in the full spectrum of special effects artistry. From sci-fi aliens and fantasy creatures to drag icons and terrifying monsters, you’ll gain hands-on skills that prepare you for film, theater, fashion and beyond. These 8 core areas cover everything you need to transform imagination into unforgettable characters.
1. Sci-Fi Makeup
Few genres demand imagination like science fiction. In this module, you won’t just design characters, you’ll engineer entire species. Learn how to morph actors into extraterrestrials, cybernetic soldiers and survivors from galaxies far away.
Key techniques include:
- Sculpting and applying alien-inspired prosthetics for facial and cranial reshaping.
- Metallic airbrushing to achieve sleek android and robotic textures.
- Painting with neon and phosphorescent pigments for mutants or bio-engineered beings.
- Fusing mechanical chrome with organic skin for seamless cyborg illusions.
Think about the makeup magic behind Star Wars, Guardians of the Galaxy, or The Terminator. Those iconic characters exist because artists like you dared to push sci-fi from script to screen.
2. Cosplay Makeup
Cosplay is more than just wearing a costume; it’s a craft of transformation, storytelling and attention to detail. At our school, you’ll learn to recreate fan-favorite characters with the kind of accuracy that looks flawless at conventions and holds up under studio lights.
From anime heroes to comic-book villains and video game icons, you’ll master techniques that make them believable both in person and on camera. With these skills, you’ll stand out at conventions, stage productions and even in film adaptations.
3. Stage & Theatrical Makeup
On stage, subtlety doesn’t cut it. Stage makeup has to reach the very last row, telling the story as much as the actor’s performance. Unlike film, where every close-up captures tiny details, theatrical makeup needs to be bold enough to hold up under blazing lights while still looking believable.
This module focuses on methods that help your characters truly stand out and command attention on stage:
- Using highlight and contour to amplify expressions so they pop from a distance.
- Crafting aging effects, wigs and prosthetics that turn actors into timeless characters or fantastical beings.
- Designing with stage lighting in mind, because warm amber or cool blues can completely change how makeup reads.
- Learning speed tricks for those nerve-wracking, quick changes during live shows.
4. Fantasy Makeup
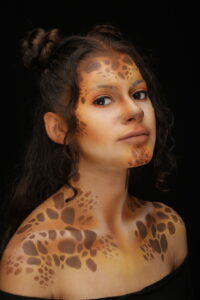
Fantasy makeup unlocks your most imaginative side, drawing inspiration from folklore, legends and magical worlds. In this training, you’ll bring to life mermaids with shimmering scales and water-inspired highlights, fairies with sparkling, iridescent touches, dragons with textured prosthetics and fiery color schemes and even fantasy deer or fauns featuring soft contouring, sculpted horns and animal-like features.
These bold creations combine striking color palettes with intricate prosthetic work, making fantasy makeup a staple not only for film and TV but also for high-fashion shoots where creativity takes center stage.
5. Monster Makeup
If horror is your passion, monster makeup is your playground. From zombie hordes to grotesque creatures, this style teaches you to design looks that shock and terrify.

Core skills include:
- Sculpting wounds, scars and decayed skin.
- Applying prosthetics for exaggerated facial and body features.
- Mixing gore effects with paint for realistic blood and bruising.
- Designing both scary and stylized monsters for events like haunted houses or Halloween.
Check out our highlights from Monsterpalooza 2025, where our team stole the show –
6. Drag Makeup
Drag makeup is all about transformation and performance. It combines precision contouring, bold colors and theatrical exaggeration to create queens and kings who command attention.
You’ll master:
- Facial reshaping with contour for hyper-expressive features.
- Dramatic eyes with glitter, cut creases and graphic liners.
- Creative wigs, brows and lashes that enhance the illusion.
- Drag king techniques for masculine transformations.
Perfect for stage, film and competitions like RuPaul’s Drag Race or DragCon, drag makeup is one of the most exciting forms of expression you’ll learn.
7. Robot & Terminator Makeup
Few transformations are as unforgettable as the clash of flesh and machine. Inspired by cult classics like The Terminator and RoboCop, this style pushes the boundaries of prosthetic artistry. Mechanical textures – gears, wires and steel plating – are sculpted with precision, then blended seamlessly with human skin to create lifelike cyborg illusions.
You’ll also explore how to create damage effects, like torn flesh or bullet holes and master metallic painting techniques that capture depth and reflection. These skills will prepare you to craft jaw-dropping looks that stand out on film sets, at conventions, or during Halloween.
8. Clown Makeup
Clown makeup is a timeless art form that swings between extremes – joy, sorrow and bone-chilling fear. Each design tells a different story: playful clowns sparkling with glitter and whimsy, tragic clowns painted in muted tones with downturned lines and sinister clowns whose distorted smiles and hollow eyes haunt the imagination.
Push it further with killer clown transformations, where prosthetics and gore turn the familiar into the horrifying. From circus stages to horror films, clown makeup is as versatile as it is emotional, an exploration of character psychology through color, shape and illusion.
Related Articles –
How Much Do Special Effects Makeup Artists Make? A 2025 Insight
Reasons to Take a Digital FX Course in 2025
Online vs In-Person SFX Makeup Course
Whether you dream of working on blockbuster films, designing haunted attractions, or creating unforgettable convention looks, Cinema Makeup School in Los Angeles, California, USA, gives you the training and industry access to make it happen. Take a tour of our campus to start your journey today.
Special effects makeup is an incredible art form that allows you to transform yourself or someone else into anything from a terrifying zombie to a mythical creature. It’s not just for professionals in film or theater; anyone with creativity, curiosity and the right guidance can start experimenting. If you’re new to SFX makeup, this guide will introduce you to beginner-friendly techniques, tools and ideas to get you started.
Whether you’re looking for creative SFX makeup ideas, planning to join beginner-friendly makeup classes, or shopping for a starter kit, this guide has everything you need to get started.
Essential Tools Every Beginner SFX Makeup Artists Should Try
For creating special effects makeup looks, you’ll need a few tools. While you don’t need to buy everything at once, having a basic kit helps you practice effectively. A special effects makeup kit for beginners should include:
- Liquid Latex or Gelatin: Used to create wounds, scars and prosthetics.
- Modeling Wax: Ideal for shaping realistic scars or adding textures.
- Face Paints or Grease Paints: Provide vivid colors for character looks.
- Fake Blood: Adds realism to cuts and injuries.
- Brushes and Sponges: Essential for applying and blending makeup.
- Setting Powder or Spray: Ensures your look stays in place.
Beginner-Friendly Special Effects Makeup Ideas
New to SFX makeup? There are plenty of fun, easy looks you can try to get started. Think of this as a playground where you can experiment, learn and gradually build your skills. From simple cuts and bruises to spooky zombies, aged faces, magical fantasy creatures and even burns or scars – you’ll find plenty of beginner-friendly ideas here. Here are some special effects makeup ideas to help you take your first steps:
1. Start With Creating Fake Wounds and Cuts
One of the simplest effects to try is a realistic wound or cut. You can use liquid latex or modeling wax to shape a small cut on your skin. Then, layer red, brown and black face paints to give it depth. Finish with a little fake blood for that realistic touch. This is a great way to practice basic blending and shading techniques.
2. Create Black Eye Effects
A black eye is one of the easiest SFX looks to try and it instantly gives that “after a fight” appearance. Start by dabbing on dark purples and blues around the eye area, then soften the edges with lighter shades like red or yellow to mimic natural bruising as it heals.
Use a sponge or soft brush to blend everything so it looks realistic but not too neat – remember, real bruises are uneven. This simple effect is great practice for learning color placement and shading.
3. Experiment With Zombie Makeup
Zombies are one of the easiest and most fun looks to try. Start by making your face look pale, then darken the areas around your eyes to give a tired, sunken look. Add some fake blood or small cuts for extra detail. To finish it off, wear some old or torn clothes. The best part about zombie makeup is that it doesn’t need to look perfect – being messy actually makes it look better!
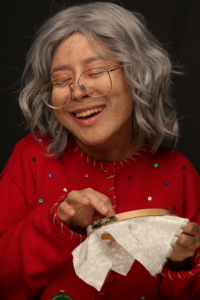
4. Practice Aging Makeup Effects
If you’ve ever wondered how to make yourself look older with makeup, this is a fun idea to try. By using face paints or pencils, you can draw gentle lines and shadows that look like wrinkles and sagging skin. It’s simple but really effective and it helps beginners practice how colors and shading can change someone’s face.
5. Create Fantasy Character Looks
This is where your imagination can run wild! Turn yourself into fairies, elves, or other mystical creatures using bright paints, glitter and small prosthetics. This idea helps beginners practice blending colors, adding textures and experimenting with magical effects in a fun way.
6. Make Burns and Scars
Don’t worry – you don’t need to be a pro to pull this off. Even beginners can create realistic burns and scars. Start by shaping the skin with modeling wax or gelatin, then layer on red, black and yellow paints to get that raw, textured look. Begin with small effects and as you get more proficient with special effects makeup, try covering bigger areas or adding more detailed designs.
Full guide on creating SFX burn makeup!
Important Note: While this guide can help you create stunning looks, you might need specialized special effects makeup training and that’s where Cinema Makeup School shines. We understand that every look requires a different set of skills, so our special effects makeup courses are designed accordingly.
Explore our program tracks and decide which skillset you want to build, such as prosthetics, airbrushing, sculpting and more.
As a beginner, you might be thinking of starting small and we totally understand that. To begin exploring special effects makeup, check out our YouTube channel, where we share behind-the-scenes content, tutorials and quick transformation overviews to inspire your looks.
And when you’re ready to take the next step, we also provide flexible financing options to make your journey into special effects makeup easier to begin.
Tips for Successful Special Effects Makeup for Beginners
- Start Small: Don’t overwhelm yourself with complex designs. Begin with one small effect at a time.
- Practice Regularly: Improvement comes with repetition.
- Use References: Study images or tutorials to understand colors, textures and proportions.
- Safety First: Always do a patch test with new products to avoid skin irritation.
- Document Your Work: Take photos of each look to track progress and build a portfolio.
Ready to join one of the best special effects makeup schools in Los Angeles, USA? Take a tour of Cinema Makeup School’s campus or apply now and start your journey into SFX makeup today.
Remember, every expert artist started as a beginner. With practice, patience and the right tools, you can create professional-quality SFX makeup looks and even pursue a career in special effects makeup.
Special effects makeup is one of the most exciting, creative and in-demand fields in the entertainment industry. From blockbuster films to TV shows, theater and even haunted attractions, audiences love believable transformations that bring characters to life. One of the most important foundations of this craft is character makeup, the ability to transform an actor’s appearance to match the demands of a script.
Have you ever wondered how makeup artists create fake bullet holes, realistic SFX scars, or even age someone decades in just a few hours? That’s the magic of special effects makeup. These skills don’t just make someone look different; they help tell a story on screen or stage.
In this blog, we’ll walk you through the essential character makeup skills every aspiring artist should know, why they matter in an SFX career and how professional training at Cinema Makeup School can help you break into the industry.
Start with Professional SFX Makeup Training
If you’re looking to build a serious career in special effects makeup, the right training can give you the foundation you need. Cinema Makeup School is renowned for offering one of the SFX makeup courses in Los Angeles, California. Our Character Makeup Crash Course introduces you to the techniques used by professional SFX artists in Hollywood.
This one-week, 35-hour intensive course is taught by veteran makeup artists who have worked in film, television and theater. It’s designed to equip you with practical, hands-on skills that you can use to start creating convincing characters right away.
Tuition Fees: $1,500 (materials included)
Bundle Option: Character + Prosthetics Crash Courses for $3,000
Core Character Makeup Skills You’ll Master in This Course
Once you’ve built your foundation, this course takes you deeper into the craft. You’ll learn how to create realistic injuries, age a character believably, apply and blend prosthetics, master hair and beard work and design looks that tell a story on screen. Let’s go through in-depth:
1. Injury Simulation: Bruises, Burns and Bullet Holes
Injuries are the bread and butter of SFX. From crime dramas to war films, directors rely on makeup artists to create believable wounds.
- Fake Bullet Holes & Exit Wounds – Using prosthetics, sculpting materials and color blending, artists create depth and realism that looks shocking but safe. Learning how to make fake bullet holes and exit wounds is a must for anyone aiming to work on action-heavy projects.
- SFX Scars – Scars add history to a character. They can be sculpted from wax, applied with prosthetic transfers, or painted with texture and shading.
- Burn Effects – Whether it’s a fresh blister or an old healed scar, burn makeup requires color layering and anatomical accuracy to be convincing.
Get insights on: SFX Burn Makeup Techniques Every Artist Should Know
2. Learn Aging Techniques
Sometimes the script calls for subtlety rather than gore. Aging makeup uses latex stippling, highlighting and shadowing to create wrinkles and sagging skin. Adding gray hair or yellowing teeth completes the illusion, allowing one actor to play multiple stages of life.
Related Blog: How to Apply Latex & Vinyl Bald Caps in Character Makeup?
3. Prosthetic Makeup Application
When you step into character makeup training, prosthetics quickly become one of the most exciting skills to master. You’ll learn how these sculpted pieces can reshape an actor’s face or add entirely new dimensions to a role.
The process begins with simple transfers – like scars or cuts that can be applied in minutes – perfect for learning precision and edge blending. From there, you move into larger silicone or foam latex appliances, where the transformation becomes dramatic: building new cheekbones, altering a nose, or even creating striking fantasy or creature-like features.
Blending and painting then become your focus, teaching you how to erase the lines between prosthetic and skin so the piece looks like it has always belonged to the performer. It’s in these details that prosthetics stop being “appliances” and start becoming part of the character itself.
4. Master Hair & Beard Work
Hair often makes or breaks a transformation. Learning how to hand-lay hair, apply lace beards, or adjust natural color is critical for creating convincing period looks, rugged characters, or aged transformations.
5. Story-Driven Design
Great SFX makeup doesn’t stop at technical execution; it’s about storytelling. A scar across the cheek suggests a violent past; a crooked nose prosthetic hints at years of rough living. Every brushstroke, prosthetic, or bullet wound should deepen the audience’s understanding of the character.
Don’t Forget to Read This: How Cinema Makeup School’s SFX Makeup Course Brings Seasonal Characters to Life?
Why Should You Master Character Makeup?
Every production needs its characters to feel real and that’s where strong character makeup skills become indispensable. These techniques allow storytellers to:
- Show transformation instantly – Makeup communicates aging, injuries, or personality shifts in a way audiences recognize immediately.
- Balance VFX with realism – Instead of relying only on digital effects, practical makeup delivers authenticity on set while keeping budgets manageable.
- Strengthen performances – When actors see themselves altered with scars, prosthetics, or wrinkles, it helps them step deeper into the role.
- Hold up under HD cameras – With today’s 4K and 8K filming, only precise makeup artistry can survive close-up shots without breaking the illusion.
Check out our podcast channel where our trainers share tips, techniques, and behind-the-scenes stories in special effects makeup.
From streaming platforms to live theater, productions depend on these skills because they directly shape how characters are perceived. No convincing characters means no convincing story.
Spaces are limited, so sign up today or book a tour to see how Hollywood’s top school for SFX can jump-start your career.
When it comes to creature design, some of the most memorable monsters, aliens and fantasy beings don’t just appear out of thin air – they’re the product of artistic imagination, rooted in a strong understanding of concept art and color theory. Whether you’re sketching your first design or refining details for the big screen, mastering these foundations can turn an average drawing into a fully realized creature that feels alive.
In this blog, we’ll break down how concept and color theory can transform your creative process, provide practical creature design ideas and explain why anatomy and visual storytelling are essential for designing creatures that stand the test of time.
Why Concept and Color Theory Matter in Creature Design?
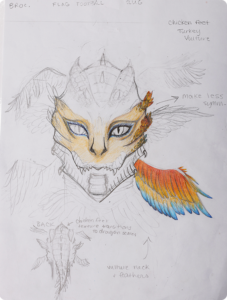
Think about your favorite movie monster or video game beast. Chances are, the design wasn’t random. Every horn, scale and skin tone was carefully chosen to support the character’s story, environment and emotional impact.
- Concept Art as the Blueprint – Concept art is where the creature first takes shape. It’s the stage where artists test anatomy, posture and exaggerated features to communicate personality. Without strong concept work, your design risks looking flat or generic.
- Color Theory as Emotional Language – Colors shape how audiences feel about your creature. Red might suggest danger or aggression, while muted blues and greys can make a monster look ancient or mysterious. By controlling color choices, you control how your creature communicates before it even moves.
Together, these two pillars form the science of creature design, allowing artists to create believable hybrids of imagination and biology.
Science of Creature Design: Understanding Animal Anatomy
Before diving into color palettes and mood boards, creature designers often start with real-world references. Anatomy plays a crucial role because, even when you’re inventing something fantastical, the audience must believe the creature could exist.
Animal Hybrids: Many iconic monsters borrow anatomy from multiple species. A dragon, for example, may combine the wings of a bat, the scales of a reptile and the muscular build of a lion.
Functionality Matters: Adding extra limbs or jaws might look interesting on paper, but asking “how would this creature walk, breathe, or eat?” keeps the design grounded.
Dynamic Posing: Studying how animals move in the wild can help you sketch natural, powerful stances that bring your creature to life.
For those new to the process, many artists rely on a creature design book or visual anatomy guides to practice breaking down real-world forms before blending them into something new.
Take a behind-the-scenes look at how our students bring creatures to life:
Level Up Your Creature Design Skills with Cinema Makeup School
Now that we have learned why concept, color theory and anatomy matter for designing creatures. But where do you master these skills from? Cinema Makeup School is your go-to.
Located in Los Angeles, California, USA, we offer special effects makeup courses in different niches like prosthetic design, character design, creature design and more. The topic we are focusing on here is designing creatures through Concept and Color Theory.
This one-week, 35-hour intensive program dives deep into the foundations of creature creation. You’ll start by mastering the core principles of anatomy and color theory, then move into sketching expressions, adding monstrous details, experimenting with custom palettes and practicing painting methods that bring your designs to life.
The best part? No prerequisites are required. Whether you’re a complete beginner with a passion for creatures or an advanced student looking to refine your craft, this course is open to all.
Course Fee: $1,000 total ($850 tuition + $150 materials).
Location: Cinema Makeup School, Los Angeles, California.
Skills You Will Learn in Our Concept & Color Course:
By the end of the training, you’ll have a clear understanding of how to transform raw ideas into fully developed, visually striking creatures. Key skills include:
1. You’ll Learn Anatomy and Structure for Creature Design
You will learn to build a believable base by understanding skeletal and muscular forms, even when creating fantastical beings.
2. Master Color Theory for Storytelling
Once the anatomy and structure of your creature are established, color becomes the most powerful storytelling tool in your design arsenal. Audiences respond to color on a subconscious level and the right palette can instantly communicate danger, mystery, beauty, or otherworldliness without a single word spoken.
- Hue & Emotion: Warm hues, like reds, oranges and yellows, instantly suggest energy, danger and vitality. Think of fiery demons or molten monsters that radiate heat. On the other hand, cool hues – blues, greens and purples – evoke calm, mystery, or an unsettling chill, perfect for designing deep-sea predators or spectral beings.
- Value & Contrast: A creature’s lightness or darkness affects how audiences perceive it. A dark, low-contrast palette makes a beast feel stealthy and predatory, lurking in the shadows. Meanwhile, a bright, high-contrast scheme can create a bold, striking figure where focal points – like glowing eyes, bioluminescent markings, or razor-sharp claws – pop dramatically on screen.
- Environment-Based Palettes: Successful creature designs often reflect their habitat. A desert predator may blend with sandy browns and ochres, while a swamp dweller thrives in murky greens and earthy tones.
For aquatic or alien beings, shimmering iridescent blues, silvers, or greens tie them visually to water or otherworldly atmospheres. By connecting palette to environment, you add a layer of believability that grounds even the most fantastical creations.
- Symbolism in Color: Different shades carry cultural and psychological meaning. Red often signals blood, rage, or primal aggression. Green can represent toxicity, decay, or alien biology. Black is the language of death, power, or evil. Using symbolic cues not only makes your creature visually striking but also taps into deep-rooted audience associations.
When you master these relationships, you’re not just “painting a monster”- you’re building emotional impact through color. A creature’s palette can make audiences recoil in fear, marvel at its beauty, or feel uneasy without ever fully knowing why. That’s the silent power of color theory in creature design.
3. Concept Art Detailing and Development
This stage focuses on capturing a wide range of expressions, manipulating proportions to achieve exaggerated or realistic forms and integrating distinct features, such as bone ridges, fangs, or scales, into final concept designs.
4. Boost Your Skills in Paint Application
Here, the emphasis is on bringing sketches and models to life with color. You’ll practice layering paint to build depth, blending tones for smooth transitions and mixing custom shades that mimic lifelike skin, scales, or fantasy textures. The result is artwork that feels three-dimensional and production-ready.
Worth Reading These Blogs:
What Kind of Clay Is Best for SFX Sculpting?
How Much Do Special Effects Makeup Artists Make? A 2025 Insight
Online vs In-Person SFX Makeup Course
Creature Design Ideas You Can Experiment With
When ideas don’t come easily, exploring themed approaches can help unlock your creativity. Here are a few directions worth trying:
- Elemental Beings
Imagine a creature born of fire, water, earth, or air. A fire entity might have molten cracks glowing beneath its skin, while an ice creature could appear crystalline, with shards jutting out like armor. - Flora-Fauna Hybrids
Combine plant life with animal forms to produce unique silhouettes. Picture a wolf with moss growing along its back, or a stag whose antlers twist into flowering vines. - Otherworldly Aliens
Study the anatomy of insects or deep-sea creatures and push it into the unfamiliar. Translucent wings, oversized eyes, or segmented exoskeletons can give your designs a convincing alien quality. - Modern Mythology
Take a well-known folklore monster and reimagine it for today’s audience. A siren could have bioluminescent patterns for deep-sea camouflage, while a dragon might evolve scales that resemble modern body armor.
Start each concept by sketching loose shapes to explore silhouettes, then experiment with color variations. Over time, one version will emerge as the most compelling path forward.
Ready to bring your creative visions to life? Book a tour of our campus and experience how we turn imagination into reality
When you see an actor take a punch in a movie and walk away with a swollen, bruised eye, you’re witnessing the magic of SFX black eye makeup – not the result of a real hit. Special effects makeup artists are experts at crafting convincing injuries without risking anyone’s safety. A well-executed fake black eye can sell the drama of a fight scene, making the audience believe every blow.
In this guide, we’ll explore the artistry behind creating realistic bruises and black eyes, the techniques professionals use and how aspiring makeup artists can learn to master this essential skill.
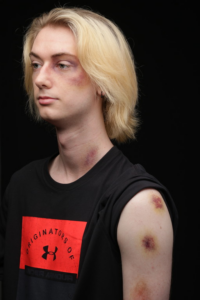
Why Realistic Black Eye Makeup Matters in Film and TV
Fight scenes lose their impact if the injuries look fake. A poorly done bruise can distract viewers, while a realistic black eye makeup effect can heighten emotion, tension and authenticity. Makeup artists must consider not just the appearance of swelling and discoloration, but also how bruises evolve.
Black eyes aren’t static. They change in color and shape as they heal – something makeup artists must replicate depending on the scene. For example:
- Fresh black eye: Redness and swelling appear first.
- One day later: Purples and deep blues dominate.
- Healing phase: Greens, yellows and faded browns spread outward.
This progression is what makes the work of a skilled artist so convincing.
Step-by-Step Black Eye Makeup Tutorial for Fight Scenes
Creating a convincing fake black eye isn’t about randomly dabbing on purple shadow; it’s about understanding how trauma develops and heals. Professional makeup artists carefully layer colors and textures to mimic the life cycle of a bruise. Here’s how they do it on set:
Step 1: Prepping the Skin
Before any color goes on, the skin around the eye is cleansed and lightly moisturized. This helps the makeup blend seamlessly and stay intact under intense lighting.
Step 2: Building the Trauma Base
Every bruise starts with broken capillaries. Makeup Artists apply a sheer layer of red tones to mimic fresh irritation and swelling. This step lays down the base that every other layer will build upon.
Learn How to Create Realistic Wounds and Scars with Prosthetics?
Step 3: Adding Depth with Darker Colors
Purples, deep blues and touches of black are added next. These shades represent pooled blood under the skin. Instead of solid patches, artists stipple and feather the colors for that soft, uneven bruise edge audiences subconsciously recognize as “real.”
Step 4: Blending for Realism
Using stipple sponges and soft brushes, the colors are blended outward to create the illusion of blood spreading beneath the skin. This blending stage is what prevents the makeup from looking like face paint.
Get to know: What Do SFX Makeup Artists Use for Fake Blood?
Step 5: Staging the Bruise Timeline
This is where SFX artistry shines – the bruise changes depending on the timeline of the scene.
- Day 1 (Fresh Injury): Reds and purples dominate with visible swelling.
- Day 3 (Peak Bruise): Dark purples and blues deepen, with puffy, uneven edges.
- Day 5 (Healing): Faded yellow-greens start appearing at the bruise’s outer edges.
- Final Healing Stage: Browns and soft yellows take over as the bruise fades.
By carefully layering these evolving colors, makeup artists can seamlessly transition between scenes filmed days apart while maintaining consistent injuries.
Step 6: Finishing Touches
To sell the illusion, a dusting of translucent powder keeps everything locked in for hours. Additional contouring can suggest swelling or puffiness, while silicone appliances may be added under the eye in HD productions to replicate real tissue distortion.
Using Silicone Appliances for Added Realism
In high-definition filming, cameras capture every pore, wrinkle and fine detail, meaning a painted bruise alone may not be sufficient. That’s where silicone prosthetics come in. These thin, flexible prosthetics are custom-sculpted to fit the actor’s facial contours and can mimic the subtle bulge of swelling beneath the eye. When adding silicone appliances under the eye, SFX makeup artists gain several advantages that elevate the illusion from good to truly cinematic:
- Silicone blends seamlessly with natural skin, helping avoid the flat, painted look that makeup alone can sometimes create.
- Unlike simple paint effects, silicone pieces are highly durable, allowing them to last through long shooting days, harsh lighting conditions and repeated takes without breaking down.
- They also flex with the actor’s natural expressions, ensuring the injury looks authentic and never stiff or artificial, even during squints, smiles, or subtle movements.
By combining painted layers of fake black eye makeup with the dimensional realism of silicone, SFX artists ensure the injury holds up under even the closest close-up shots.
Curious about the techniques and challenges behind legendary SFX work? Tune in to our latest episodes of Talking Shop: an SFX Podcast.
Black Eye Makeup for Stage vs. Film
Creating a fake black eye isn’t a one-size-fits-all process. The techniques used for theater are very different from those used for film and television.
On stage, bruises need to be bold and exaggerated, with stronger colors, larger strokes and dramatic contrasts that remain visible to audiences even from the back row.
In contrast, SFX makeup in film calls for a more subtle approach. Close-up cameras capture every detail, so artists rely on soft blending, layered tones and delicate shading to make the injury look believable under high-definition scrutiny.
Being able to adjust techniques depending on the medium is a core skill that professional SFX makeup programs emphasize, ensuring artists are prepared for both theatrical and on-screen demands.
Check Out: What is the Difference Between Movie and Stage Makeup?
Worth Noting: For students eager to master both theatrical and on-screen techniques, Cinema Makeup School is the ultimate destination for real-world SFX training. Our Special Effects Makeup Program goes beyond teaching how to create bruises, cuts and injuries – students learn how lighting, camera angles and an actor’s performance can completely change the way makeup reads on stage and on screen.
Through hands-on practice in bold, exaggerated theater effects as well as subtle, high-definition film techniques, graduates gain the versatility and confidence to thrive in any production environment.
Real-World Spotlight: Black Eye Makeup in Cinema
Think of Martin Scorsese’s Raging Bull, where Robert De Niro’s transformation into boxer Jake LaMotta remains one of cinema’s most striking examples of realistic fight aftermaths. The makeup team meticulously crafted every black eye, bruise and swollen feature to capture the brutality of life inside the ring.
Without those convincing injuries, the film’s raw emotional power and sense of authenticity would not have hit nearly as hard.
Curious what it feels like to study SFX makeup in Los Angeles, USA? Take a tour of our campus and see for yourself or apply now.