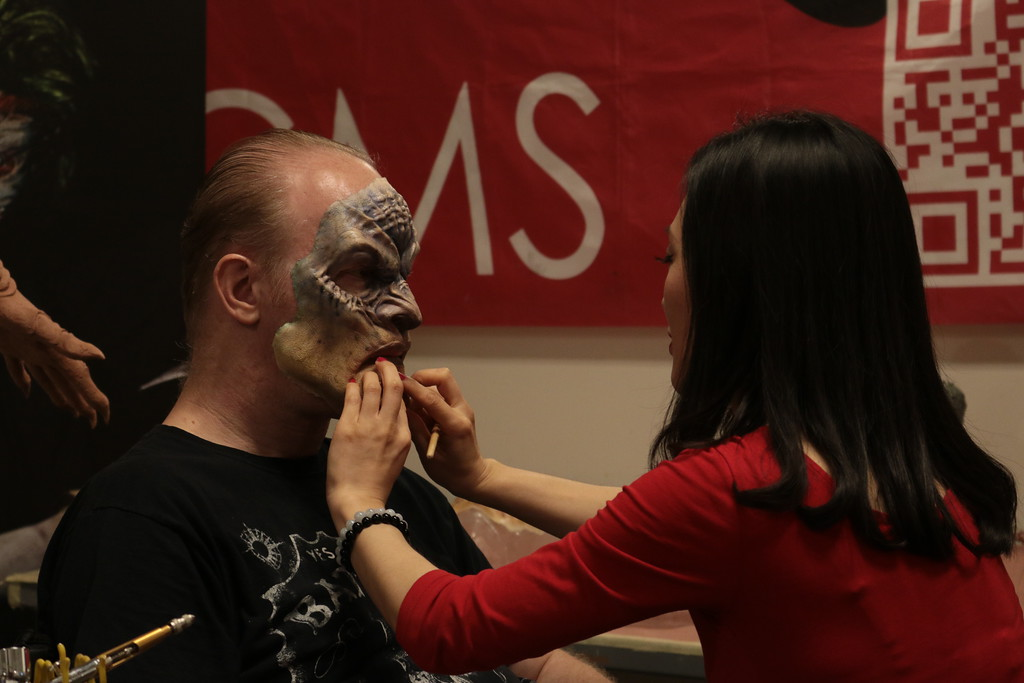
In special effects makeup, facial structure plays a major role in character transformation. A single prosthetic can completely change how an actor appears on screen. From witches and goblins to elderly characters and fantasy creatures, the long-nose prosthetic has remained one of the most widely used prosthetic appliances in film, television, theater and cosplay makeup.
However, creating a believable prosthetic nose involves far more than simply extending the shape outward with clay. A professional-quality sculpt must feel anatomically connected to the actor’s face, move naturally during performance and remain convincing under HD cameras and strong production lighting. Every curve, edge, wrinkle and contour affects whether the appliance looks realistic or fake.
Let’s explore the process of sculpting a realistic long-nose prosthetic, from understanding facial anatomy and building the primary shape to refining texture, edges and overall realism for professional-level character makeup.
Facial Anatomy for Long Nose Prosthetic Sculpting
Before sculpting a long prosthetic nose, artists must first study how the natural nose is structured and how it connects to the rest of the face. Understanding anatomy helps the prosthetic appear believable rather than like an artificial extension attached to the skin.
Professional sculptors usually begin by observing real faces from multiple angles, especially side profiles. The table below explains the main facial areas artists study before sculpting.

| Facial Area | What Artists Should Study |
| Nose Bridge | Observe the width, height and angle of the bridge from front and side views. |
| Nose Tip | Study how the tip curves, droops, or projects outward naturally. |
| Nostrils | Examine nostril size, spacing and direction on real faces. |
| Cartilage Structure | Notice how the lower nose appears softer than the upper bridge area. |
| Cheek Transitions | Observe how the nose blends smoothly into the cheeks. |
| Upper Lip Relationship | Study the distance and angle between the nose and upper lip. |
| Side Profile | Analyze how the nose shape reads from profile angles. |
| Natural Asymmetry | Look for slight unevenness in real noses and facial features. |
Learn Why SFX Makeup Artists Should Study Human Anatomy for Sculpting Realistic Prosthetics.
Which Characters Commonly Use Long Nose Prosthetics
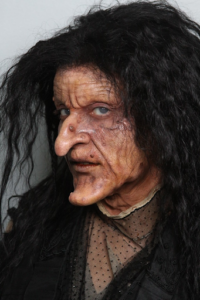
- Witch Characters: These designs often feature hooked bridges, drooping tips, sharp nostrils and aged texture to create a sinister or mystical appearance. The silhouette usually becomes more exaggerated from the side profile to make the character instantly recognizable on camera or stage.
- Goblins and Fantasy Creatures: Fantasy creatures often use elongated or distorted nose designs to create a non-human appearance. Goblin prosthetics may feature enlarged nostrils, crooked bridges, sharp curves, or uneven cartilage shapes to make the character appear more aggressive, mischievous, or creature-like.
- Elderly Character Makeup: As people age, the cartilage in the nose can appear longer and softer over time. Prosthetic artists often use subtle long-nose prosthetic designs in old-age makeup to recreate these natural anatomical changes.
- Villains and Dark Characters: Sharp or elongated facial features can create a more intimidating appearance in villain makeup. A narrow bridge, downward tip, or asymmetrical shape may help make the character appear colder, more severe, or psychologically unsettling.
- Historical and Period Characters: Some historical transformations require nose prosthetics to match portraits, sculptures, or real individuals from specific time periods. In these cases, artists sculpt prosthetics that closely resemble the facial structure of the reference subject while still fitting naturally on the actor’s face.
- Stylized Theater and Cosplay Characters: Theater productions and cosplay makeup often use more exaggerated nose prosthetics because the designs must remain visible from a distance or match iconic fictional characters.
Tip: Mastering these types of character transformations requires more than basic sculpting techniques. Artists must learn how to combine anatomy study, prosthetic design, mold-making, texture detailing, painting and appliance application to create believable on-screen results.
Cinema Makeup School offers professional training programs in special effects makeup that cover prosthetic sculpting, mold-making, character design, appliance application, painting techniques, lifecasting and production-focused makeup workflows used throughout the film, television and entertainment industries.
The programs are taught by experienced SFX instructors and are designed to help aspiring artists build practical industry-relevant skills.
Apply here to start developing hands-on special effects makeup skills used in film & television. Alternatively, book a tour here.
Related Articles –
Why Your Sculpt Looks Great in Clay but Fails in Mold?
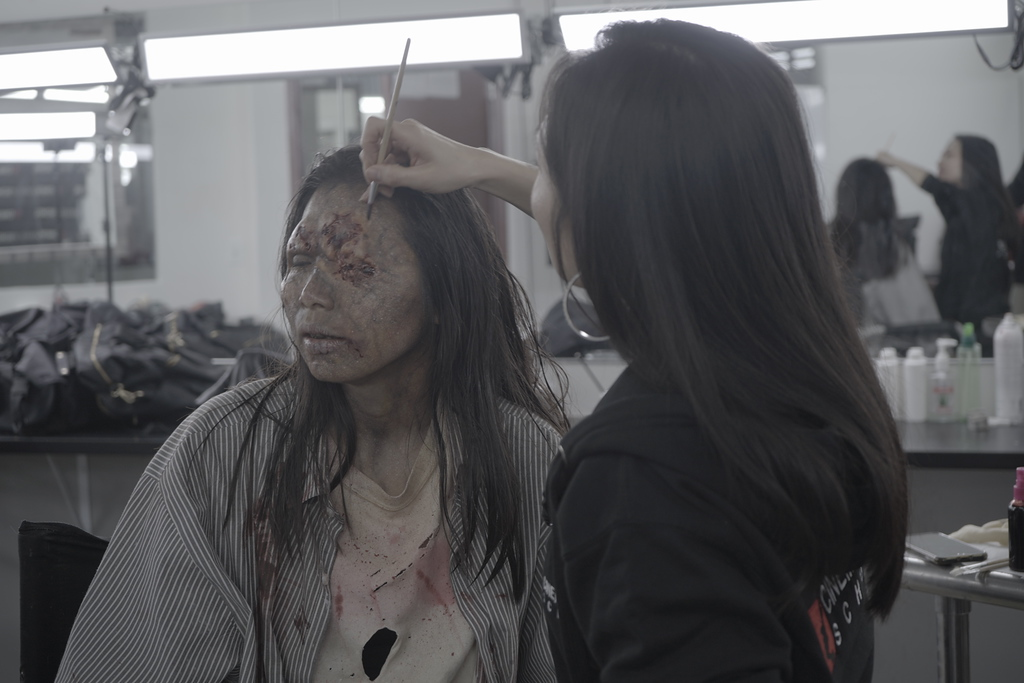
How Makeup Tests Help Finalize Character Looks?
How SFX Artists Build & Apply Ear Prosthetics?
How to Create a Realistic Long Nose Prosthetic
Creating a realistic long prosthetic nose requires careful planning, anatomy study, sculpting control, edge refinement and realistic surface detailing to make the appliance appear believable on camera. The following steps cover the complete sculpting workflow, from preparing the lifecast and building the primary forms to refining texture, blending edges and casting the final prosthetic.
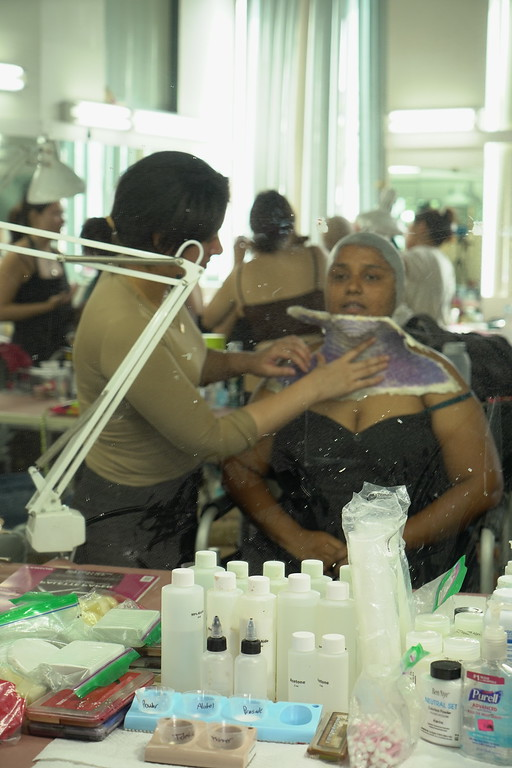
Step 1: Prepare the Lifecast
Start by preparing a clean lifecast of the actor or model. A lifecast provides an accurate replica of the face, allowing you to sculpt directly onto the correct facial anatomy. This helps you understand how the nose connects to the cheeks, forehead, nostrils and upper lip area.
Even small proportion mistakes can become highly noticeable under HD cameras or side-profile lighting, so make sure the lifecast surface is clean and properly prepared before applying clay. This helps the clay adhere smoothly during sculpting.
Step 2: Study References and Plan the Shape
Before adding clay, study reference images, anatomy photos, side profiles and character concepts to understand how the final nose should appear. Avoid sculpting entirely from imagination because reference study helps create more believable shapes and proportions.
At this stage, decide:
- how exaggerated the nose should become,
- whether the tip should droop or extend outward,
- how sharp or soft the bridge should appear,
- and how the prosthetic supports the overall character design.
Planning the shape beforehand helps prevent overbuilding and makes the sculpting process easier to control later.
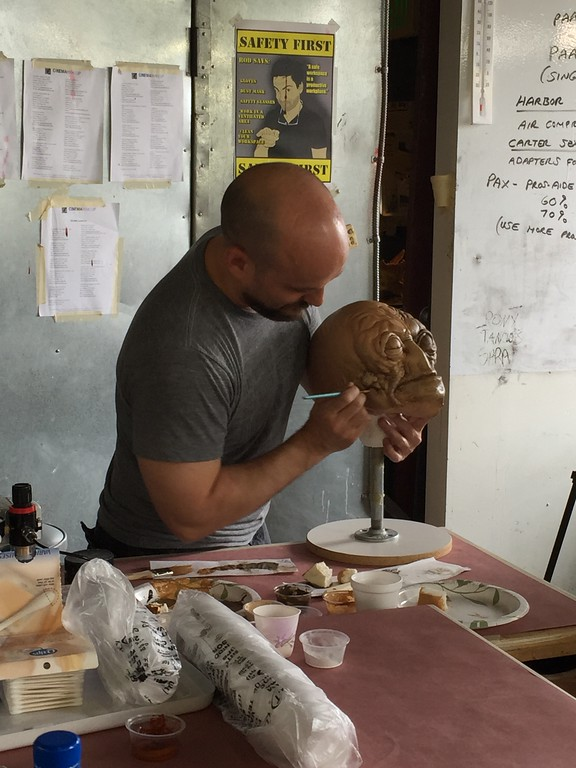
Step 3: Apply Clay and Block Out the Main Structure
Once the design is planned, apply oil-based clay directly onto the nose area of the lifecast. Begin with larger clay forms first instead of focusing on fine details immediately.
As you sculpt, continuously add, remove and reshape the clay while checking the form from multiple angles. Focus on building the overall length, bridge shape, nostril placement and profile silhouette before refining smaller details.
Keep the surrounding anatomy visually connected to the prosthetic throughout the sculpt, especially around the cheeks and upper lip, so the final long prosthetic nose appears natural and balanced.
Check Out: What Kind of Clay Is Best for SFX Sculpting?
Step 4: Refine the Shape and Facial Transitions
After the main structure feels balanced, refine the sculpt into cleaner anatomical forms by shaping the bridge, defining the nostrils and developing the tip structure more carefully.
Focus on how the prosthetic blends into the surrounding facial areas. The sides of the nose should transition naturally into the cheeks and upper face without looking abruptly attached. Use loop tools, spatulas and clay shapers to smooth the forms and refine the sculpture.
Step 5: Sculpt the Cartilage and Nostril Areas
Once the larger forms are complete, focus on the softer structural areas of the nose, including the cartilage, nostrils and tip.
These areas require careful sculpting because stiff nostrils or unnatural curves can quickly make the prosthetic appear fake under close-up shots.
Step 6: Thin and Blend the Edges
Edge work is one of the most important parts of prosthetic sculpting. Thick edges often expose the appliance immediately once makeup and lighting are added.
To avoid this, gradually feather the clay outward until the prosthetic visually disappears into the lifecast. The transition should appear smooth enough that the viewer cannot easily identify where the appliance begins or ends.
Take your time during this stage because subtle blending greatly improves realism during final application.
Step 7: Add Skin Texture and Surface Detail
Once the sculpt feels structurally complete, begin adding texture to the surface. Real skin contains pores, wrinkles, compression lines and tiny irregularities that help break up smooth surfaces under HD cameras.
Carefully sculpt skin pores, fine wrinkles, crease lines and natural imperfections to create realistic surface detail. Use sponges, stipple tools, brushes, or fine-detail sculpting instruments to build realistic texture gradually.
Avoid overtexturing because excessive detail can make the prosthetic appear unnatural or overly stylized.
Note: Adjust the texture style depending on the character design.
Step 8: Inspect the Sculpt From Every Angle
Before molding begins, inspect the sculpture carefully from front, side and three-quarter views. Since long nose prosthetics rely heavily on silhouette, the profile shape must appear balanced and believable from every angle.
Check:
- bridge flow,
- nostril shape,
- edge smoothness,
- facial balance,
- and overall proportions.
Make final clay adjustments before moving into the mold-making stage.
Step 9: Mold and Cast the Prosthetic
Once the sculpture is finalized, begin the mold-making process using materials such as Ultracal or plaster stone to capture the sculpt detail accurately.
After the mold cures, cast the final prosthetic in silicone, foam latex, or gelatin, depending on the desired finish and flexibility. Silicone is commonly used in film and television because it closely mimics the movement and translucency of real skin.
Schedule a campus tour to explore the classrooms, studios and hands-on learning spaces used for professional special effects makeup training.
In special effects makeup, the quality of a prosthetic is not judged the moment it is applied. It is judged hours later under heat, sweat, studio lighting, repeated facial movement and high-definition cameras that expose every technical flaw.
A prosthetic may look flawless during application, but if the paint begins separating, the surface becomes patchy, or the edges start breaking down halfway through filming, the makeup has failed its real production test.
This is why sealing is one of the most important technical stages in prosthetic makeup. In this blog, we will break down the professional sealing techniques used to improve prosthetic durability, surface stability and long-wear performance in SFX makeup.
What Is Sealing in Prosthetic Makeup?
In SFX makeup, sealing is not simply about “locking makeup in place.” It is a controlled process that stabilizes the appliance surface, protects paint systems, regulates texture and helps the prosthetic survive demanding filming conditions. Proper sealing determines whether the makeup remains camera-ready after hours on set or starts deteriorating after the first few takes.
Prosthetic makeup is exposed to constant stress during filming. Actors sweat under studio lights, facial appliances move continuously during performance and prosthetic materials react differently under heat, humidity and long shooting hours.
Different materials used in SFX makeup also respond differently during wear. For instance, foam latex tends to absorb moisture more easily, while silicone surfaces may struggle to hold paint consistently without proper surface preparation. Over time, repeated facial movement and environmental exposure can weaken the overall makeup finish.
Sealing techniques are used to control these material reactions and help maintain the prosthetic’s texture, color consistency, flexibility and realistic appearance throughout production.
Sealing Products Guide for Different Prosthetic Materials
Different prosthetic materials respond differently to sealing products during application and filming. Factors such as surface texture, flexibility, moisture absorption, paint adhesion and material density all influence how a prosthetic should be sealed. Because of this, professional SFX artists use different sealing systems for foam latex, silicone, gelatin and encapsulated prosthetics to maintain durability, movement and a realistic on-camera appearance.
1. Foam Latex Prosthetics
Foam latex is one of the most porous materials used in prosthetic makeup, which means it absorbs paint and moisture very quickly. If the surface is not sealed properly, the makeup can appear uneven, dry, or patchy during filming.
To seal foam latex prosthetics, artists commonly use:
- Pros-Aide
- PAX paint systems
- Flexible acrylic sealers
- Barrier sprays
These products help create a controlled surface for painting while improving durability during long shooting hours. The sealer is usually applied in thin layers because excessive buildup can flatten the foam texture and make the appliance look artificial under HD cameras.
2. Silicone Prosthetics
Silicone prosthetics require specialized sealing products because silicone naturally resists many standard makeup materials. Traditional acrylic-based sealers often do not bond correctly to silicone surfaces.
Artists commonly use:
- Silicone-based paints
- Silicone sealers
- Matte silicone additives
- Silicone deadeners
These products help maintain paint adhesion while allowing the prosthetic to stretch naturally during facial movement. Proper sealing also helps reduce excessive shine, which is important for achieving a realistic skin appearance under studio lighting.
Also Read Foam Latex vs Silicone: Choosing the Right Material for SFX Prosthetics
3. Gelatin Prosthetics
Gelatin appliances are sensitive to heat, sweat and humidity, so sealing is necessary to improve their stability during wear. Because gelatin is softer than many prosthetic materials, artists usually avoid heavy sealing layers that could stiffen the appliance.
Common sealing products for gelatin prosthetics include:
- Alcohol-based sealers
- Lightweight barrier sprays
- Flexible finishing sprays
- Translucent setting powders
These materials help protect the prosthetic surface while maintaining flexibility and natural movement during performance.
4. Encapsulated Silicone Prosthetics
Encapsulated silicone prosthetics are designed with extremely thin edges for seamless skin transitions, so sealing techniques must remain very controlled. Heavy products can damage the encapsulation layer or create visible texture buildup on the camera.
Artists often use:
- Alcohol-activated paint systems
- Transparent matte sealers
- Silicone-compatible finishing products
- Airbrushed sealing layers
These sealing methods help preserve the realistic translucency and fine surface detail of the prosthetic while improving durability throughout filming.
Important Things to Keep in Mind While Sealing Prosthetics
1) Avoid Over-Sealing the Appliance: Heavy sealing layers can flatten skin texture, reduce appliance flexibility and create an artificial surface appearance under studio lighting. In film and television makeup, maintaining natural translucency and surface detail is just as important as improving durability.
2) Always Match the Sealer to the Prosthetic Material: Different prosthetic materials react differently to sealing products. Foam latex, silicone, gelatin and encapsulated appliances all require compatible systems to maintain proper adhesion and flexibility. Using incompatible sealers can lead to paint separation, surface cracking, peeling, or texture distortion during filming.
3) Test the Surface Under Lighting Conditions: A prosthetic that appears realistic in normal room lighting may behave very differently under production lights. Some sealers increase unwanted shine, while others can make the surface appear too flat or dry on camera. Professional makeup artists often evaluate sealed prosthetics under strong lighting before filming begins.
4) Allow Proper Drying and Curing Time: Rushing the sealing process can weaken the overall makeup finish. If sealers or paint systems are layered before the previous layer has fully cured, the prosthetic may develop bubbling, peeling, or uneven texture during wear. Controlled drying time helps create a more stable and long-lasting surface.
5) Monitor Environmental Conditions During Filming: Heat, humidity, sweat, rain effects and long shooting hours all affect how prosthetics behave on set. Artists often adjust sealing methods depending on the filming environment to maintain paint stability and edge integrity throughout production.
Learn How to Maintain SFX Makeup in Different Weather Conditions
6) Consider Movement and Facial Performance: Prosthetic makeup must remain flexible during facial movement and repeated performance takes. Sealers that become too rigid may crack around high-movement areas such as the mouth, eyes, forehead and cheeks. Professional sealing workflows are designed to preserve both durability and natural movement.
Related Articles –
Which Adhesives Are Used in Professional SFX Makeup?
Why Your Sculpt Looks Great in Clay but Fails in Mold?
How to Choose Between Heavy and Lightweight Prosthetics in SFX Makeup?
How Professional Prosthetic Makeup Training Helps Prevent Sealing Mistakes
Proper prosthetic sealing requires far more than simply knowing which products to buy. In professional SFX makeup, artists must understand how different prosthetic materials behave during filming and how environmental conditions can affect the overall makeup performance. Without proper training, common issues such as paint separation, surface cracking, excessive shine, edge lifting and texture breakdown can quickly appear on camera.
At Cinema Makeup School, students gain hands-on experience with professional prosthetic makeup techniques used in film and television production. Through hands-on SFX makeup training, students learn how to properly apply, blend, seal, paint and maintain prosthetics for long-lasting on-camera performance.
Here, you will understand important factors such as surface chemistry, paint compatibility, appliance flexibility, sweat resistance, texture behavior and cinematography requirements involved in prosthetic makeup.
Schedule a campus tour to experience the creative environment, hands-on learning spaces and production-focused training at our special effects makeup school.
FAQs
Q 1: Why do prosthetic edges sometimes lift even after sealing?
Edge lifting can happen for several reasons, including poor skin preparation, incompatible adhesives, excessive facial movement, sweat buildup, or incorrect sealing methods. In many cases, the issue is not the sealer but how the entire prosthetic application was prepared and maintained during wear.
Q 2: Is sealing required for every type of prosthetic makeup?
Most prosthetic applications require sealing or surface finishing techniques to improve paint stability, durability and overall makeup performance during filming. However, the sealing process varies depending on the material being used.
Q 3: Why is prosthetic sealing important in high-definition filmmaking?
High-definition cameras capture extremely fine details, including texture inconsistencies, paint cracking, edge separation and uneven surface shine. Proper sealing helps maintain a more stable and realistic makeup finish, allowing prosthetics to appear natural under close-up filming and strong production lighting.
What looks like a seamless alien transformation on screen is actually a carefully designed prosthetic built over multiple production stages. From initial design to final application, every step is controlled, tested and refined to meet the demands of cameras and performance-driven scenes.
An alien creature mask isn’t just about appearance; it must move naturally with the actor, hold up under studio lighting and remain consistent across long shooting schedules.
This guide breaks down how artists create alien creature masks using special effects makeup, covering the full process, tools and materials used in the industry, from concept development to on-set application.

Alien Creature Mask Styles Used in Film and Television
Alien creature mask styles in film and television typically include humanoid designs, monster-inspired forms, predator-inspired structures and hybrid creations. Each of these approaches serves a different purpose, ranging from characters that need human-like expression to those built for intimidation, dominance, or transformation, depending on how the alien is meant to function within the story.
1. Humanoid Alien Creature Masks
Humanoid alien masks are designed to closely resemble human facial structure while introducing subtle non-human elements. These may include modified bone structure, unusual skin texture, altered eye shapes, or slight asymmetry in facial features. This style is commonly used when the alien character needs to speak, express emotion, or interact closely with human actors.
2. Monster-Inspired Alien Creature Masks
Monster-inspired alien masks are designed to create a more intense, threatening, or unsettling visual presence. These designs often feature exaggerated anatomy, deep surface textures, distorted proportions and sharper structural elements. They are used in darker science fiction or horror-driven storytelling where the alien is meant to feel dangerous or unfamiliar.
3. Predator-Inspired Alien Creature Masks
Predator-inspired alien masks focus on structured, symmetrical and highly defined visual design. These creations often communicate intelligence, strength and control through sharp facial forms, clean structure and surface detailing that feels protective or armor-like in nature.
They are typically used for dominant or advanced alien species within a story. The design supports a sense of authority and presence on screen while maintaining a fully non-human identity.
4. Hybrid Alien Creature Masks
Hybrid alien masks combine human-like features with more extreme or abstract alien design elements. These characters often represent transformation, genetic experimentation, or evolutionary complexity within the story.
This style allows for greater creative freedom in sculpting and detailing, blending realism with imagination. Hybrid designs are especially useful when a character transitions between human and alien states or exists between two biological identities.
Check Out: What Are Prosthetic Masks in Special Effects Makeup?
Step-by-Step Process to Create an Alien Creature Mask
Creating an alien creature mask follows a structured production workflow that moves from lifecasting and sculpting to molding, casting, painting and final on-set application. Each stage builds on the previous one to ensure accurate fit, realistic surface detail and seamless integration with the actor under camera conditions.
1. Start with Lifecasting the Actor
The process begins by creating a lifecast of the actor’s face. This step ensures the alien creature mask is built on a replica of the performer, which is critical for fit, movement and on-set performance.
What is used:
- Alginate (skin-safe molding material)
- Plaster bandages
- Petroleum jelly (release agent)
- Water and mixing bowls
Alginate is applied over the actor’s face to capture all facial details, including pores and subtle contours. Once it sets, plaster bandages are applied on top to form a rigid outer shell. After curing, both layers are removed carefully, creating a negative mold of the actor’s face. This becomes the foundation for sculpting the alien design.
Also read How to Make a Face Cast That Fits Perfectly for Prosthetic Makeup?
2. Move into Sculpting the Alien Creature
Once the lifecast is prepared, the alien design is sculpted directly onto it. This is where the transformation from human anatomy to creature design happens.
Clay is built up over the lifecast to reshape the facial structure. Major forms like brow ridges, jawline changes, cheek extensions and cranial modifications are established first. After the primary structure is locked, finer sculpting tools are used to add skin texture, pores, folds and surface variation.
This stage defines the final identity of the alien creature mask and determines how it will read on camera.
3. Mold Making the Finished Sculpt
After sculpting is complete, the design is locked into a mold so it can be reproduced in flexible materials.
The sculpt is divided into sections if required to ensure clean removal. A mold material is applied over the surface in controlled layers to capture every detail. Once the mold is fully set, a strong outer shell is added for stability. After curing, the mold is carefully separated and cleaned for casting.
Why Does Your Sculpture Look Great in Clay but Fail in the Mold?
Learn Why Your Sculpt Looks Great in Clay but Fails in Mold?
4. Casting the Final Mask
The mold is now used to create the wearable alien creature mask.
Silicone or foam latex is poured or brushed into the mold, depending on the production requirement. Silicone is used for high-detail, close-up work due to its realistic skin movement, while foam latex is preferred for lightweight wear and longer shooting days.
Once cured, remove the material from the mold.
5. Painting and Surface Finishing
Move into painting the raw cast to establish realism, depth and camera-ready detail.
Airbrush the base tones first to lock in the primary skin color. From there, build additional layers gradually to introduce variation in tone, depth and surface complexity. Work sponges across the surface to disrupt uniformity so the finish doesn’t appear flat or artificial under lighting.
Choose the final seal based on the intended visual result. Keep it matte for grounded skin realism or shift toward a slight gloss if the alien design requires a more organic, wet, or enhanced surface response on camera.
6. On-Set Application and Blending
Bring the prosthetic onto the actor and proceed with the final application for shooting.
- Apply skin-safe adhesive evenly across both the actor’s skin and the inner edges of the prosthetic.
- Position the mask with precision and settle it into place using controlled pressure.
- Once fixed, blend the edges with solvents until the transition between the skin and the prosthetic disappears completely.
- Finish with corrective makeup passes to unify tone, remove visible seams and ensure the alien creature mask holds consistently under production lighting.
Tools and Materials Guide for Creating Alien Creature Mask
| Category | Tools & Materials |
| Sculpting Tools and Materials | Oil-based clay, loop tools, spatulas, detailing tools, armature or lifecast base |
| Lifecasting Materials | Skin-safe molding material, plaster bandages and release agents |
| Mold Making Supplies | Plaster or fiberglass materials, silicone for detail molds, registration keys |
| Casting Materials | Silicone, foam latex, mixing tools, pigments |
| Painting Tools | Airbrush system, alcohol-activated paints, brushes, sponges |
| Application Tools | Skin-safe adhesive (Pros-Aide or similar), blending solvents, brushes, sponges and cleanup tools |
Want to Build Professional SFX Makeup Skills?
Creating alien creature masks requires strong technical skills in sculpting, molding, casting and painting. These are essential to build and execute any prosthetic design.
However, technical skills alone are not enough. Professional special effects makeup training makes a significant difference by showing how these techniques are applied in real production workflows, how materials behave under studio lighting and how to maintain consistency across shoots.
At Cinema Makeup School, artists are trained through structured SFX programs that cover everything from facial anatomy to complete creature transformation. The focus is on hands-on learning, where each stage is taught with real production standards in mind.
Enrolling in our courses gives you:
- Exposure to real workflow timing, coordination and on-set expectations
- The ability to approach creature design with both creative and practical decision-making
- Experience in maintaining continuity and consistency across multiple shoot days
- Insight into professional standards expected in studio and production settings
- A structured learning path that prepares you for real-world SFX roles
Book a tour of our campus to get a closer look at our SFX training environment and workflow.
In film and television, prosthetic makeup is judged under conditions that expose every technical flaw, including high-resolution cameras, controlled lighting setups and extreme close-ups. Under these conditions, even a slightly visible edge, uneven texture, or incorrect surface finish will immediately reveal the prosthetic.
Blending is the stage where a well-sculpted and well-applied appliance either holds up or fails. This process involves controlling edge thickness, managing adhesive behavior, replicating skin texture and ensuring that both the prosthetic and natural skin respond identically to light.
Let’s break down how SFX makeup artists blend prosthetic edges using latex and silicone.
Which Factors Affect Prosthetic Blending
Blending prosthetics is not a single fixed process. It is controlled by technical factors that determine how the edge behaves, how the material integrates with skin and how the final result appears on camera. Understanding these factors is essential before applying any blending technique.
1. Edge Thickness and Appliance Quality
The thinner the edge, the easier it is to blend. Professionally made prosthetics are designed with tapered edges that sit flush against the skin. Thick edges require more correction and often remain visible under lighting.
2. Material Type (Latex vs Silicone)
Material determines the blending method. Latex allows layering and feathering, while silicone requires precision placement and paint integration since it cannot be dissolved or built up in the same way.
3. Adhesive Selection and Application
Different materials require different adhesives and the application technique affects edge visibility. Excess adhesive creates buildup and shine, while insufficient bonding leads to lifting, both of which expose the edge.
Check Out: Which Adhesives Are Used in Professional SFX Makeup?
4. Surface Texture Requirements
Skin is not uniform. The prosthetic must match skin texture, fine lines and irregularities in the surrounding area. The blending approach changes depending on where the appliance is placed.
5. Lighting and Camera Conditions
Blending that looks correct in neutral lighting may fail under directional or high-intensity lighting. Camera resolution and lens proximity influence how precise the blend needs to be.
6. Application Control and Technique Execution
The precision of application directly affects the final blend. Uneven layering, poor adhesive control, or incorrect stippling can create visible edges even when the material and appliance are correct. Consistent pressure, controlled product use and accurate technique are required to maintain a clean transition between the prosthetic and skin.
Note: When it comes to technique execution, structured SFX makeup training makes a measurable difference. Controlled application, edge handling and material-specific blending are skills developed through guided practice rather than trial and error.
At Cinema Makeup School, we offer a range of special effects makeup courses. You can apply for courses in prosthetic application, character makeup, creature transformation, digital FX and more, all focused on industry-standard techniques and on-set workflows.
How to Blend Latex Prosthetics
Latex prosthetics are blended by building and feathering material over the edges. The process focuses on controlled layering, texture matching and surface finishing to gradually eliminate the transition between the prosthetic and skin.
Step 1: Secure the Prosthetic Properly
The prosthetic must be fully adhered before any blending begins. Press it down from the center outward to remove air pockets and ensure even contact. Pay close attention to the edges; if they are not sitting flat at this stage, they will remain visible no matter how much blending is applied later.
Step 2: Apply Liquid Latex to the Edges
Use a sponge or stipple tool to apply a thin layer of liquid latex over the prosthetic edge. Avoid brushes, as they create streaks and uneven buildup. Extend the latex slightly onto the natural skin to begin forming a transition zone rather than a hard line.
Step 3: Build in Thin, Controlled Layers
Latex blending works through a gradual buildup. Apply multiple thin layers instead of one thick coat. Each layer must dry completely before the next is added. Thick or rushed application creates raised edges that become visible under lighting and in camera close-ups.
Step 4: Feather the Transition Area
With each additional layer, extend slightly farther onto the skin. This softens the transition and removes the visual boundary between the prosthetic and natural skin. The goal is to spread the edge across a wider area so it becomes undetectable.
Step 5: Stipple for Texture Matching
Once the edge is physically blended, the surface must match the surrounding skin. Latex dries with a uniform finish, which does not resemble real skin. Use a stippling motion to create an irregular texture that mimics natural variation. This step is essential for realism.
Read this blog to know more about the stippling techniques.
Step 6: Set and Control the Surface Finish
Apply translucent powder to remove any remaining tackiness and reduce unwanted shine. This step stabilizes the surface and prepares it for color application. Unsealed latex can appear shinier than the surrounding skin, which makes the edge more visible under lighting.
Step 7: Apply Color to Integrate the Prosthetic
Apply makeup over both the prosthetic and the surrounding skin. Match the skin tone and undertones so there is no visible difference between the two areas. Apply the color in thin layers, gradually adjusting until it matches the skin. Lightly extend the makeup beyond the prosthetic edge to remove any visible boundary. Avoid heavy coverage, as it can hide the texture and make the surface look flat.
Step 8: Inspect Under Multiple Lighting Angles
Evaluate the blend under direct and side lighting. An edge that appears clean from one angle may become visible under another. This step ensures the blend will hold under filming conditions, not just in neutral prep lighting.
More Helpful Blogs:
How Concept & Color Theory Boost Your Creature Design Skills
Why SFX Makeup Artists Should Study Human Anatomy for Sculpting Realistic Prosthetics?
What Are Prosthetic Masks in Special Effects Makeup?
How to Blend Silicone Prosthetics
Silicone prosthetics require a precision-based approach. Since the material cannot be layered or dissolved, blending depends on thin edges, accurate placement and controlled color integration to make the prosthetic and skin appear as one continuous surface.
Step 1: Apply and Secure the Prosthetic
Use a silicone adhesive to attach the appliance. Press it evenly into place without shifting. The goal is to achieve full contact across the entire surface, especially at the edges. Any uneven placement will be difficult to correct later.
Step 2: Remove the Cap Plastic (if encapsulated)
Most professional silicone prosthetics are encapsulated with a thin outer layer. Use isopropyl alcohol to dissolve this cap plastic. As it breaks down, it reveals an ultra-thin edge that sits closer to the skin and is easier to hide.
Step 3: Refine the Edges with Minimal Product
Once the edge is exposed, refinement must be done carefully. If needed, use a very small amount of adhesive or blending medium to secure it further. Apply using tapping motions only. Dragging tools across the edge can lift or distort it.
Step 4: Maintain Edge Thinness
Unlike latex, silicone cannot be built up to hide edges. Any additional product increases thickness and creates a visible ridge. The blending process depends on preserving the thinness of the original edge rather than modifying it.
Step 5: Match Surface Texture Subtly
Silicone surfaces can appear smoother than natural skin. Use light stippling to introduce texture, but keep the application controlled. Overworking this step can damage the edge or create unnatural patterns.
Step 6: Apply Color in Controlled Layers
Use alcohol-activated paints or silicone pigments to build color gradually. Focus on matching not just the surface tone, but also the undertones and translucency of the skin. Thin layers allow the prosthetic to retain depth and realism.
Step 7: Extend Color Beyond the Prosthetic Edge
Blend the paint slightly onto the surrounding skin. This removes any remaining visual separation and helps unify both surfaces into a single continuous appearance.
Step 8: Evaluate Under Production Lighting Conditions
Check the final result under strong, directional lighting and at close range. Silicone blending must hold under high-resolution cameras, where even minor inconsistencies become visible.
Explore how professional SFX makeup training works at Cinema Makeup School. Book a campus tour, available both in person and online, to see the learning environment, techniques and hands-on approach used to train aspiring artists.
In film and television, makeup is not just about appearance; it’s about storytelling under a camera lens. Every detail must read correctly on screen, hold up under lighting and support the narrative. Character makeup and special effects makeup are the two main types that make transformations look real on screen.
They often get grouped, but in a professional production environment, they serve very different functions. If you’re serious about working on set, whether in film, streaming series, or horror production, you need to understand how these two makeup techniques differ.
Why Character Makeup and SFX Makeup Are Different
Character makeup shapes an actor’s look so they fit a specific role on screen, supporting the story through realistic appearance changes tied to personality, age, or setting. SFX makeup works on a different level, building physical alterations with prosthetics, textures and materials to create injuries, creatures, or transformations that do not exist in everyday reality.
Skills Required for Each One
Character Makeup Skills
Character makeup artists work directly with the camera and performance conditions. Their focus is precision under real-time production pressure.
Key skills include:
- Color theory for film lighting conditions
- Airbrush control for skin realism
- Continuity tracking across shooting schedules
- Lace blending and bald cap techniques
- Script interpretation for makeup breakdowns
- Fast application and on-set adjustments
- Communication with directors and cinematographers
Also read: Essential Special Effects Techniques for Aging Makeup
Special Effects Makeup Skills
SFX artists work with life casting, sculpting, mold-making and prosthetic systems to design and apply physically built transformations that operate in real production environments.
Key skills include:
- Anatomical sculpting for characters, creatures and effects-driven designs
- Life casting, mold construction and prosthetic development workflows
- Silicone and foam latex processing for on-set applications
- Seamless prosthetic application and edge integration on skin
- Material handling for texture, movement and durability under the camera
- Blood and trauma affect execution for practical realism
- Mechanical integration for movement-based prosthetic effects
Materials and Tools Used in Character and SFX Makeup
Character Makeup Materials and Tools
1) Skin prep products such as moisturizers, primers and barrier sprays
2) Foundation, concealer and color correction palettes for skin tone matching
3) Alcohol-activated and cream-based pigments for shading and detailing
4) Airbrush gun for controlled application of color and texture
5) Stipple latex for aging, pores and skin texture creation
6) Adhesives for lace wigs, facial hair and small prosthetic pieces
7) Lace wigs, hairpieces and facial hair for character identity changes
8) Brushes, sponges and blending tools for precise application
Special Effects Makeup Materials and Tools
1) Alginate and plaster bandages for life casting
2) Sculpting clay, such as oil-based clay, for designing prosthetic forms
Learn What Kind of Clay Is Best for SFX Sculpting?
3) Silicone, foam latex and gelatin for prosthetic appliance creation
4) Plaster and fiberglass for mold construction
5) Platinum silicone for flexible, skin-like prosthetic pieces
6) Intrinsic pigments for coloring prosthetics during casting
7) Prosthetic adhesive and medical-grade removers for application and removal
8) Alcohol-activated paints and PAX paint for prosthetic detailing
9) Edge blending materials for seamless integration with skin
10) Stage blood in different thicknesses to create realistic wounds and injury effects
Production Use of These Makeup Styles
Character makeup is used in television dramas, streaming series, period films, episodic multi-day productions and advertising shoots. It is applied in almost all standard on-camera work where actors need a consistent appearance across scenes, ensuring continuity throughout different shooting days and lighting conditions.
SFX makeup is demanded for:
- Horror and thriller films
- Sci-fi and fantasy productions
- Creature-focused streaming series
- Superhero and franchise films
- Theme parks
- Live horror shows
Comparing Character Makeup and Special Effects Makeup
| Category | Character Makeup | Special Effects (SFX) Makeup |
| Core Purpose | Used to build on-screen identity through realistic appearance changes | Used to create physical transformations using prosthetics and SFX materials |
| Method | Direct application to the skin using cosmetic techniques | Lab-based creation followed by on-set application |
| Tools & Materials | Foundations, corrective palettes, airbrush, wigs, texture products | Alginate, silicone, foam latex, sculpting clay, prosthetic paints |
| Work Process | On-set application with continuity adjustments | Pre-production fabrication followed by application and maintenance on set |
| Type of Transformation | Aging, period looks, character styling and corrective reshaping | Wounds, creatures, extreme aging and anatomical changes |
| Camera Dependency | Highly dependent on lighting and continuity accuracy | Must blend seamlessly for the camera |
| On-Set Speed | Fast application and frequent touch-ups | Longer setup and application time |
| Industry Expectations | Clean execution, continuity, accuracy, HD camera understanding, fast on-set workflow | Strong sculpting and prosthetic skills, mold-making knowledge, realistic texture work, production-ready portfolio |
Helpful Articles –
How to Create Creature Design Using Latex, Silicone & Prosthetics?
Foam Latex vs Silicone: Choosing the Right Material for SFX Prosthetics
Career Options for Special Effects Makeup Artists
Want to Master Both Techniques?
If you are serious about building a career in film and television makeup, structured training is essential. Cinema Makeup School provides hands-on experience in both character and SFX workflows, helping you develop real production-level skills.
You can explore individual character and special effects programs or choose integrated diploma and certificate courses with defined clock hours. Each path is designed to align with different learning goals, whether you want to specialize in one area or train in both to pursue industry opportunities.
Character Makeup is suited for you if you:
- Enjoy working directly with actors daily
- Prefer storytelling through subtle visual control
- Want consistent work across all production types
- Like fast-paced on-set environments
SFX Makeup is suited for you if you:
- Enjoy sculpting and building physical forms
- Are interested in horror, fantasy, or creature design
- Prefer fabrication and pre-production workflows
- Want to work on visually complex transformations
Apply for the program that best fits your career direction.
You can also schedule a campus tour (in-person or virtual) to understand how training prepares you for on-set workflows.
Breaking into the special effects makeup industry requires more than talent; it demands structured training, technical precision and exposure to production-level standards. For international students looking to learn SFX makeup and pursue opportunities in the United States, Cinema Makeup School offers a focused, industry-aligned training environment designed specifically for that path.
From visa documentation to arrival protocols, we provide a defined pathway for non-U.S. students to train in SFX makeup under industry-aligned conditions.
Let’s break down exactly how that process works and what international applicants need to understand before enrolling.
Why International Students Choose the U.S. for SFX Makeup Training
According to Archive Market Research, the SFX makeup industry is heavily driven by the United States, backed by its established film and television sector and high consumer spending.
Across the United States, Los Angeles holds its position as a key global production hub for film and television.
International students who train in this environment gain:
- Experience working in an environment where film and television projects are continuously being developed
- Understanding of real production planning and management
- Awareness of current industry standards based on ongoing work
- A better idea of the pace and expectations of working in the industry
How Cinema Makeup School Supports International SFX Makeup Students
We provide a structured, step-by-step process that supports international students from initial application through arrival on campus, ensuring full compliance with U.S. visa requirements at every stage.
1. M-1 Visa Guidance
We guide students through the M-1 visa process, which is required for vocational and technical training in the United States. This visa is issued for the full duration of your program at Cinema Makeup School and remains valid up to 30 days after completion.
2. I-20 Application Process
To receive I-20 documentation from Cinema Makeup School, international students must complete the following:
- Submit an international registration form (online, by phone, or by mail)
- Provide a completed I-20 application
- Pay a $210 non-refundable I-20 processing fee along with a $200 non-refundable class registration fee
- Provide proof of financial support to cover tuition and living expenses
- Provide proof of secondary education completion
Once all required documents are reviewed and approved, we issue an official acceptance letter along with the I-20 form.
3. SEVIS Fee and Visa Appointment
After receiving the I-20, students must complete the next steps:
- Pay the $350 SEVIS I-901 fee online
- Schedule a visa appointment at a U.S. embassy or consulate
- Present required documents, including a passport, I-20 form, acceptance letter and financial proof
Visa processing times vary by location, so we recommend allowing at least 2 to 3 months before your program start date. Once your visa is approved, contact us to confirm you are ready to begin your program.
4. Student Housing
Cinema Makeup School does not provide on-campus housing. However, we share a selection of housing options with both domestic and international students to help them plan their stay in Los Angeles. These accommodations differ in cost, size and distance from the campus.
All housing options are subject to availability and are offered on a first-come, first-served basis. Students are responsible for securing their own accommodation, but our team is available to answer questions and provide general guidance during the process.
Related Articles:
How Cinema Makeup School’s Bootcamps and Workshops Empower You to Master SFX Makeup?
How Big Is the Global Special Effects Makeup Industry in 2026?
Interview Preparation Tips for Aspiring SFX Makeup Artists
Step-by-Step Process for International Students to Apply and Study SFX Makeup
To study SFX makeup at Cinema Makeup School as an international student, the process involves a series of required steps. Each stage must be completed carefully to ensure visa approval and a smooth transition into your program.
1. Complete Registration and I-20 Application
Begin by submitting your international registration form along with a completed I-20 application. You will also need to pay the required processing and registration fees and provide proof of financial support and secondary education completion.
2. Receive Acceptance Letter and I-20 Form
Once your documents are reviewed and approved, you will receive an official acceptance letter along with your I-20 form. This document is required to proceed with your visa application.
3. Pay the SEVIS I-901 Fee
After receiving your I-20, pay the SEVIS I-901 fee online. This step is mandatory before scheduling your visa interview.
4. Schedule a Visa Appointment
Schedule an appointment with a U.S. embassy or consulate. Bring all required documents, including your passport, I-20 form, acceptance letter, financial proof and SEVIS fee confirmation for visa processing.
5. Wait for Visa Approval
Visa processing times vary depending on your location. It is recommended to begin this process at least 2 to 3 months before your intended program start date.
6. Prepare for Travel to the United States
Once your visa is approved, make travel arrangements and ensure all documents, including your passport and I-20, are ready for inspection at the port of entry.
7. Enter the United States
Upon arrival, present your passport and I-20 documents to U.S. Customs. An I-94 record will be issued, confirming your legal entry into the country.
8. Confirm Your Arrival at Cinema Makeup School
After arriving in the United States, report to Cinema Makeup School within 10 days to maintain your visa status and begin your training.
Note: Choosing the right training environment is a critical step in building your career in special effects makeup. At Cinema Makeup School, you have the opportunity to experience our facilities, faculty and learning environment before you enroll.
In-Person Tour: Step inside our working classrooms and labs, meet the instructors and get a direct sense of how SFX makeup is taught in a production-focused space.
Virtual Tour: If traveling to Los Angeles isn’t practical, you can still explore our special effects makeup school remotely. Connect with an admissions advisor through a live online session and get detailed answers about the program, process and expectations.
In horror makeup, when creating demon-possessed looks, the eyes play a key role in making the character believable to the audience. Special effects makeup makes this transformation possible. Artists may introduce redness, veining, or tonal shifts in the skin around the eyes to support the look, depending on the level of transformation required.
Because this work is done so close to the eyes, the process also requires careful material selection and safe application practices.
Let’s break down the professional approach to creating demon-possessed eyes, with attention to on-camera visibility and performer safety.
Different Types of Demon Possessed Eyes Created with SFX Makeup
Common types of demon-possessed eyes include blacked-out eyes, white or washed-out eyes, veined and bloodshot eyes, glowing or reflective eyes and distorted or altered iris designs, each created using different combinations of lenses and paintwork depending on the required level of transformation.
1. Blacked-Out Eyes
This look is created using blackout sclera contact lenses that cover the entire visible eye, removing all natural contrast between the iris and sclera. The surrounding skin is usually kept controlled, with slight darkening or neutral tones, so the focus stays on the eyes. It is commonly used for fully possessed or non-human characters where the effect needs to be read clearly even in wider frames.
2. White or Washed-Out Eyes
Special effects makeup artists use white or clouded lenses to remove detail from the eye and create a blank, lifeless appearance. To integrate the effect, subtle grey, blue, or yellow tones are added around the eye area. This prevents the lenses from looking isolated and helps the overall makeup feel consistent on camera.
3. Veined and Bloodshot Eyes
Instead of relying on lenses, this look is often built through paintwork. Alcohol-activated colors are used to add fine red veining, irritation and slight discoloration around the sclera and eyelids. In some cases, clear or lightly tinted lenses are added for a slight shift without fully covering the eye. This approach is effective for early possession stages or more grounded transformations.
4. Glowing or Reflective Eyes
The effect usually starts with reflective or specially finished contact lenses that react to light. On set, lighting is adjusted to create controlled highlights within the eye, giving the impression of a glow. In some cases, the effect is slightly enhanced in post-production, but it relies heavily on how the lenses and lighting work together during filming.
5. Distorted or Altered Iris Designs
Custom-designed lenses are used to change the shape, size, or pattern of the iris. These may include split designs, enlarged pupils, or irregular textures that break the natural symmetry of the eye. Supporting paintwork around the eye helps blend the lens into the overall look, so the distortion feels intentional rather than separate.
Also Read: How Makeup Artists Create Realistic Black Eyes for Fight Scenes?
Professional Techniques to Create Demon-Possessed Eyes
Creating demon-possessed eyes involves combining lenses, paintwork and on-set adjustments based on how the look needs to appear on camera. The process is usually handled in the following steps:
Step 1: Selecting the Right Contact Lenses
SFX makeup artists begin by choosing lenses based on the required eye effect. Blacked-out or white eyes require full or partial sclera lenses, while more subtle looks may use clear or lightly tinted lenses. The choice depends on visibility, comfort and how the eyes need to read in different shot sizes.
Step 2: Lens Fitting and Testing
Before filming, lenses are tested on the performer to check fit, comfort and visibility. Ensure the lenses sit correctly on the eye and evaluate how they appear under camera and lighting conditions. This step helps avoid issues during actual shooting.
Step 3: Preparing the Eye Area
Before applying any product, the skin around the eyes is cleaned and prepped. This ensures proper adhesion of makeup and reduces the risk of irritation, especially during long shoot days.
Step 4: Building the Base Eye Effect
Once lenses are applied (or planned), artists establish the primary look. This may involve placing the lenses first or beginning with paintwork if the design relies more on surface detail. The base defines whether the look is extreme, subtle, or in transition.
Step 5: Lens Insertion
Contact lenses are inserted once the eye area is ready and the initial prep is complete. This step is done carefully to avoid irritation and timing is managed to ensure the performer is not wearing lenses longer than necessary.
Step 6: Adding Paintwork and Detail
For effects like veining, redness, or discoloration, artists use alcohol-activated palettes to create fine detail around the sclera and eyelids. This step helps integrate the eye effect into the surrounding skin so it does not appear isolated.
Step 7: Blending with Surrounding Makeup
The eye design is then blended with the rest of the character’s makeup. Shading, tonal adjustments and texture are added to ensure the eyes feel part of the overall look rather than a separate element.
Step 8: Adjusting for Lighting and Camera
On set, artists often make small adjustments based on lighting conditions. Reflective lenses, for example, may require controlled highlights, while darker eye designs may need additional contrast to remain visible on camera.
Step 9: Final Checks for Safety and Continuity
Since the work is done close to the eyes, safety is critical. Special effects makeup artists monitor lens wear time, ensure all materials are eye-safe and maintain hygiene. Continuity is also tracked so the eye design remains consistent across multiple takes and shooting days.
Learn the Importance of Hygiene and Safety in SFX Makeup Careers
Build Skills to Create Demon Possessed Eyes
Creating convincing demon-possessed eyes requires skills in anatomy, color theory, prosthetics, material handling, hygiene and on-set workflow. Aspiring artists are trained through hands-on, industry-focused SFX makeup courses at Cinema Makeup School.
Whether you’re starting with character makeup or looking to expand into advanced techniques, our programs cover a complete, production-focused curriculum, including:
Apply here to join SFX makeup courses at Cinema Makeup School.
Safety and Professional Standards for Creating Demon-Possessed Eyes
- Use only certified, sterile and eye-safe contact lenses
- Never share lenses between performers
- Ensure proper lens storage and handling at all times
- Allow only trained professionals to handle lens insertion and removal
- Sanitize hands, tools and workspace before working near the eyes
- Limit lens wear time, especially with sclera lenses
- Schedule regular breaks to reduce dryness and irritation
- Use makeup products that are safe for the eye area
- Avoid harsh adhesives or pigments near the eyes
- Maintain strict hygiene to prevent contamination
- Monitor the performer for redness, discomfort, or vision issues
- Pause immediately if irritation or pain occurs
- Repeat safety checks during every reapplication
Related Articles –
How to Create a Facial Distortion Effect with SFX Makeup?
5 Skills Every SFX Makeup Artist Should Master for Monsterpalooza
Easy Alien Makeup Ideas for Beginners
If you’re considering joining, book a tour of our campus through an in-person or virtual tour.
In the film and television industry, skill is not proven by what you say you can do; it’s proven by what you can execute under pressure. That’s exactly where SFX makeup competitions step in. They are not just creative showcases or fan-driven events; they function as high-intensity, real-world simulations of production environments where artists are pushed to perform, adapt and deliver.
For aspiring and intermediate artists looking to break into film, TV, or horror production, participating in special effects makeup competitions can accelerate professional growth. These competitions compress months of learning into hours of execution, forcing you to think like a working artist, not just a student.
In this blog, we will go through understanding how these competitions shape artists into industry-ready professionals.
How Artists Grow Through SFX Makeup Competitions
SFX makeup competitions offer artists more than just a chance to showcase their skills. Through these events, artists experience real-world pressure, build their reputations, expand their networks and refine their techniques. By consistently participating in these competitions, artists not only gain exposure but also develop the confidence and expertise needed to thrive in the competitive SFX industry.
1. Working Under Real Production Pressure
In film and television, time is directly tied to budget and scheduling. Delays in the special effects makeup can affect an entire production day, especially on effects-heavy projects. In SFX makeup competitions, artists work within fixed timeframes to complete complex looks from concept to finish, closely replicating the urgency of real production environments.
This constraint forces a shift in approach. Instead of overworking minor details, artists focus on what will read clearly on camera: structure, contrast and texture. Precision becomes intentional rather than excessive. With repeated exposure to this kind of pressure, timing improves and execution becomes more controlled. Decision-making also sharpens, allowing artists to move forward with confidence instead of hesitation.
Check Out: On-Set SFX Makeup Challenges and How Artists Solve Them
2. Building a Recognizable Professional Track Record
Every SFX makeup competition an artist participates in becomes part of a visible record of their work. Strong executions don’t just exist in the moment; they get documented, circulated and remembered within the community. Over multiple events, this builds a track record that reflects consistency, technical control and the ability to deliver under time constraints.
When an artist performs well, that work tends to stay in circulation through judges, organizers, or industry professionals who were present. Opportunities often come from repeated exposure rather than a single standout moment. Consistent participation builds a track record that directly reflects an artist’s performance.
3. Expanding Industry Networking Through Active Participation
Competitions attract working professionals, not just learners. Experienced artists, recruiters and collaborators often attend or participate, making these environments highly valuable for building connections.
The key difference is context. Networking here is not based on introductions alone; it’s backed by demonstrated skill. When professionals see how an artist works in real time, it creates a stronger impression than any portfolio alone. This kind of recognition through performance can lead to collaborations, mentorship, or even job opportunities, especially when combined with consistent participation.
4. Building Visibility and Audience Recognition
Live competition formats naturally draw attention. Whether through in-person audiences or digital coverage, artists are seen while they work, not just through final images. This creates a different level of recognition because both the process and outcome are visible.
This translates into:
- audiences returning to watch the same artist across multiple events
- increased engagement during live work (questions, reactions, attention span)
- stronger interest in the artist’s future work beyond the competition setting
This kind of recognition is difficult to build through isolated practice or social media alone because it is tied directly to live performance and real-time engagement.
5. Learning Through Direct Comparison With Other Artists
Competitions place special effects makeup artists side by side with others working on the same challenge. This creates a unique opportunity for real-time comparison, which is one of the fastest ways to identify gaps and improve.
Observing how others approach design, material use, or time management reveals alternative methods. It also helps artists evaluate their own decisions more critically. Instead of working in isolation, they gain perspective on efficiency, creativity and execution.
6. Strengthening Confidence Through Public Execution
Working in front of an audience changes how SFX artists approach their craft. There is a level of accountability that doesn’t exist in private practice.
Repeated exposure to this environment builds confidence. Artists become more comfortable making decisions in real time, adapting when something doesn’t go as planned and standing behind their work. This confidence carries directly into professional settings, where communication and composure are just as important as technical skill.
7. Portfolio Development Through Competition Work
A strong SFX portfolio needs to show execution, not just concepts. Work created in competition settings demonstrates how an artist performs within real constraints: limited time, available materials and ongoing decision-making.
Unlike controlled projects, these pieces are completed in a single pass. From concept to final application, they reflect workflow, speed and the ability to maintain quality without rework.
Learn How to Build a Portfolio That Gets You Hired as an SFX Makeup Artist?
Top SFX Makeup Competitions You Should Participate In
1. IBI Awards – Global Makeup Competition
An international hair & makeup competition open to artists worldwide, focused purely on the quality of work. Artists can submit their entries digitally, making it accessible without travel.
Entry deadline: May 3, 2026
2. Mehron Drag Makeup Contest
A themed competition centered on drag, theatrical and transformative makeup looks. Artists submit newly created, high-resolution images on social media, incorporating at least one Mehron product and a defined character concept.
Entry window: March 20 – April 20, 2026
Winners announced: April 22, 2026
3. Horror Hotel FX Makeup Competition
A live, on-site SFX makeup competition held during a horror convention, where artists create looks in real time on models. Judging is based on technical skill, creativity and overall presentation across themed categories like horror and sci-fi.
Competition date: June 21, 2026
Related Articles –
Contract-Based vs Direct Hiring SFX Makeup Jobs
Interview Preparation Tips for Aspiring SFX Makeup Artists
How Internships Help You Start a Career in SFX Makeup?
Get Prepared for SFX Makeup Competitions
Understanding competition formats is only part of the process. Performing well requires control over execution, working within time limits, managing materials efficiently and maintaining consistency from concept through final application.
This level of preparation comes from structured, hands-on training that focuses on workflow, material behavior and decision-making under pressure. Which is exactly what Cinema Makeup School is built around.
We offer:
- Comprehensive SFX makeup Training: Artists will develop core competencies in key areas, including sculpting, molding, prosthetic applications, painting techniques, airbrushing and digital sculpting. These skills are essential for mastering the full spectrum of SFX makeup.
- Hands-On Experience with Industry-Standard Tools and Materials: Students get direct exposure to the tools and materials used by professionals, ensuring they learn how to handle and apply them properly in real-world settings.
- Structured Training Based on Real-World Production Briefs: Our instructors prepare you for real-world challenges by guiding you through production-based scenarios and character briefs, ensuring you’re equipped with the creativity and problem-solving skills needed in the professional SFX industry.
- Full-Look Development from Concept to Final Application: Students will not only design but also execute a complete SFX look, learning every step of the process under expert guidance. This gives them a deeper understanding of the creative and technical process involved in character creation.
- Building Technical Control, Speed and Precision: Each stage of training is specifically crafted to improve technical control while reinforcing the importance of speed, precision and consistency.
Schedule an in-person or virtual tour of our campus to see our facilities, meet our instructors and learn how our programs help you succeed in the SFX career.
Creating a convincing face distortion effect is where technical skill meets pure imagination in special effects makeup. This effect involves physically altering the structure of the face to create something unsettling, dramatic and completely outside natural anatomy.
From warped features in horror productions to extreme character transformations in film and editorial work, distortion effects are designed to challenge what the audience perceives as real. They demand a strong understanding of materials, anatomy and blending techniques to ensure every edge, texture and detail holds up under close-up camera work.
Let’s understand the step-by-step workflow and material application that make a facial distortion effect look believable.
What Does a Facial Distortion Effect Actually Mean?
Special effects makeup artists use prosthetic appliances, liquid latex, silicone, foam latex and advanced paint work to make the human face appear warped, torn, split, or physically altered beyond its natural anatomy. This is what is broadly referred to as a Face Distortion Effect.
These techniques are used across horror, creature and theatrical productions where transforming the face is central to the character or scene. Achieving a convincing result requires a working knowledge of anatomy, material behavior, sculpting and color matching so the application integrates seamlessly with the performer’s skin and holds up under professional camera and lighting conditions.
Different Types of Facial Distortion Effects
Facial distortion in SFX makeup includes a range of techniques that alter the face through splitting, tearing, melting, or extreme deformation. Each type requires a different combination of materials, application methods and artistic approach to achieve a believable result on camera. Understanding these variations helps artists choose the right technique based on the character, genre and level of transformation required.
1. Split Face Effect
The Split Face Effect creates the illusion that the face has been divided straight down the middle, exposing raw muscle and bone. Used widely in psychological horror and sci-fi genres, the most critical skill here is seam blending, making the appliance edge disappear entirely into the performer’s skin for a result that is nearly impossible to distinguish from reality on camera.
2. Biting Effect
The Biting Effect simulates a savage bite or flesh tear where a section of the face appears missing or shredded. This effect is created using prosthetics like silicone or foam latex alongside professional blood simulation products and demands anatomical accuracy in both structure and placement. It is a staple technique in zombie films and survival horror productions.
3. Grotesque Effect
When the face appears severely deformed, with unnatural growths, distorted features, or an exaggerated creature-like appearance, it is classified as a Grotesque Effect. It is achieved using facial prosthetics, encapsulated silicone and multi-layered airbrush paint work, requiring a firm grasp of anatomy, sculpture and color theory to produce a result that reads convincingly on camera.
4. Melting Face Effect
The Melting Face Effect gives the appearance that the skin is dissolving or sliding off the bone. Achieved using gravity-pulled latex builds and tinted gelatin drips, it is a popular choice for supernatural horror and villain transformations where texture and color gradation are everything.
5. Torn Skin Effect
This effect creates the illusion that the outer layer of the face has been peeled or ripped back, exposing underlying tissue or veins. Torn Skin Effect is achieved using thin foam latex sheets, carefully applied at precise angles to simulate lifted or separated skin. It is then detailed with layered flesh tones, shadows and texturing to enhance depth and realism.
Executed through advanced SFX lab techniques, this effect requires precision, patience and a strong understanding of professional materials. It is widely used in body horror and supernatural thriller productions where realistic skin trauma and anatomical distortion are essential to the overall character design.
Step-by-Step Guide to Create a Distorted Face Effect
Creating a distorted face effect in special effects makeup requires a combination of creativity, anatomical knowledge and mastery of professional materials. While each look varies depending on its complexity, the following steps outline a workflow commonly used by SFX artists to achieve a realistic and visually striking result.
Step 1 – Concept & Design:
Start by gathering reference images and creating sketches of your concept. Focus on which facial features you want to exaggerate, warp, or distort, such as the eyes, mouth, cheeks, or forehead. For prosthetic-based designs, sculpt the appliance in clay over a life cast of the performer’s face.
This ensures that the distorted features align with the performer’s anatomy while creating a dramatic, unnatural effect. At this stage, the goal is to visualize the final distortion clearly before moving on to materials and application.
Step 2 – Materials & Mold Preparation:
Decide whether your design will use prosthetic appliances or direct application techniques. If using prosthetics, create a mold from your sculpt using plaster, Ultracal, or silicone. This mold will be used to cast the final appliance in foam latex, silicone, or gelatin.
For direct application, prepare materials like liquid latex, gelatin, or silicone, which can be layered and shaped directly on the performer’s face. Planning the materials carefully ensures that the effect can achieve the desired warped or torn appearance safely and realistically.
Step 3 – Build & Shape the Distortion:
For prosthetic designs, cast the appliance in the chosen material, trim the edges carefully and add texture to emphasize the distorted features. For direct application techniques, layer your material onto the skin and manipulate it with sculpting tools, brushes, or fingers to pull, stretch, fold, or bulge the features.
Asymmetry is crucial, as perfectly symmetrical distortions often appear unnatural. This step establishes the physical form that will create the illusion of a convincingly distorted face.
Step 4 – Skin Preparation:
Properly preparing the performer’s skin is essential. Clean and dry the face thoroughly, then apply a skin-safe barrier to protect against irritation from adhesives or materials. Mark key placement points for prosthetic appliances or designate zones for direct application. Ensuring the performer can move naturally without disturbing the effect is critical for both comfort and realism.
Step 5 – Application & Blending:
Apply prosthetic appliances with a professional adhesive, starting from the center and working outward, blending the edges carefully with tools or thinners to make seams invisible. For direct application, shape and refine the materials while they set, stretching or folding areas to enhance the warped appearance.
Pay close attention to transition points so that the distorted regions merge seamlessly with the performer’s natural skin, creating a unified and believable effect.
Step 6 – Painting & Detailing:
The final stage is to bring the distorted face to life. Match the performer’s skin tone using PAX paint, alcohol-activated palettes, or an airbrush and create depth with shadows and highlights to accentuate exaggerated or unnatural contours.
Add veins, bruising, blood, or torn flesh textures for added realism. Finally, seal the makeup with a compatible fixative to protect it from movement, sweat and heat on set, ensuring the effect remains durable and camera-ready.
Learn Why Every Serious Makeup Artist Should Learn Mold-Making Techniques
Pro Tips for Lasting and Realistic Makeup Results
- Always use a life cast of your specific performer – generic mannequin heads produce poor-fitting appliances that lift and peel on set.
- Thin your edges as much as possible during trimming, as feathered edges blend invisibly; thick ones never do.
- Build color in transparent layers rather than applying opaque paint in one pass.
- Seal all painted surfaces with a compatible sealer to protect the look from sweat, movement & lighting heat.
- Test your face distortion effect under the actual lighting conditions of the shoot before the production day.
Note: If creating impressive, screen-ready SFX makeup effects like facial distortion is your goal, professional training is essential. The right program gives you hands-on experience, material knowledge & the industry network to build a real career.
Explore SFX makeup courses at Cinema Makeup School and start building the skills needed for real on-set work. Our students graduate with industry-ready skills, guided by experienced instructors who provide hands-on training and prepare them for professional production environments.
Ready to begin your journey at Cinema Makeup School? Apply now for the course that fits your goals.
Related Articles –
5 Skills Every SFX Makeup Artist Should Master for Monsterpalooza
How SFX Artists Build & Apply Ear Prosthetics?
Easy Alien Makeup Ideas for Beginners
Frequently Asked Questions
Q1. What materials are best for a beginner attempting a Facial Distortion Effect?
Beginner SFX artists should start with liquid latex and tissue to practice building basic textures and simple distortion effects, such as raised surfaces, stretched skin, or uneven facial contours. As their skills improve, they can progress to pre-made foam latex appliances or gelatin-based prosthetics for more advanced and controlled facial distortion.
Q2. Can a Face Distortion Effect be removed safely?
Yes. Use a professional adhesive remover such as Detachol or isopropyl myristate to break down the bond gently. Never pull a prosthetic off dry skin.
Q3. Which Facial Distortion Effect is best for a first-time SFX project?
The Torn Skin Effect or a basic Biting Effect are ideal starting points. Both can be achieved with accessible materials and teach the foundational blending and painting skills that carry across all other distortion techniques. As your confidence grows, you can progress toward a more complex look.
Want to experience our training environment firsthand? Book a campus tour in person or schedule a virtual tour if you can’t visit Los Angeles.
Every summer, attention across the horror industry shifts to Long Beach, not for sunshine, but for something far more intense. The Midsummer Scream Halloween and Horror Convention brings together haunted attraction creators, horror fans and SFX makeup artists in one space built around fear, creativity and transformation.
So how does a human face transform so completely into something terrifying and believable? In this blog, we’ll break down the techniques, materials and artistry behind those nightmare-inducing looks and how SFX makeup makes it all possible.
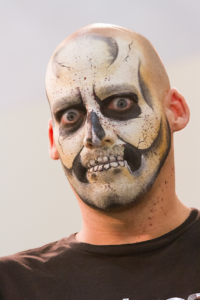
What Is Midsummer Scream?
Midsummer Scream is an annual Halloween and horror convention held at the Long Beach Convention Center in California. It brings together haunted attraction designers, horror fans, costume makers, SFX artists and vendors from all over the country. The whole event is built around one shared obsession: the art of fear.
This is deeply rooted in the haunted house and horror industry. That means a huge part of what you see on the floor, i.e., the monsters, the creatures, the ghoulish faces, is the work of special effects makeup artists. Some are seasoned professionals, others are just starting out and many are students looking to learn from the best.
The upcoming edition of the Midsummer Scream Horror Convention is scheduled for August 7–9, 2026, at the same venue, making it the perfect opportunity for anyone who wants to experience how horror concepts are built, as well as for those simply looking to enjoy the atmosphere of a full-scale Halloween event.
Why SFX Makeup Stands Out at Midsummer Scream
The Midsummer Scream Halloween and Horror Convention is widely recognized for its horror night-style experiences, where live scare environments bring characters into close interaction with visitors. Bringing these characters to life relies heavily on SFX makeup.
SFX makeup artists are responsible for building the visual identity of each creature or character through:
- Prosthetics – Custom pieces that reshape facial features or add new forms
- Skin textures – Creating realistic surfaces like decay, burns, or aging effects
- Detailed paintwork – Adding depth, color variation and lifelike finishing touches
The work is designed for real-time viewing. It must hold up under different lighting conditions, continuous movement and direct audience interaction. This requires not only creativity but also strong technical control over materials and application.
In these environments, SFX makeup moves beyond appearance; it becomes a functional part of the experience, shaping how each character is seen and perceived by the audience.
How SFX Makeup Artists Create Horror Looks for Midsummer Scream Horror Convention
Creating horror looks for the horror nights at Midsummer Scream follows a structured process. From building the base with prosthetics to adding fine details through paint and hair work, each step plays a specific role in bringing a character to life in a live setting.
1. Prosthetic Makeup (Building the Base Structure)
Prosthetics are custom-made pieces, usually created from foam latex or silicone, that are applied directly to the skin. They can reshape facial features, add scars, create aging effects, or completely transform a person into a creature or horror character.
When applied correctly, prosthetics blend so well into the skin that it becomes difficult to tell where the real face ends and the design begins.
2. Foam Latex vs Silicone (Choosing the Right Material)
These are the two main materials used in prosthetic makeup:
- Foam latex is lightweight and flexible, making it ideal for larger designs like creature heads or body suits.
- Silicone is heavier but more realistic. It moves like real skin and reflects light naturally, which makes it perfect for close-up work.
Most high-end film and haunted attraction designs rely on silicone for a more lifelike finish.
3. Life Casting (Preparing the Foundation)
Before making a prosthetic, SFX artists often create a life cast of the actor’s face or body. This is a mold taken directly from the person.
It allows the artist to sculpt the design on an exact copy of the performer’s features, ensuring the final prosthetic fits perfectly during application.
Learn More About How to Make a Face Cast That Fits Perfectly for Prosthetic Makeup?
4. SFX Makeup Painting and Skin Detailing (Adding Realistic Detail)
Creating the prosthetic is only part of the process; painting is what truly brings the character to life. SFX artists use techniques like airbrushing, hand painting and layering to build realistic skin tones and depth. Through careful detailing, they add shadows, veins and subtle texture variations that make the design look natural and believable, whether the goal is healthy skin or something far more unsettling.
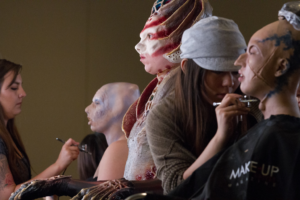
5. Bald Caps, Wigs and Hair Effects (Final Character Finish)
Hair plays a big role in finishing a character.
Artists use:
- Bald caps to cover natural hair
- Wigs for full transformations
- Hand-punched hair for realistic detail
Hand-punching involves inserting individual strands of hair into prosthetics, which creates a more natural and believable result.
Get to know the detailed hair work process used in special effects makeup.
How Attending Midsummer Scream Horror Nights Helps Aspiring SFX Artists Build Their Career
If you’re planning to work in special effects makeup, whether in film, television, haunted attractions, or themed entertainment, attending the Midsummer Scream Halloween and Horror Convention offers something that online tutorials or textbooks can’t fully provide: real-world exposure.
Being in a live environment allows you to see how professional SFX work holds up at close range, how materials behave under different conditions and how complete character designs come together outside of a controlled studio setting.
Here’s what aspiring artists can take away from the experience:
- A clearer understanding of professional SFX standards: You get to observe what high-quality work actually looks like in person, including detailing, blending and overall finish.
- Industry connections and networking opportunities: You can interact with working artists, vendors and professionals from the haunt and entertainment industry.
- Creative inspiration for your own work: Exposure to a wide range of styles and techniques can influence how you approach your own designs.
- Practical learning from live demos and panels: Watching artists explain and demonstrate their process adds real value beyond theory.
- Insight into the industry environment: You begin to understand where your skills fit and what areas you may want to specialize in.
Tip: If you’re just starting out and want to build real skills in special effects makeup, getting proper training can make a big difference. At Cinema Makeup School, students are trained in the same techniques used across film, television and live horror events like the Midsummer Scream Halloween and Horror Convention.
The focus is not just on learning individual techniques, but on understanding how to apply them in real-world environments. Here, students also get opportunities to work on projects connected to films, TV and events, helping them build practical experience early in their SFX makeup careers.
You can explore student work and behind-the-scenes projects on our YouTube channel to see how these skills translate into actual productions.
Related Articles –
5 Skills Every SFX Makeup Artist Should Master for Monsterpalooza
How Internships Help You Start a Career in SFX Makeup?
How to Maintain SFX Makeup in Different Weather Conditions?
FAQs
Q 1: What is the right way for an artist to get involved & display SFX makeup work at Midsummer Scream?
The most straightforward path is to apply through the official vendor and exhibitor registration, which opens ahead of each year’s event. Independent SFX artists, small makeup studios and horror-focused creators are all welcome to apply for a booth space on the show floor. It is worth preparing a strong portfolio and having a clear idea of what you want to showcase.
Q 2: Do SFX artists at Midsummer Scream use the same techniques they use in film & TV?
Many of them do. Prosthetic application, silicone and foam latex work, life casting and detailed hand painting are all standard across these industries. Where things differ is in the pace and scale; a film set might dedicate an entire day to one actor’s makeup, while a convention or haunt environment demands faster turnaround across multiple performers.
Q 3: What kind of characters & creature types are most popular at the Midsummer Scream horror convention?
At the event, you’ll see a strong presence of familiar horror looks like zombies, demons, decayed faces and slasher-style characters. However, many artists go beyond these basics by creating original creatures, haunted-style characters with simple stories and unique designs that don’t follow a set pattern.
If you’re ready to take the next step, you can apply for the SFX makeup course and choose the learning format that fits your goals, whether you prefer in-person training or a virtual option that follows real-world production workflows.